satoshivm airdrop

https://docs.satoshivm.io/user-guide/btc-bridge-testnet
SatoshiVM 101: The Basics You Need to Know
SatoshiVM is a decentralized ZK Rollup Layer 2 solution for Bitcoin, compatible with the Ethereum Virtual Machine (EVM) ecosystem and using native BTC as gas. It integrates Bitcoin with the EVM ecosystem, allowing asset issuance and application development within Bitcoin. Key features include:
- ZK EVM Compatibility: Works like Ethereum for user interactions and development
- ZK Rollup Technology: Bundles multiple transactions into one for validation on the Bitcoin network, maintaining Bitcoin-level security
- ZK Fraud Proofs: Employs Taproot and Bitcoin Script for on-chain contract verification, preserving Bitcoin’s consensus rules
- Data Availability: Releases transaction data on the Bitcoin network for external verification
- BTC Native Gas: Uses BTC for transaction fees in the EVM, similar to ETH’s role in other Layer 2 solutions
As of this writing, only 20,000 wallets have been created for the $SAVM token, which is scheduled to launch on Bounce on January 19th, 2024.
Step 1: Create your Unisat wallet
In the initial step, please visit unisat.io, click on “Download from Chrome Store” to download the Unisat Wallet Chrome extension, and then add it to your browser. After that, we will proceed to create a new wallet.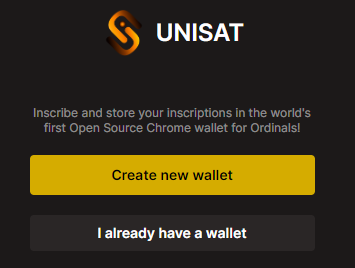 Now, generate a password that you will use to unlock your wallet, and be sure to securely save your secret recovery phrase.
Step 2: Change the network settings to “Testnet”
Begin by accessing the “Settings” menu located in the lower right corner of the Chrome extension: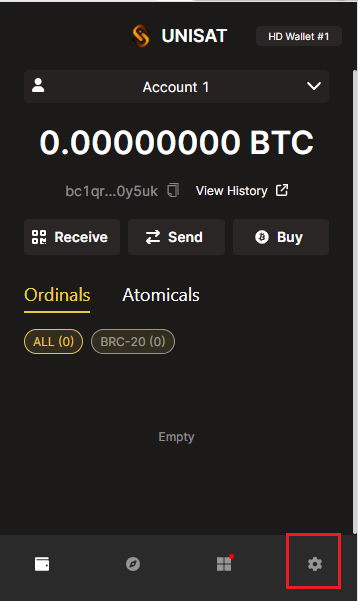 From there, proceed to the network settings and choose “TESTNET”:
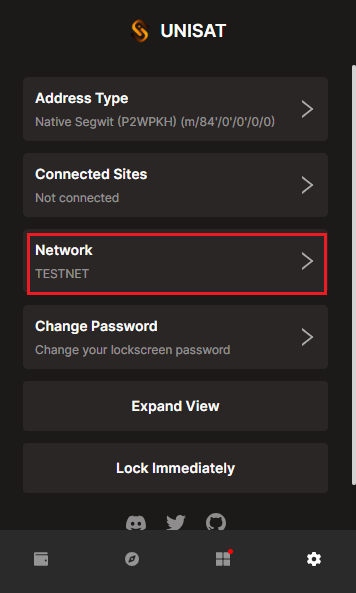
Step 3: Claim testnet tokens through the BTC faucet
We’ll be claiming BTC Testnet tokens from the BTC faucet. To do this, you’ll need to copy your BTC wallet address, go to the faucet website, paste your wallet address, adjust the amount to 0.00008, and then click on the “Send testnet bitcoins” button:
Step 4: Use the official BTC Bridge
Go to the official BTC Bridge page. Here is where you’ll begin the process of transferring BTC from the Bitcoin Testnet to the SatoshiVM Testnet. Now, proceed to click on the “Connect Wallet” option. For the SatoshiVM section, link your Metamask wallet, and for the Bitcoin section, establish a connection with your Unisat wallet.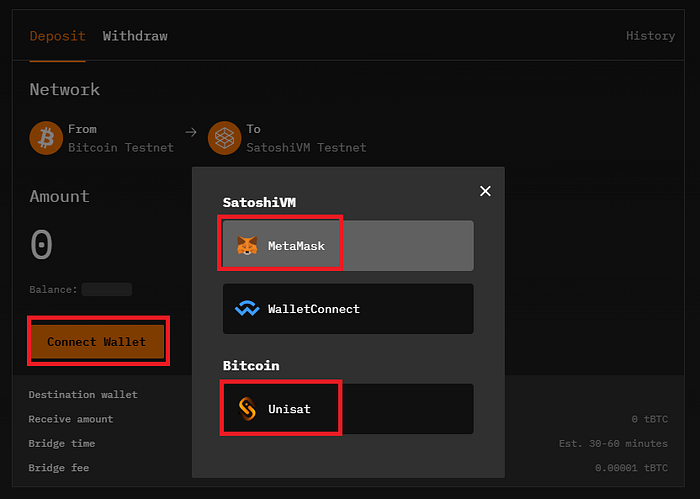 Remain on the deposit tab and input the desired amount of Testnet BTC you wish to transfer to the SatoshiVM Testnet. For instance, you can enter 0.00004 tBTC, then click on “Deposit” and complete the transaction by signing it. The bridging process typically takes around 30 to 60 minutes.
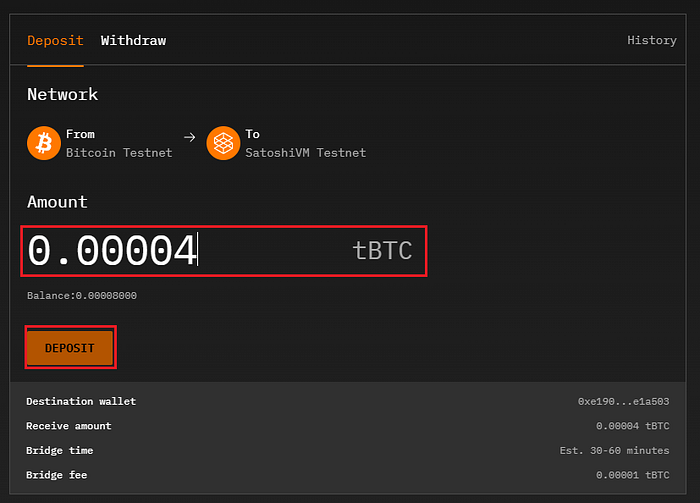 You can verify the transaction’s success by checking the “History” tab located at the top right:
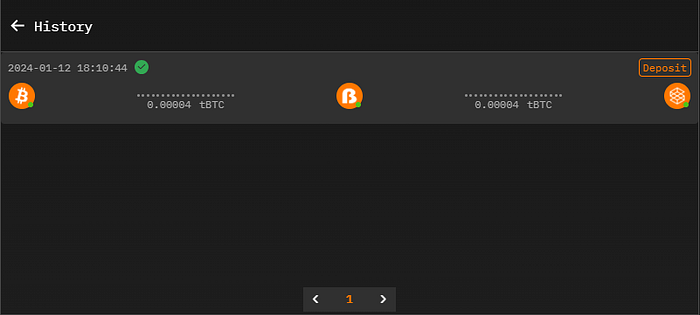 In the final step, navigate to the “Withdraw” tab to transfer some tBTC back to the Bitcoin Testnet. Remember, the minimum withdrawal amount is 0.0001. This means you may need to use the faucet again to ensure sufficient funds. Also, keep in mind that transferring from the SatoshiVM Testnet to the Bitcoin Testnet typically takes about 12 hours.
Step 5: Use the SAVM Bridge
To initiate the transfer of SAVM from Ethereum Sepolia to SatoshiVM Testnet, either switch to the “SAVM Bridge” tab or visit this website. This is the starting point for the transfer process: It’s important to know that for activities on Ethereum Sepolia, users must acquire ETH via external faucets. You can get these tokens from the Sepolia faucet (note that an Alchemy login is required), or from the Infura faucet. When using the Bridge interface, connect your MetaMask wallet. Then, follow the instructions and confirm the connection of your wallet.
Next, select the “tSAVM Faucet” located at the bottom of the page. To request test SAVM, sign the transaction using your wallet.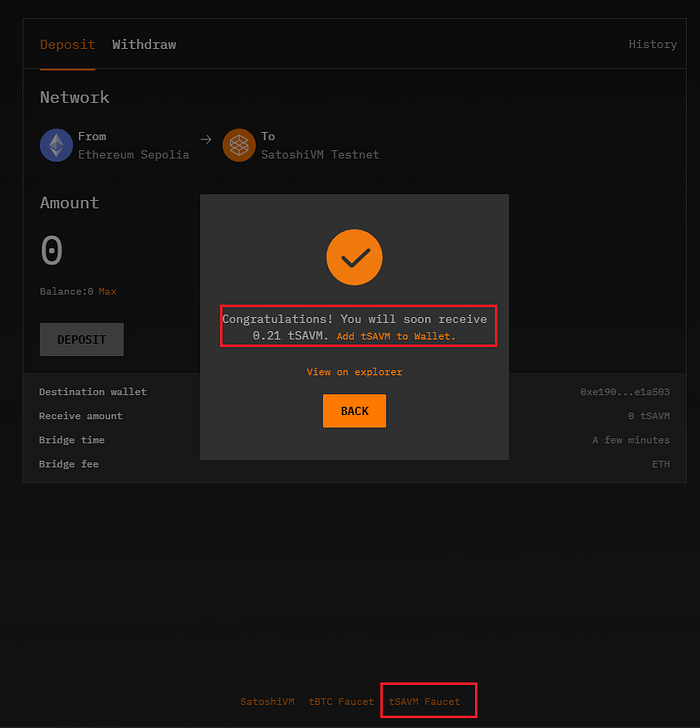 Once you have received 0.21 tSAVM, proceed to the “Deposit” tab. From there, you can transfer about 0.12 tSAVM from Ethereum Sepolia to the SatoshiVM Testnet.
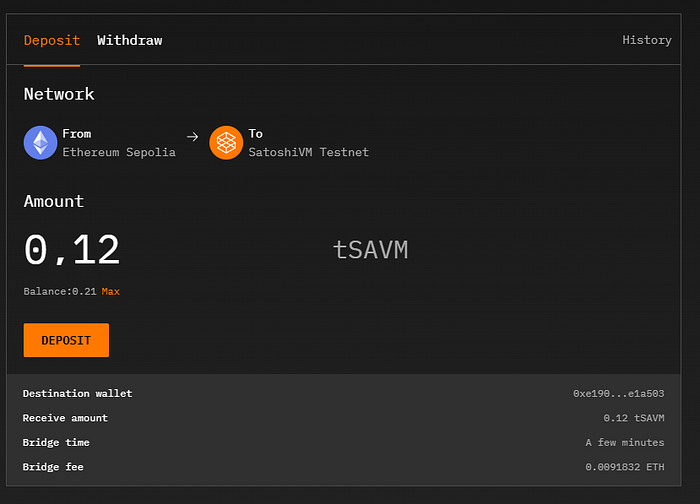 This procedure is expected to take only a few minutes. After some time, verify the process’s success by checking the “History” tab in the top right corner. Once confirmed, you can return to the “Withdraw” tab and transfer all funds back to the Ethereum Sepolia network:
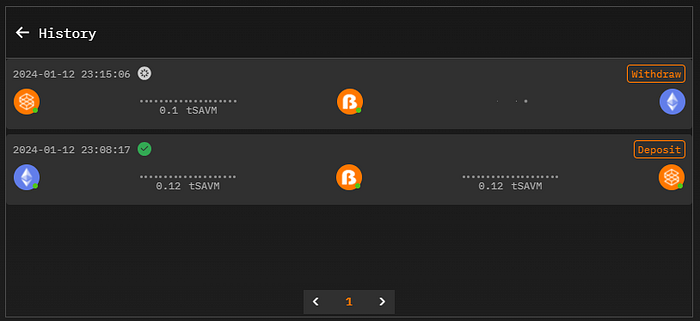
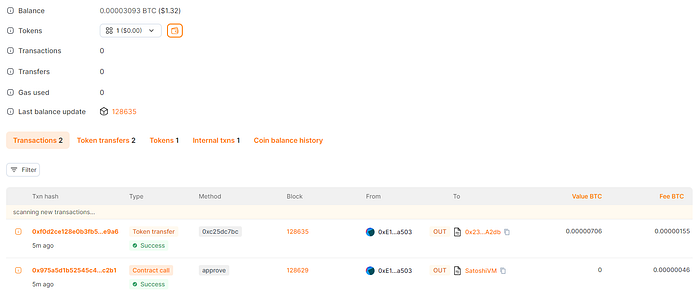
Step 6: Check SAVM balance via Explorer
Once the wtihdrawal is finished, confirm the token balances for the receiving address through the SatoshiVM Testnet explorer. Look up your wallet address and verify that there are several transactions and token transfers visible.