Zora Airdrop: The $ZORA Token Guide (2025)


 Main Guide
Note: To proceed, you will need a wallet like Metamask. If you don’t have one, you can follow our guide to set it up, along with approximately $10 to cover Gas fees on the Ethereum network.
Preparation
To interact with the network, we need to add it to our wallet:
- Open your wallet, navigate to the network selection tab, and click “Add network.”
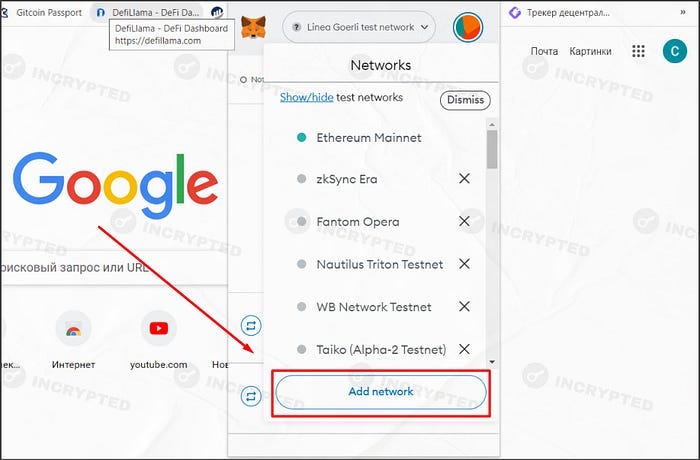
- Then click “Add a network manually.”
- Enter the network details and click “Save.”
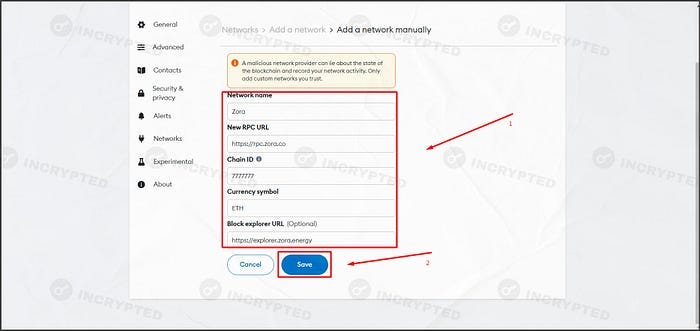
Network Details:
- Network Name: Zora
- New RPC URL: https://rpc.zora.co
- Chain ID: 7777777
- Currency Symbol: ETH
- Block Explorer URL (Optional): https://explorer.zora.energy
Note: Enabling a VPN might be necessary to add the network.
Great! We’ve completed the preparation. Now, let’s move on to testing the new network.
Using the Network
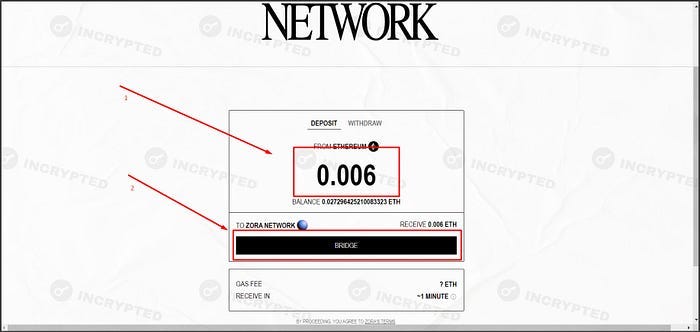
- Visit the website and connect your wallet to the Ethereum mainnet.
- Enter the desired amount and click “BRIDGE,” confirming the transaction in your wallet.
Note: The bridge fee averages $2–3, depending on the Gas price. Also, withdrawing funds from the Zora network may take up to seven days, so keep this in mind when bridging.
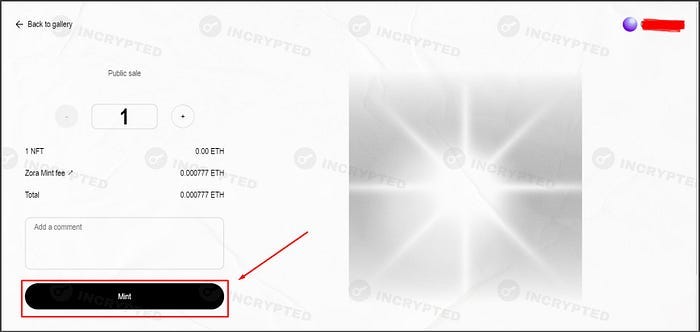
- Visit the link, connect your wallet if required, and claim NFTs by clicking “Mint.”
- Join the project’s Discord, click “Start,” and follow the link.
- Connect your Discord and wallet, then click “Join Discord.”
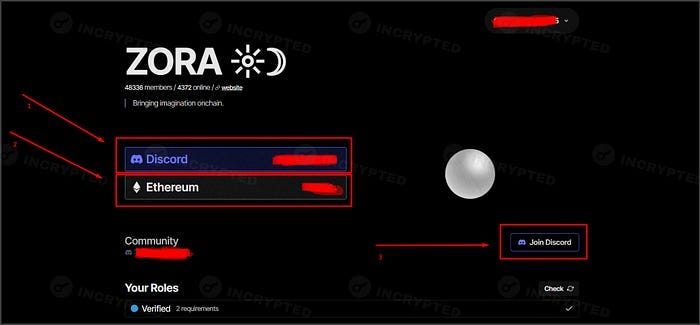 Note: After connecting Discord and your wallet, you’ll receive the “Verified” role. You can also obtain the “Zorb” role by purchasing NFTs, but at the time of writing, the floor price is around 0.0378, approximately $70.
Continuing Activity in the New L2
In the previous guide sections, we bridged ETH to the Zora network and purchased one of the first NFTs in this L2.
In this part of the guide, we’ll buy several new NFTs, create our collection, and explore activities to increase our chances of receiving a drop if the team decides to distribute one.
Note: If you encounter errors during the process (wallet not loading the network, unable to access the website, etc.), try enabling a VPN.
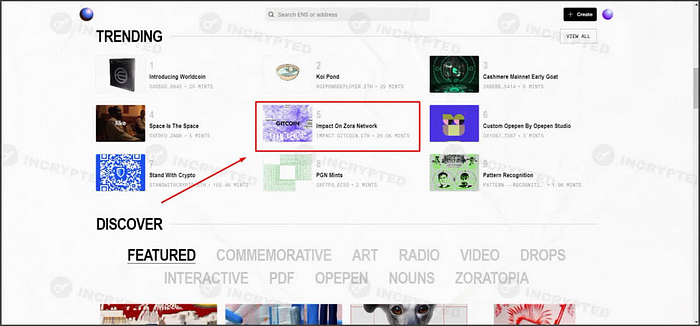
- Visit the website and connect your wallet to the Zora network.
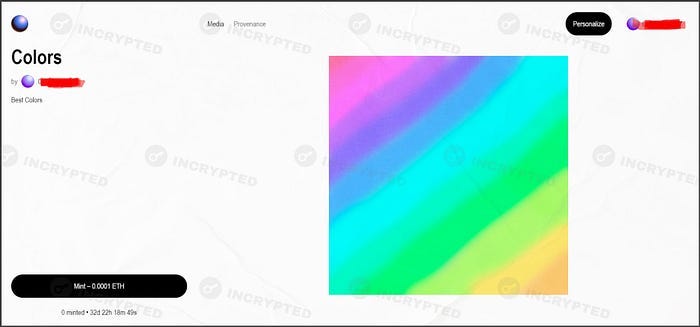
- Scroll down and choose a collection you like, such as “Impact On Zora Network” under the “TRENDING” section.
Note: Collections with more mints usually have lower prices.
- Click “Mint,” enter the desired quantity, click “Mint” again, and confirm the transaction.
Note: You can reduce Gas fees by clicking “Market” before confirming the transaction, then selecting “Advanced.” In the “Priority Fee” section, change the number to 0.005 and click “Confirm.”
 Step 3:
- Perform several mints, preferably more than five, with some intervals, like once a day or every couple of days.
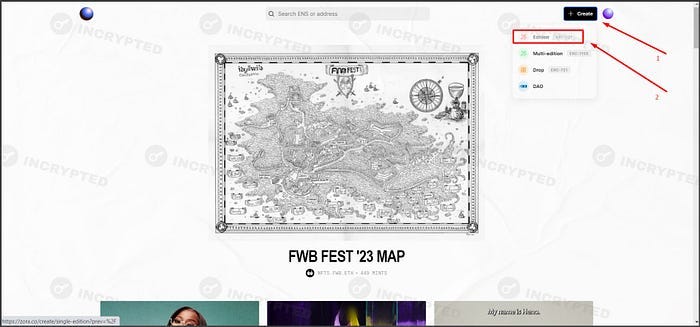
Next, we’ll create our collection:
- Return to the homepage and click “Create,” then choose “Edition.
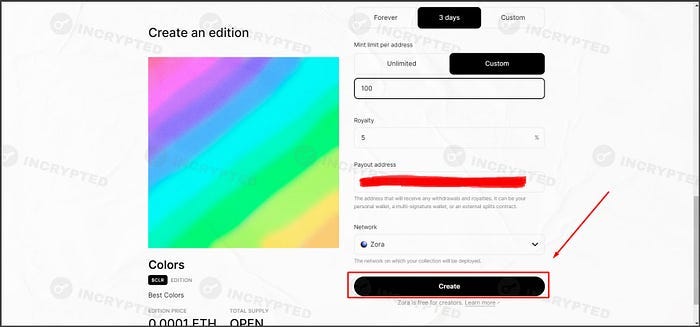
- Upload an image, fill in the fields, and click “Create.” Confirm the transaction.
- Wait for the transaction to complete, then click “Personalize page mint.” Here, you can mint your NFT yourself or copy the link to mint it through sub-accounts.
 It’s best to interact with the platform periodically, collecting NFTs from different categories. As additional activities, consider making transactions between your wallets, but always be aware of the risks. By doing so, you link your wallets, which may hinder your chances of receiving a drop in the future. Proceed with this activity at your own risk.
This version should be more readable and clearer for English-speaking audiences.