Etherlik Login: Etherlink Testnet Guide

Decentralized L2 Development Open to All
What is Etherlink?
Etherlink is an EVM-compatible layer-2 blockchain with a decentralized sequencer, offering very low fees and MEV protection, powered by Tezos Smart Rollup technology.
What makes Etherlink Special?
Decentralized 🌐: The decentralized sequencer reduces the risk of centralized control and manipulation.
Secure: Built-in MEV protection protects users against exploitation.
Low fees: Think $0.01 per transaction, not $20.
Etherlink uses Smart Rollups on the decentralized Tezos protocol for data availability and will expand to use the Tezos Data Availability Layer.
What’s an Optimistic Rollup?
Optimistic rollups are a type of scaling solution for Layer 1 chains — they are referred to as Layer 2 solutions.
They inherit the consensus of Layer 1 chains, for example, Etherlink inherits the governance/consensus of Tezos Layer 1.
Optimistic rollups move computation and state storage off chain. First of all, Etherlink Test stages can be followed here Gitlab Repository and browse the roadmap phases from testnet to mainnet over on Etherlink’s website.
How to get started with Etherlink
Ready to dive in? Deploying smart contracts on Etherlink is a streamlined process, allowing developers of all skill levels to harness the power of blockchain technology.
Popular Ethereum tools like Hardhat and Foundry work right out of the box. If you’ve been writing smart contracts for quite some time, you might have used them before. They both provide a development environment to create, test, and deploy smart contracts (along with some additional features).
How to deploy a smart contract on Etherlink
The following instructions will walk you through how to get testnet tez, deploy a smart contract at lightning speed using developer tools, and then view it on the testnet block explorer.
let's get started
1) First of all, we need to get test tokens from the faucet. For this, we open a test account on Metamask and then connect the wallet on the faucet site (at this stage, the ghostnet network, which is the testnet tezos network, will be automatically added when requesting balance from the faucet).
2) We will deploy our first smart contract on Remix IDE or Hardhat. I prefer remix at this stage.
3)For those who want to add the network manually;
Click on the network button to change the network
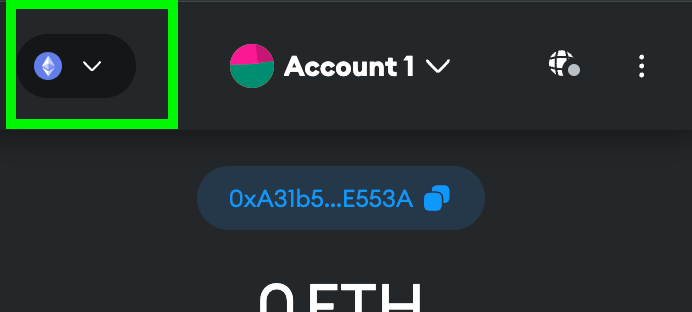
Click Add network

On the next screen, click Add a network manually and use the following information;
Network name: Etherlink
New RPC URL: https://node.ghostnet.etherlink.com
Chain ID 128123
Currency Symbol XTZ
Block Explorer URL https://testnet-explorer.etherlink.com/
Save the network configurations.
Getting test XTZ on Etherlink
Next, we need to get test XTZ tokens(the native token of Etherlink).
- Head to the Etherlink Faucet
- Connect your wallet on Etherlink (remember to change the network) to metamask.
- Follow the prompts to connect your wallet
- Click the Send 0.1 XTZ button to get test XTZ in your Etherlink wallet
We open Remix in a new tab and create a file into which we will enter the codes below.


// SPDX-License-Identifier: MIT


pragma solidity <0.9.0;


contract Counter{    uint number;


 function store (uint num) public{        number = num;    }


   function increment () public{        number++;    }


    function decrement () public {        number--;    }


   function getter () public view returns (uint256) {        return number;     }

}
Compile your contract using the Compile (play) button within the Remix IDE. This will generate the bytecode (the code that actually runs on the EVM). You should also notice that 2 new files were created Counter.json and Counter_metadata.json.
In the left navbar within the Remix IDE, click the Deploy and run transactions button. Change the selected environment from Remix VM to injected provider. This will trigger your metamask wallet to pop up. Select the wallet you’ll like to connect to deploy your transaction — make sure it’s the wallet containing the test 0.1XTZ on the Etherlink network.
Follow the prompt on metamask to connect your wallet to Remix.
Lastly, click the Deploy button.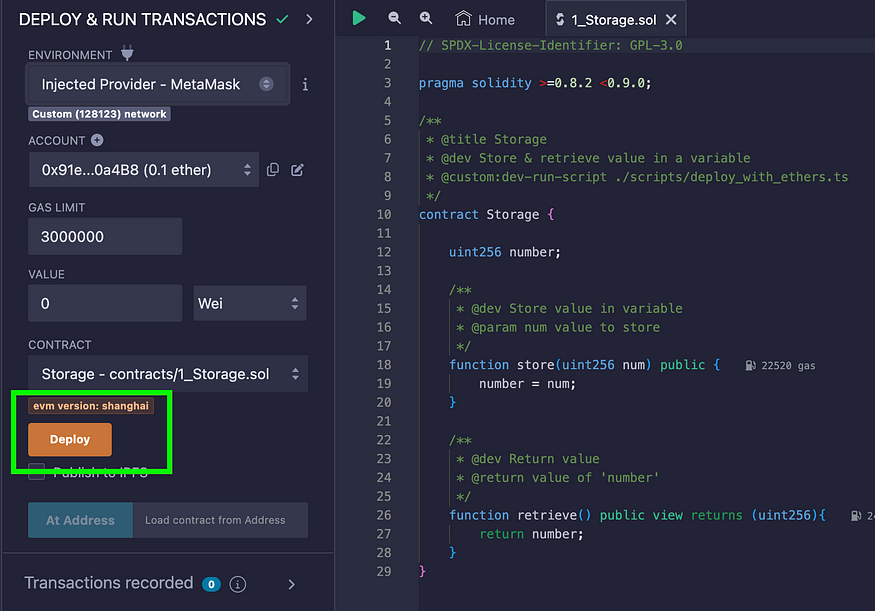
Once deployed, look in the Remix IDE terminal for the contract address of the deployed contract on Etherlink.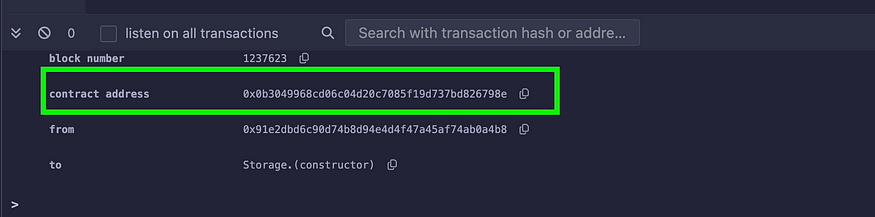
Using the Etherlink Explorer
With the contract deployed, we can use the Etherlink Explorer to see more details about the deployed contract. Paste in the contract address into the explorer. Here’s an example of the details of our deployed smart contract on the Etherlink testnet.
Interacting with the Smart Contract using the Exporer UI
We can interact with the smart contract by clicking the contract tab, then write contract. Make sure your wallet is already connected by clicking the connect wallet button in the top right. Then, enter the number you’d like to update the storage to.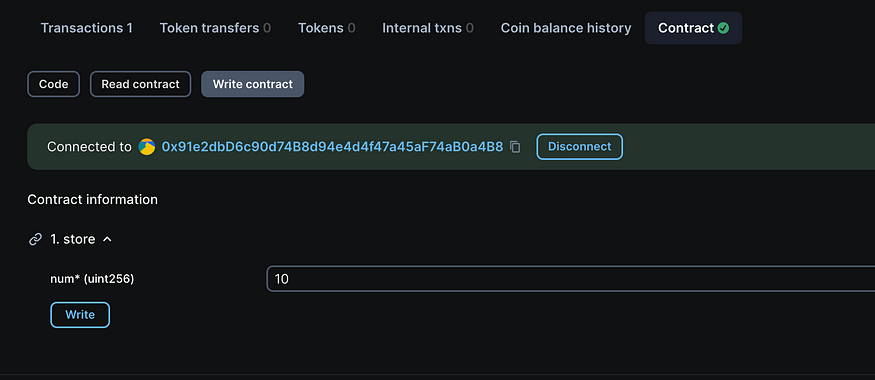
Click the write button and confirm the transaction with your wallet.
You can see the number 10 that we wrote to the storage under the read contract tab. The retrieve entrypoint in our smart contract returns the number in the storage.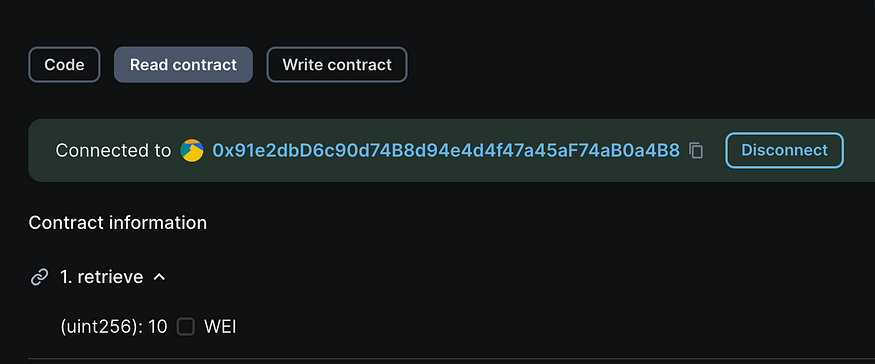
And that’s how you deploy your first smart contract on Etherlink using the Remix IDE.
Interacting with the Smart Contract using the Remix UI
Under the Deploy and Run tab, you can also interact with the smart contract you’ve deployed on Etherlink.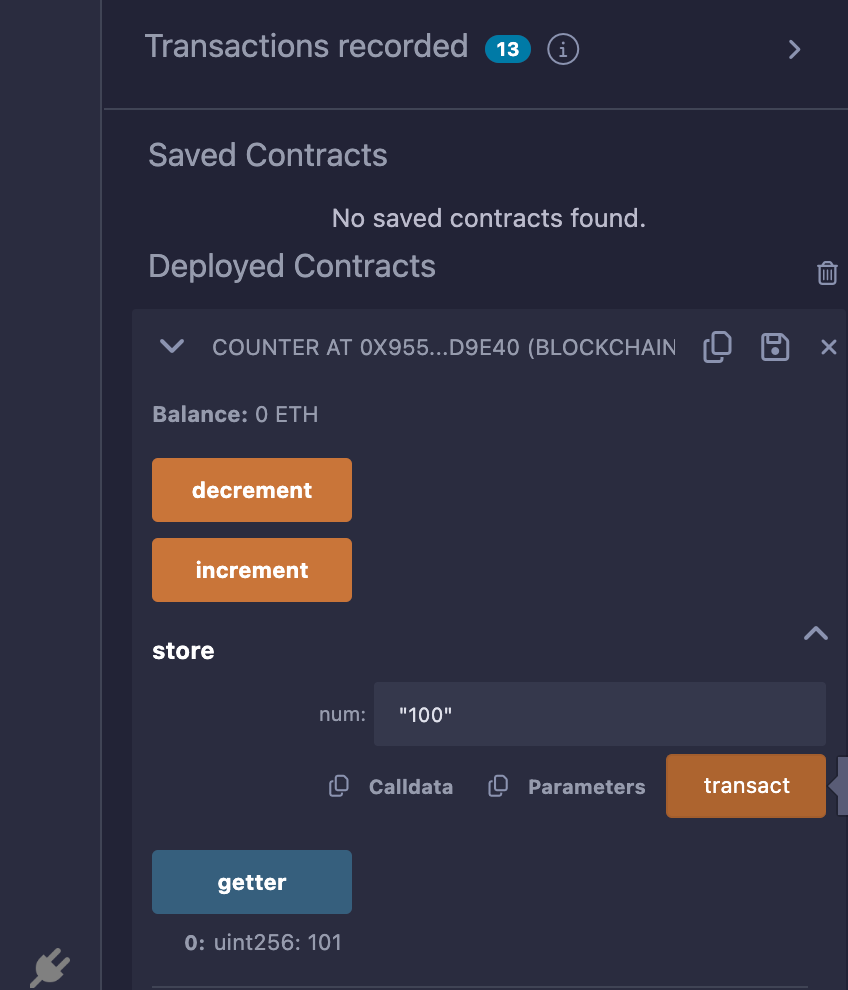 Click the transact button just under store to write a call the store method.
You can then navigate to the contract page on the Explorer to see the effects of calling that method.
References;
1.Deploy Your First Contract on Etherlink With Remix IDE and Hardhat | by Adebola Adeniran | Mar, 2024 | Medium
2.Etherlink Testnet: Decentralized L2 Development Open to All | by Etherlink | Mar, 2024 | Medium
3.Etherlink – Medium
useful links
Etherlink – Medium
Discord
X.com