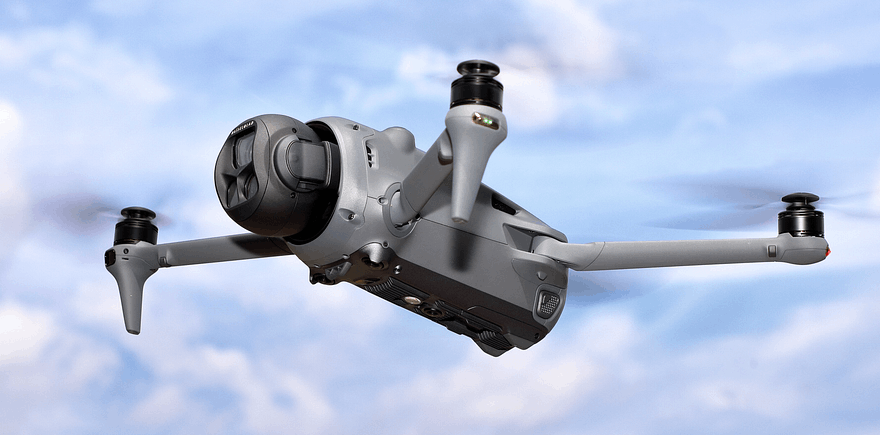
The ESP32 Remote ID Sniffer

For less than $50.00 in parts, you can build your own remote ID sniffer.
Note: This prototype was built with parts that were on hand and available. It’s under ongoing development, and as with most hardware builds, it came with some unexpected hurdles along the way. It is by no means a finished or flawless project. But it’s been a fun build.
Over the past few weeks, we’ve spent a bit of time looking into Drones, Drone Detection and the Remote ID protocol. We covered the Remote ID protocol in detail in this piece, while this article showed you how to put together a drone detection system thanks to the Raspberry Pi and the Drone Aware image.
As RF and general hardware nerds, though, we couldn’t do a detailed look at Remote ID without taking the time to see what we could put together as a detection project. While dedicated Remote ID sniffers like the ultra-cool OUIspy do exist, it’s also fun to burn some solder and tweak some hardware to come up with an in-house design.
It’s fair to say that at the moment, hardware prices are a tad brutal. So, anything we build has to avoid the stupidly expensive Raspberry Pi to keep hardware prices manageable. It just so happens that a Remote ID detection system is a pretty decent application for a dedicated embedded system.
Enter the ESP32. It’s got enough grunt to run a decent firmware image, is fully capable of 2.4GHz Wi-Fi and Bluetooth, has a bunch of pins to accept inputs and won’t make your wallet cry. Try saying that about the Raspberry Pi.
Let’s cook!
The Concept
Radio is typically theory-heavy, but thankfully one of the best ways of learning is by getting out there and doing something. Thankfully, Remote ID is no different and, thanks to the open nature of the protocol, setting a design goal was relatively easy.
Goal: Configure a Remote ID detector based on the publicly accessible standard that leveraged as many of the Remote ID detection methods as possible while using hardware that was only available on hand
With a well-purposed lab and having done this for a while, we managed to come up with:
2x ESP32 WROOM
1x SSD1306 OLED
1x NEO-6M GPS Module with External Antenna
1x 18650 battery, holder and regulator
1x Buzzer for audible detection
As well as assorted jumper wires, some prototype boards for the end prototype and a spare hard case to put it into.
It’s a quick and dirty system with no capability for 5GHz, but it should give us the ability to leverage four detection methods across 2.4GHz. And using two boards instead of one should give us better scanning efficiency and eliminate the hopping across modes that a single board would face.
It’s worth mentioning that the last point is actually a key design problem. With Remote ID occurring across different modes, a single radio sharing duties between WiFi and Bluetooth is going to have a hard time.
To offset this, we’ll allocate one board to each task, then share the information via UART to create a unified detection platform.
To retrieve drone information, we’ll also throw in a web portal. But we’ll need to make sure that it works in a handheld manner so we aren’t forced to take a laptop or phone with us to access it.
We can use the OLED display and buzzer to tell us when there is a drone nearby without needing the portal. Problem solved (for now).
The Code
The design architecture was to come up with something functional without chasing perfection or the most elegant system. The project you built and deployed today is much more interesting than the one that never got built because, reasons.
Every design choice was made with intent in mind.
ESP32 > Raspberry Pi addressed the cost factor.
Two Boards > one to address duty cycle and radio management
Four Detection methods > one helps to avoid blind spots
Capacity to iterate built into it from the start.
Let’s be clear. This won’t solve all design problems. It won’t eliminate the need for testing, although it probably will reduce the number of problems you face during the build process.
What it will do is allow you to build a system that is stable enough to trust while retaining the
capacity to be modified, extended and refined.
With the system under ongoing development, the code is regularly being modified. So while actual code snippets aren’t going to be helpful, it is going to be useful to understand how the detection logic works.
Board One: Firmware places the device into monitor mode to collect WiFi packets within an area. Then, each packet is sorted to identify Remote ID transmissions from within the noise.
If the packet contains a Remote ID payload, the classifier will sort it to determine if it is a Beacon RID frame or a NAN (Neighbour Awareness Networking) RID Frame. It will simultaneously parse the MAC address and check that against a stored table of known Drone Manufacturers and OUI’s.
Finally, Board One is also responsible for collecting and parsing NMEA GPS information so the detector knows its position. Anything relevant that it finds is pushed automatically via UART link to Board Two.
Board Two: Bluetooth RID and the Brain of the operation are all managed via Board Two. It runs a BLE scanner to check the advertising channels for RID payloads, pulling the same information that the WiFi system does upon detection.
It then unifies this information across the entire system, pooling BLE, Wi-Fi, and GPS information and presenting them as a single picture via the onboard web portal.
Once the position of the drone and the position of the station are both known, some simple math allows for the drone’s altitude information to be presented along with a calculated bearing and range.
On Detection: In the interests of flexibility, a drone in the vicinity will trigger three alert methods that fire simultaneously. This means that the system can be used on the go and doesn’t have to be directly monitored to be useful. Upon detection, an audible buzzer will fire, and a visual notification is displayed on the OLED display.
Then, the information is also presented in a web portal. Here, it can be analysed in detail, filtered and exported for later review.
This helps to show why stability was such an important consideration right from the start. The entire detection loop runs continuously and is designed to be mostly unattended. No stability issues. No reliability issues. It’s that simple.
The Result
Firmware can be a particularly challenging thing to deploy because, despite the diminutive size of some firmware files, it can be challenging to keep things stable without extensive soak testing. And with the ESP being particularly vulnerable to heap issues, this is even more relevant. Get it right, you’ll have a functional, deployable product. Get it wrong, and the next stop is a glitchy, unreliable mess. So having the prototype be stable and work consistently over an extended period without issue was a reward for ensuring heap management was tackled correctly.
For Remote ID purposes, the prototype works great. However, it’s worth considering what this means in context, as it relies on Drones transmitting valid Remote ID packets for us to know that they are there. It will not detect Betaflight, INAV, or MAVLink systems. It will not detect drones that are operated via fibre optic, which is a whole interesting discussion on its own. So while it’s a functional system, it’s not without its limitations.
For now, the series has reached the end of the line with Remote ID, and next up, it’s other platforms that we are looking to explore.
Some drones have the ability to fly companion computers and use analog transmissions that can be detected. We have the ability to use different sensors for detection nodes and the potential for networked detectors thanks to protocols like ESP-NOW and LoRa.
The drone series still has a way to run yet.
Investigator515 explores the RF spectrum, cybersecurity, and the hidden tech behind modern espionage.
Follow for new content weekly
Bluesky • X • Substack
You might also like,
- OSINT Investigators Guide to Self-Care & Resilience
- What The Tech?! Water Purification
- Radio Hackers: Bluetooth Security