How to install and run the RedBelly Node.

A few months ago, we registered to become eligible to run a node for Redbelly Network.
Since then, they have been sending numerous emails to the participants. Now, I am here to provide you all with a detailed guide to running a node.
Let’s run our node for @RedbellyNetwork without wasting any time, shall we?
But how do you know if you’ve been selected for the node?
You would have likely received an email similar to this. If you have received it, you can run this node.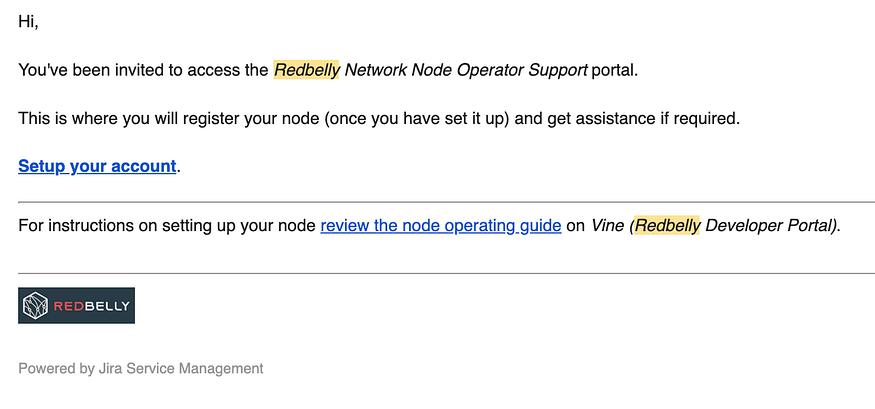 The first step is to acquire a VPS. You can easily obtain the VPS L by visiting this link and running @RedbellyNetwork, as the node requires substantial resources.
Buy the “Cloud VPS L” for $21.5 and select the 1.2 TB SSD option currently available for free.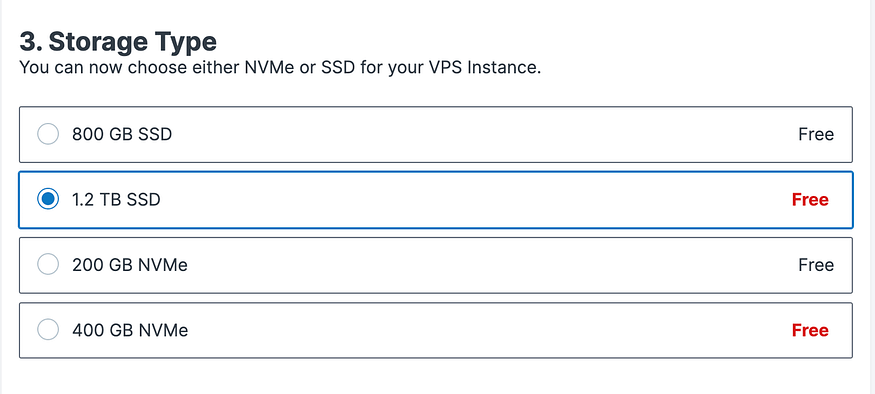 Select the “Ubuntu 22.04” option, which is free. Create a password, and please remember it and make the payment.
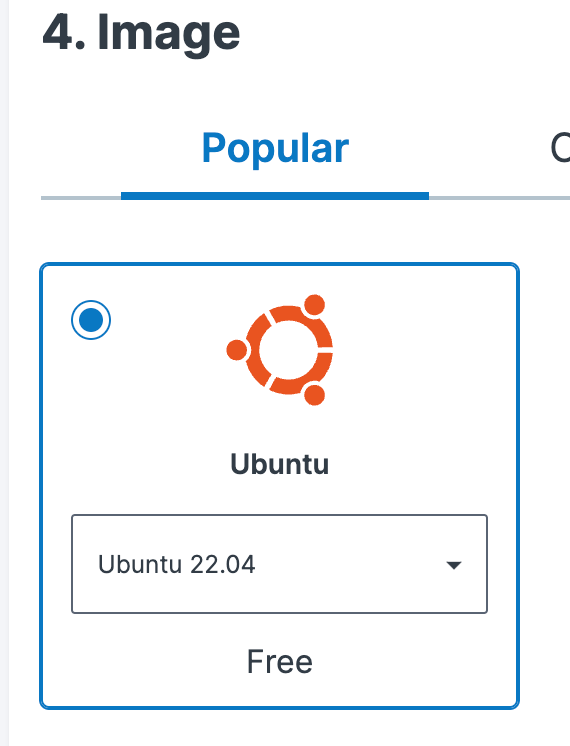 The next step is to access your VPS. Download Termius, which is available for both Mac, Windows, and your phone.
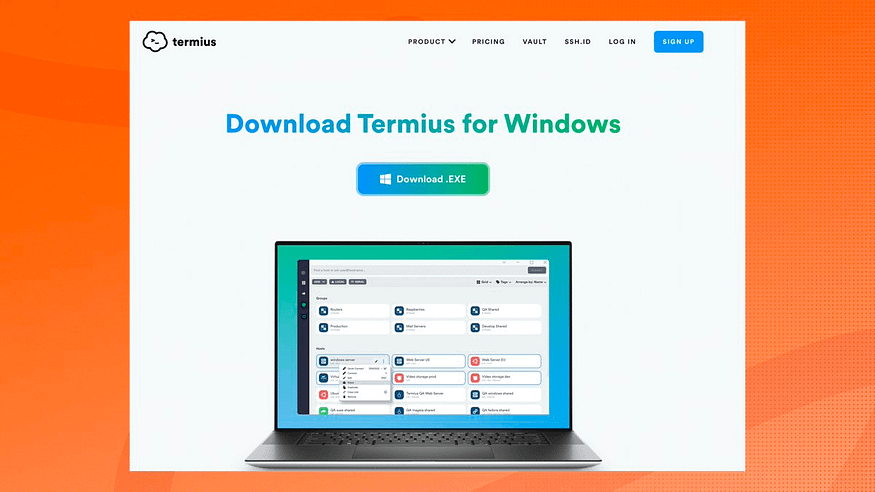 After downloading the file, open it and click “new host.”. Paste the IP address you obtained from Contabo, then enter “root” in the same field I mentioned.
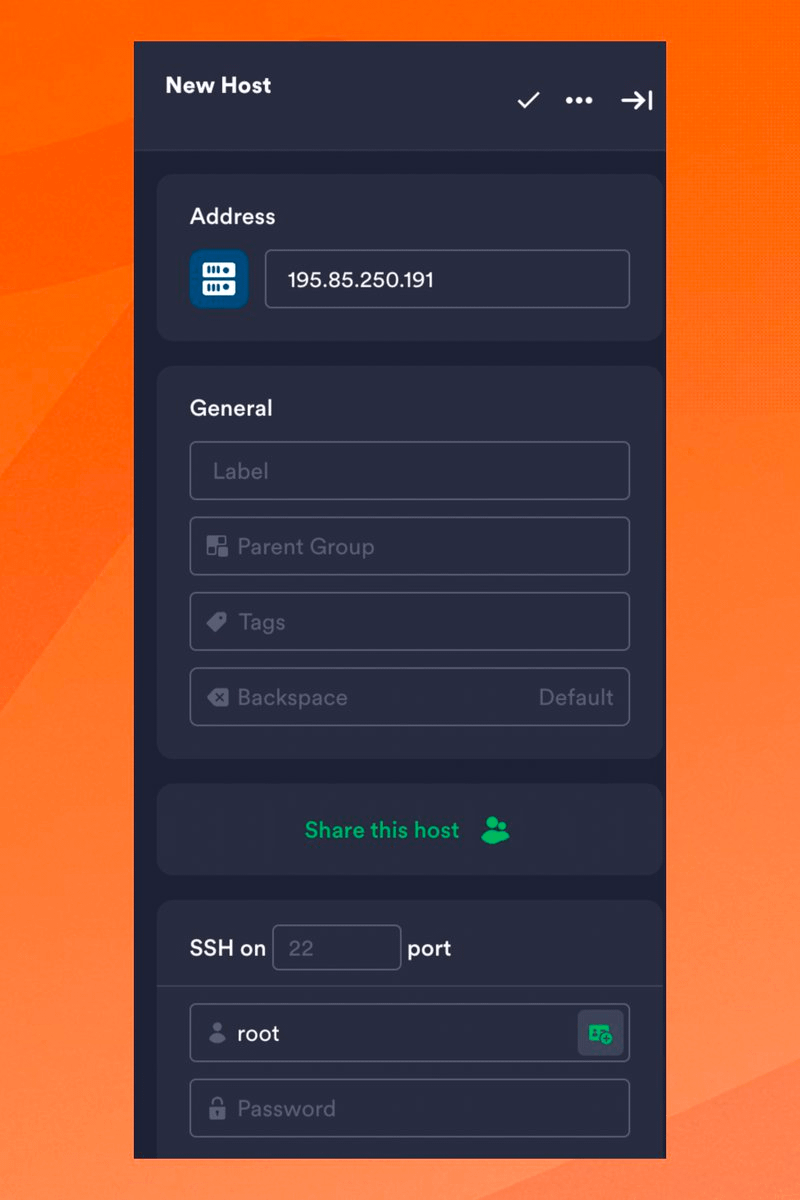 Once you are connected to your VPS, you will see something similar to this on your screen.
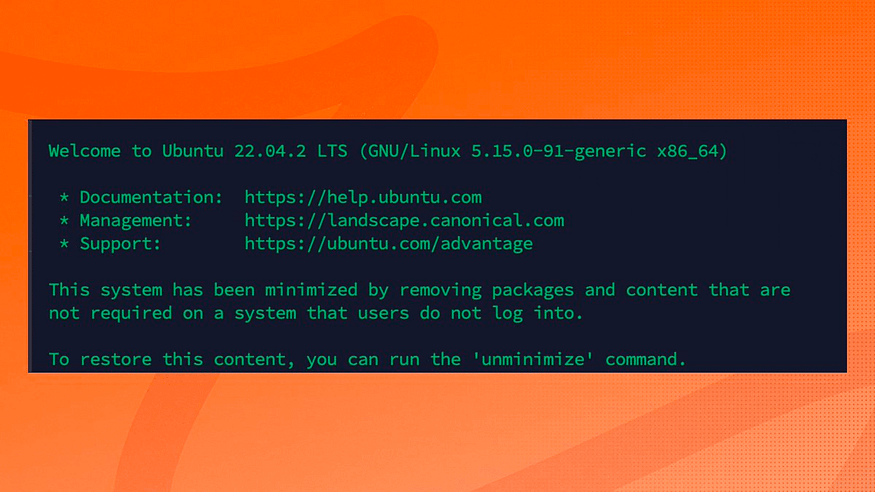 Now, let’s get a domain on Namecheap for DNS configuration. Visit https://www.namecheap.com/ and search for your desired domain.
In my case, I’ll choose “chase”. It will cost you around $2.18, and you can pay using your card. Now that you have purchased your domain let’s configure it.
Go here:https://ap.www.namecheap.com/domains/list/ and click on manage, then click on the domain and select NameCheap BasicDNS.
Then click on “Advance DNS.”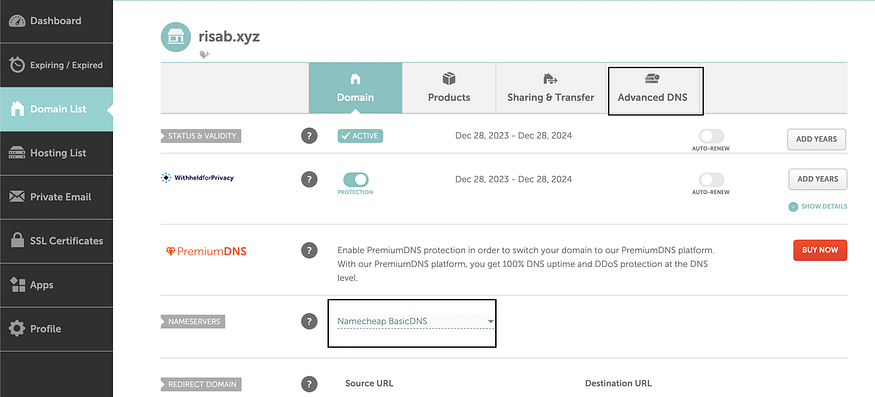 To configure the advanced DNS settings, follow these steps:
1. Go to the “Advanced DNS” tab.
2. Click on “Add new record.”
3. Fill in the record details as shown in the picture below.
4. In the “IP Address” section, paste your VPS IP address from the Contabo email or dashboard.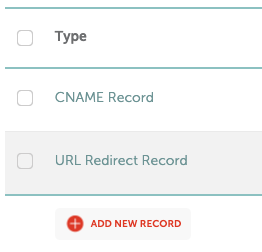
 After you have received your first email with a receipt of our payment, open it, and you can track your order from there. Now, you must wait about 20 minutes for the second email, which will come with your login details. After that, open the second email.
And you will see the IP address given to you. Now, that’s the most important thing on that email, and now, anywhere on this tutorial, I ask you to use an IP address. Just know I’m talking about these numbers; your own will definitely differ from mine, so keep yours safe. Now, let’s jump to running the Redbelly node on your new VPS, which requires us to open Termius.
We don’t want to keep our PC running 24/7, do we? It’s time to set up our node on the VPS we purchased earlier.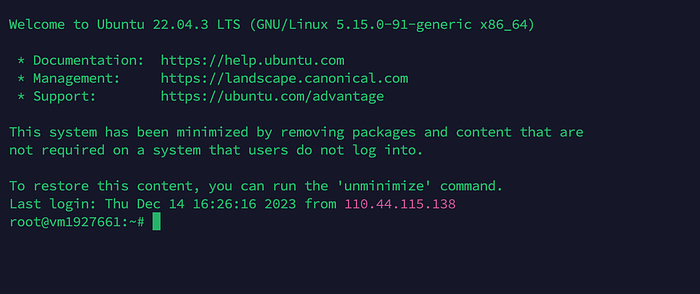 Go to Termius and connect with your VPS.
Now, remember the email you received for the node process and navigate to that email.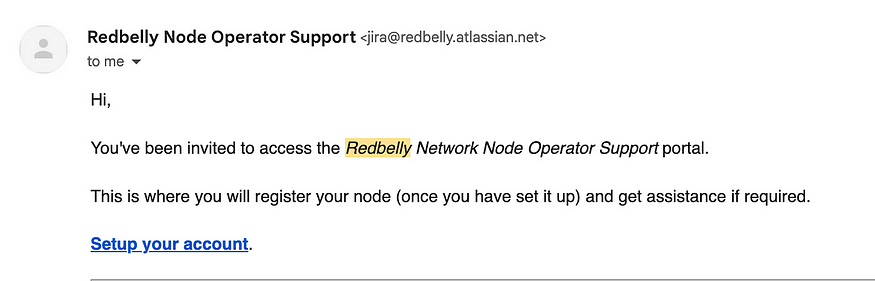 Click on “Setup your account.”
Here, create a fresh new Metamask wallet. Remember that we’ll be using the private key of the second wallet.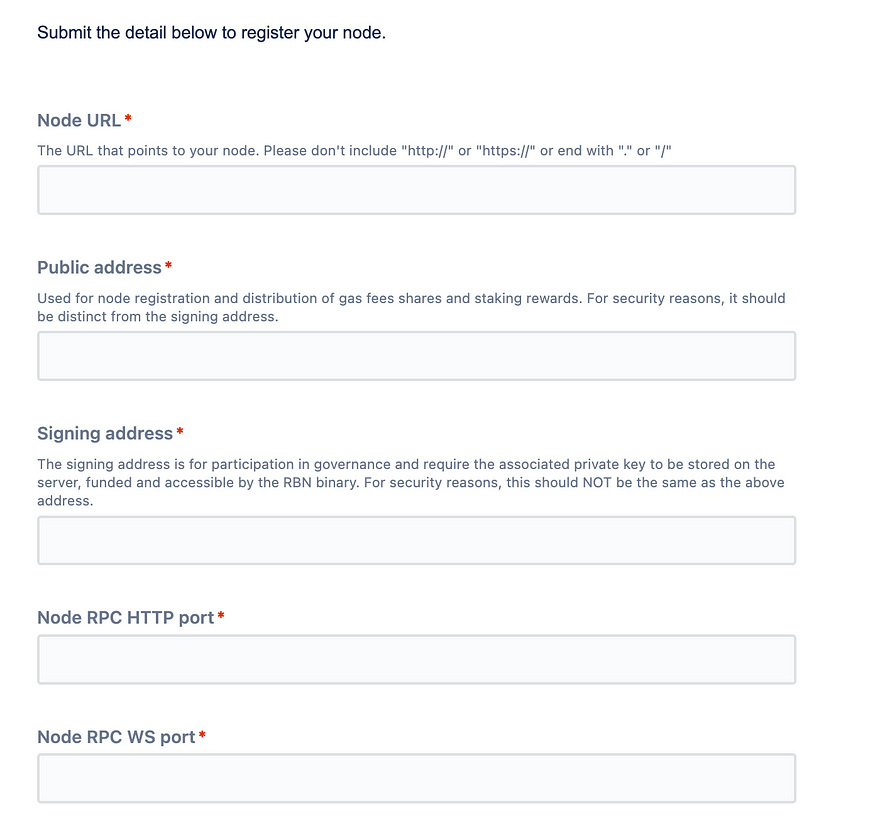 Now, let’s fill in all the node details step by step:
1. Node URL:
domain name obtained from Namecheap.
2. Public Address:
The first new Metamask address.
3. Signing Address:
The second new Metamask wallet address requires the corresponding private key.
4. Node RPC HTTP Port: 8545
5. Node RPC WS Port: 8546
6. Node Consensus Port: 1888
7. Node Recovery Port: 1111
8. Discord Handle: Your Discord handle.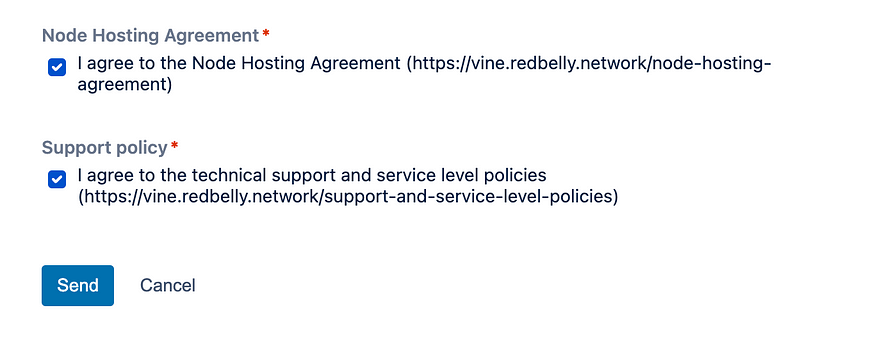 Once you’ve filled out the form, go ahead and submit it. Now, you must wait for the team to approve your node request form and ensure everything is in order.
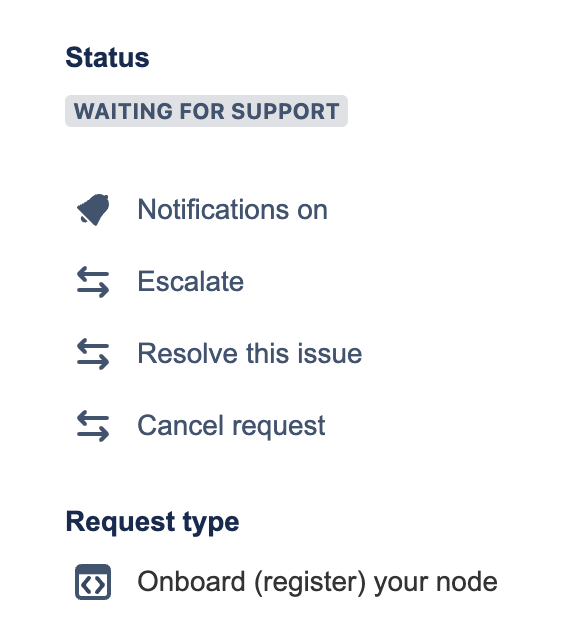 Great! Now that our application has been approved, let us move on to the remaining codes!
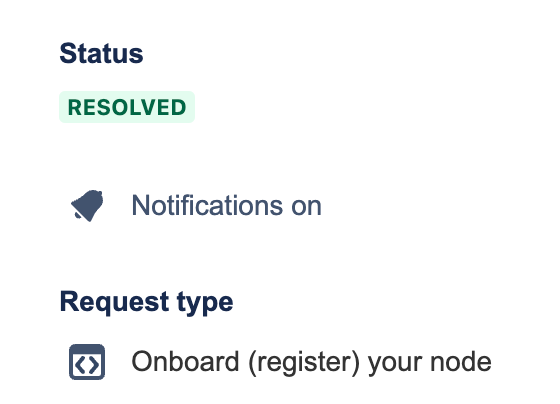 Once your application is approved, the Redbelly team will email you your node ID. Make sure to save it in a secure location.
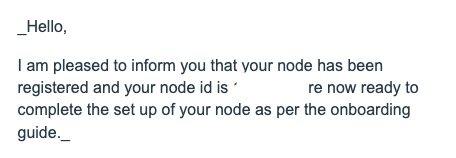 Now, I will list the commands line by line. Just paste them and see if your screen matches mine.
There is a manual process to run our node, but it can be complicated and lengthy. However, I have found a simple way to get to our node for all of you with just a few lines of code.
- Run this automatic code, which will set up everything for you with just a few pieces of information.
cd $HOME && curl -o auto-run.sh https://raw.githubusercontent.com/vnbnode/binaries/main/Projects/Redbelly/auto-run.sh && bash auto-run.sh
After that, it will ask you for your details. Fill in everything, and it will be done in no time.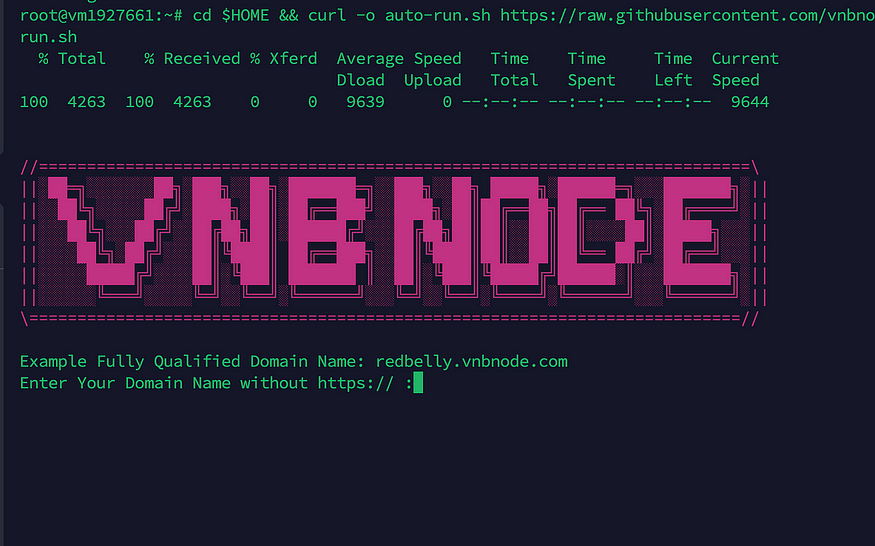
- Your domain name, obtained from Namecheap.
- An accessible email address that you can use.
- Your node ID, provided by the Redbelly team after your application is approved,
- The signing address you filled in the form told you to save the private key for this one.
- Private key of the signing address.
That’s it. Your node will be installed automatically, but it may take some time.
After pasting the text, press Ctrl+X. It will prompt you with a Y/N question. Enter Y, and then press Enter to exit the editor.
Now go here and download all three files.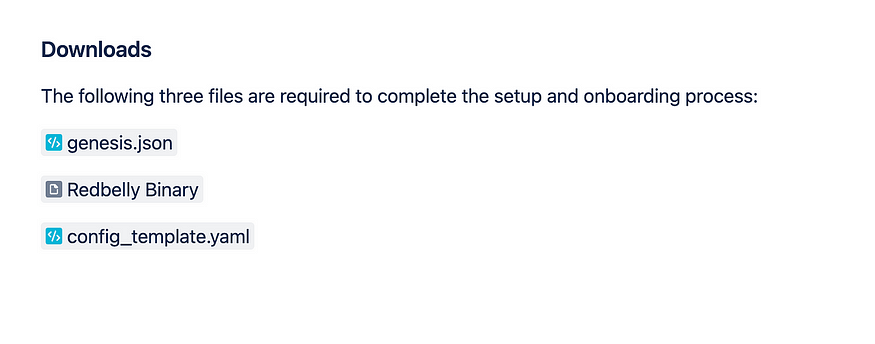 Once you have downloaded all your files, go to the SFTP tab in Termius. Select the folders where you saved your downloaded files for Redbelly. Next, choose the Redbelly VPS on the host side.
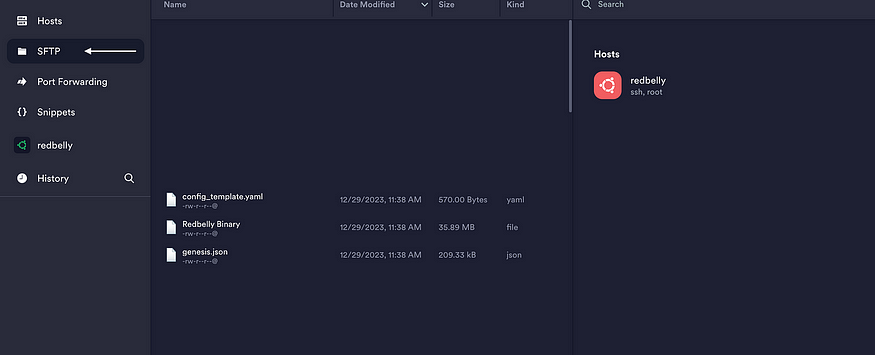 Now, move the Redbelly Binary genesis.json file to the root directory of your host by dragging and dropping. Then, rename the file from “Red-belly Binary” to “rbbc,” as shown in the image below.
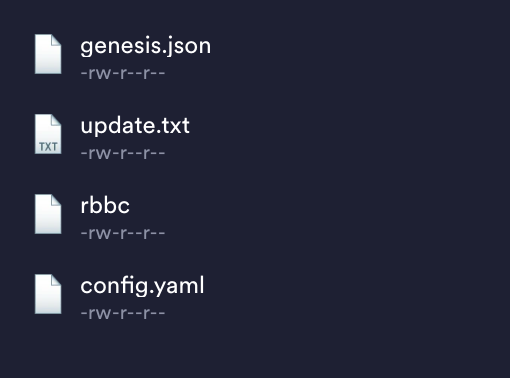 After the installation process is finished, let’s start our node.
./start-rbn.sh
After starting your node, let’s check if it’s working or not.
pgrep rbbc
After running this code, you should receive the output as a number. It doesn’t have to be the same as what my image shows.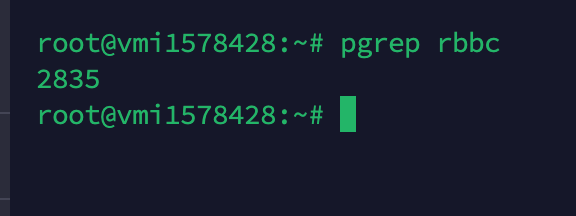 Now, let’s check our node logs to ensure they generate the necessary logs.
cat ./logs/rbbcLogs
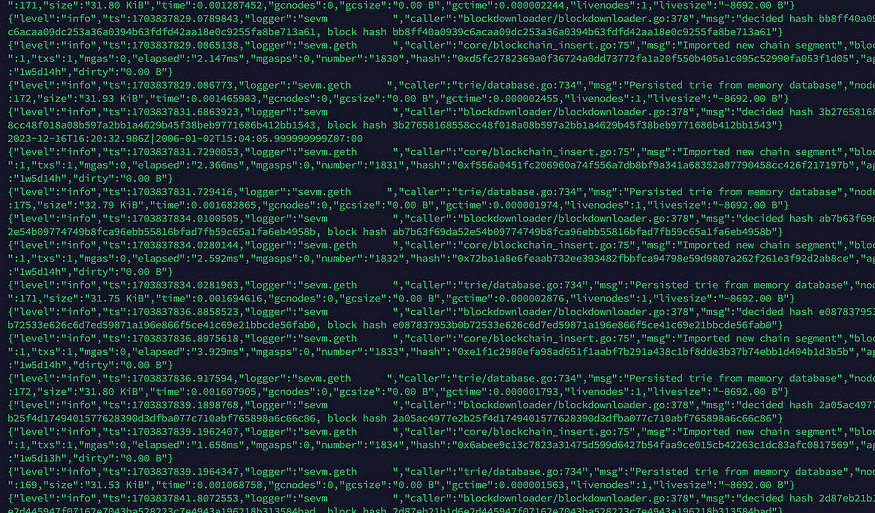 It should generate some logs.
Let’s request a faucet from their discord now.
Request the faucet using your signed wallet address by going to the devnet-faucet channel in the Redbelly Discord channel. Let’s add the Redbelly network to our Metamask.
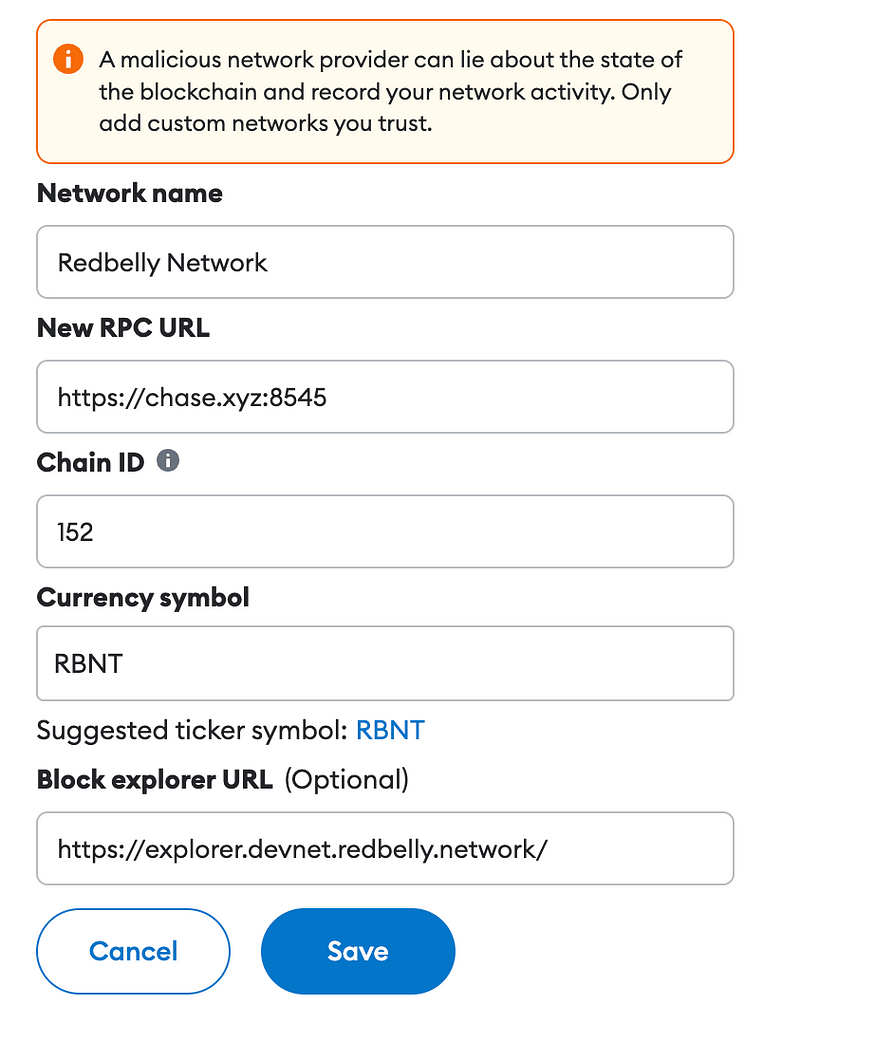
Navigate to “Add a network manually” in the metamask.
- Network name: Redbelly Network
- New RPC URL: https://yourdomainname.com:8545
- Chain ID: 152
- Currency symbol: RBNT
- Block explorer URL: https://explorer.devnet.redbelly.network/
 Your faucet balance will be credited to you within 24 hours.
Congratulation! You successfully ran the red-belly node.