The Weatherman: Capturing Meteor M-2 Imagery

In this previous article, we took a look at how to use Satdump paired with the RTL-SDR and a modest antenna to collect live weather imagery from space.
Shortly after this, however, it was announced that the NOAA Automatic Picture Transmission (APT) satellites would be retired, bringing a long and esteemed career to a close. For the first time in decades, there would be no APT satellites available for amateur experimentation.
While L-band satellites are available, they can be a little more complex, so beginners might be happy to hear that the Meteor series of satellites is still in orbit and sends imagery down via a VHF downlink similar to the old APT systems.
Today, we’ll show you how to use the same RTL-SDR paired with the same modest antenna to intercept and decode this imagery using satdump.\
To follow along, it’s assumed you already have an RTL-SDR and a computer that already has SatDump installed. Let’s get started!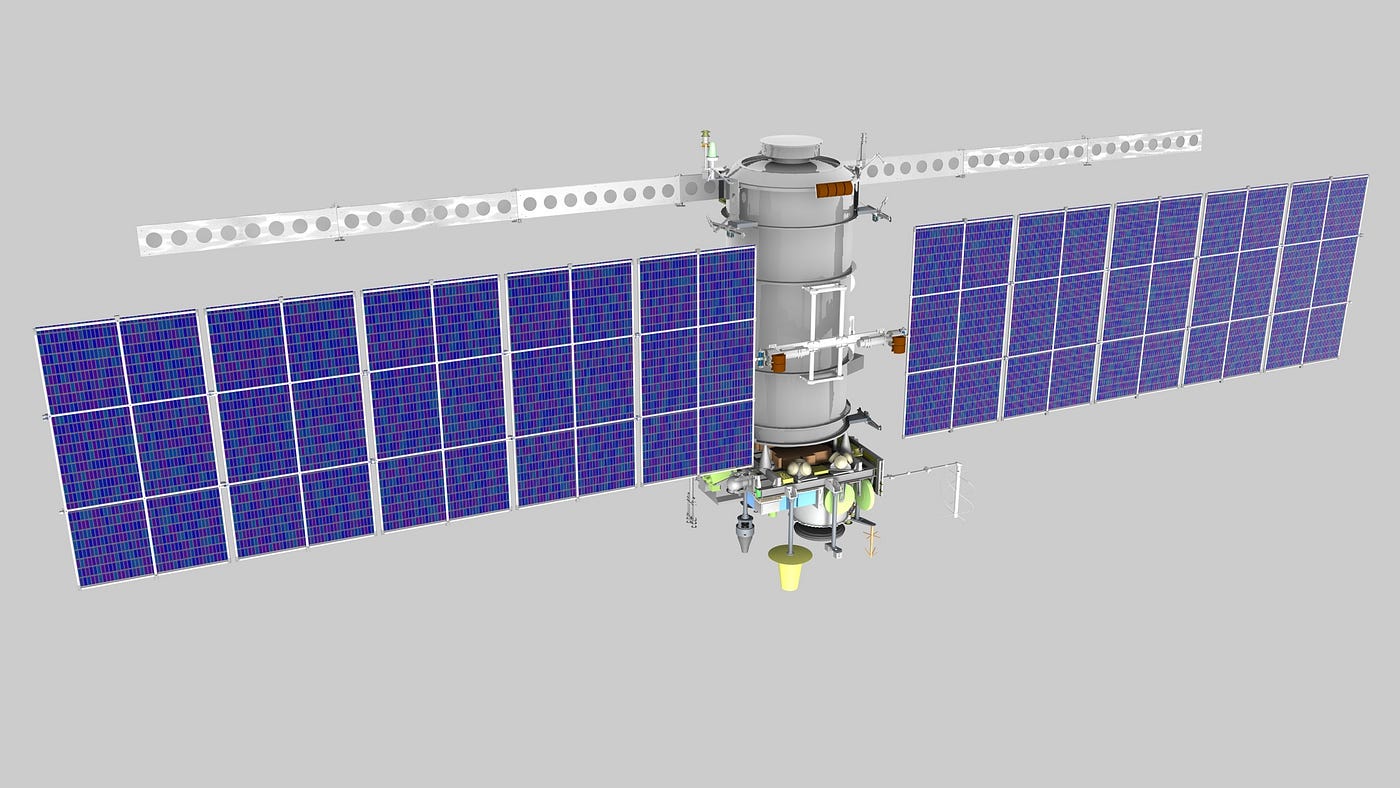
Low Rate Picture Transmission (LRPT)
One of the biggest differences between the APT satellites and the Meteor M series is the capabilities of the onboard sensors. While NOAA would use the Analogue APT mode of transmission, Meteor uses the digital Low-Rate and High Rate picture transmission modes.
This includes error correction and a significant boost in resolution, capable of providing imagery that resolves to around 1k/m per pixel. The perks of this mean that rather than having your imagery lose quality thanks to issues like noise and fading, you get much better error correction and resiliency.
Because of its digital image format, the workflow for image capture and decoding ends up looking a bit like this.
RF pipeline:
→ carrier recovery
→ OQPSK demodulation
→ symbol timing recovery
→ FEC decoding
→ packet reconstruction
→ image assembly
To save some frustration, it’s worth mentioning that the error correction between the modes is entirely different. Rather than fading out and producing a “noisy” image like APT mode when the signal is low, LRPT will use its error correction to maintain stability. This means that when the signal gets low enough, it will drop out entirely.
Required Equipment
The required equipment for this is inexpensive and freely available, meaning that Meteor-M imagery is a great project to get started with. On the hardware side, you’ll need:
- An RTL-SDR or equivalent SDR
- A compatible VHF antenna (The extendable dipole with the kit should work)
- Laptop Running Satdump
This is the minimum barrier to entry however, if you’d like to improve your image quality, you might also like to consider adding:
- Low-noise Amplifier
- Bandpass filter
- A directional antenna to track the satellite
For now, we will stick with the rabbit ear dipole antenna that comes with the RTL-SDR. Set each arm to around 52cm in length to optimise it for meteor reception.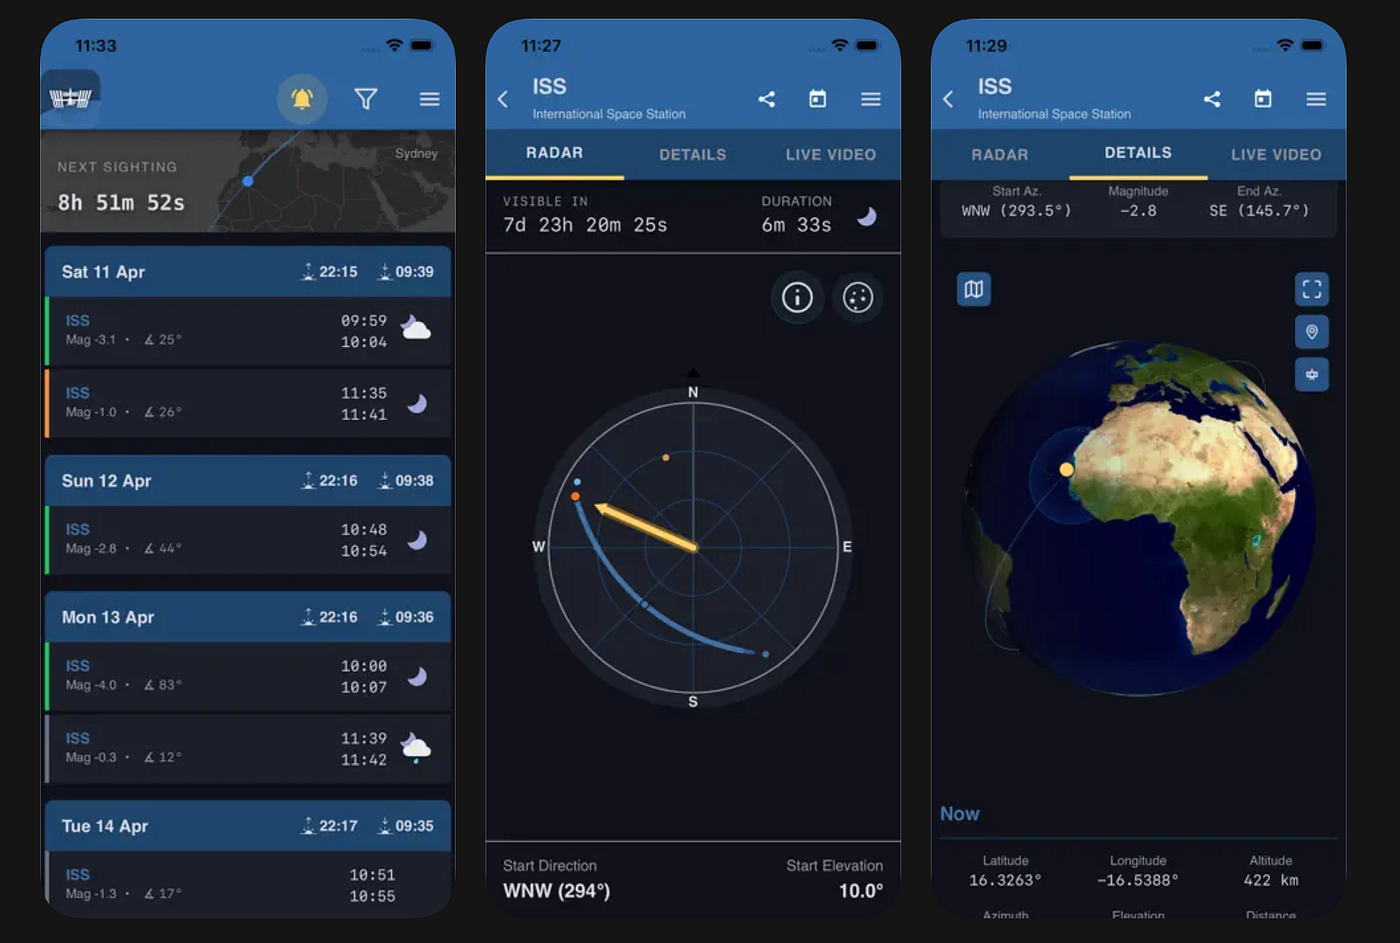
Tracking The Satellite
To correctly track the satellite, we need to understand three main parts:
- When will the satellite appear
- Where it will move across the sky
- How its frequency shifts due to Doppler
Meteor transmits its telemetry via Very High Frequency (VHF) download, so today, Doppler correction is a minor concern. Therefore, we simply need to identify when it will appear and what path it will take across the sky, relevant to our position.
While there are plenty of software options available for laptops, ISS Detector is a free way of identifying them on mobile. The software is available for both Android & iOS, and you can unlock weather sats relative to your location.
Get ISS Detector for Apple
Get ISS Detector for Android
Once you’ve installed the app, add your location and enable the Satellite tracker add-on. From here, you can select the Meteor satellites and figure out when passes are available.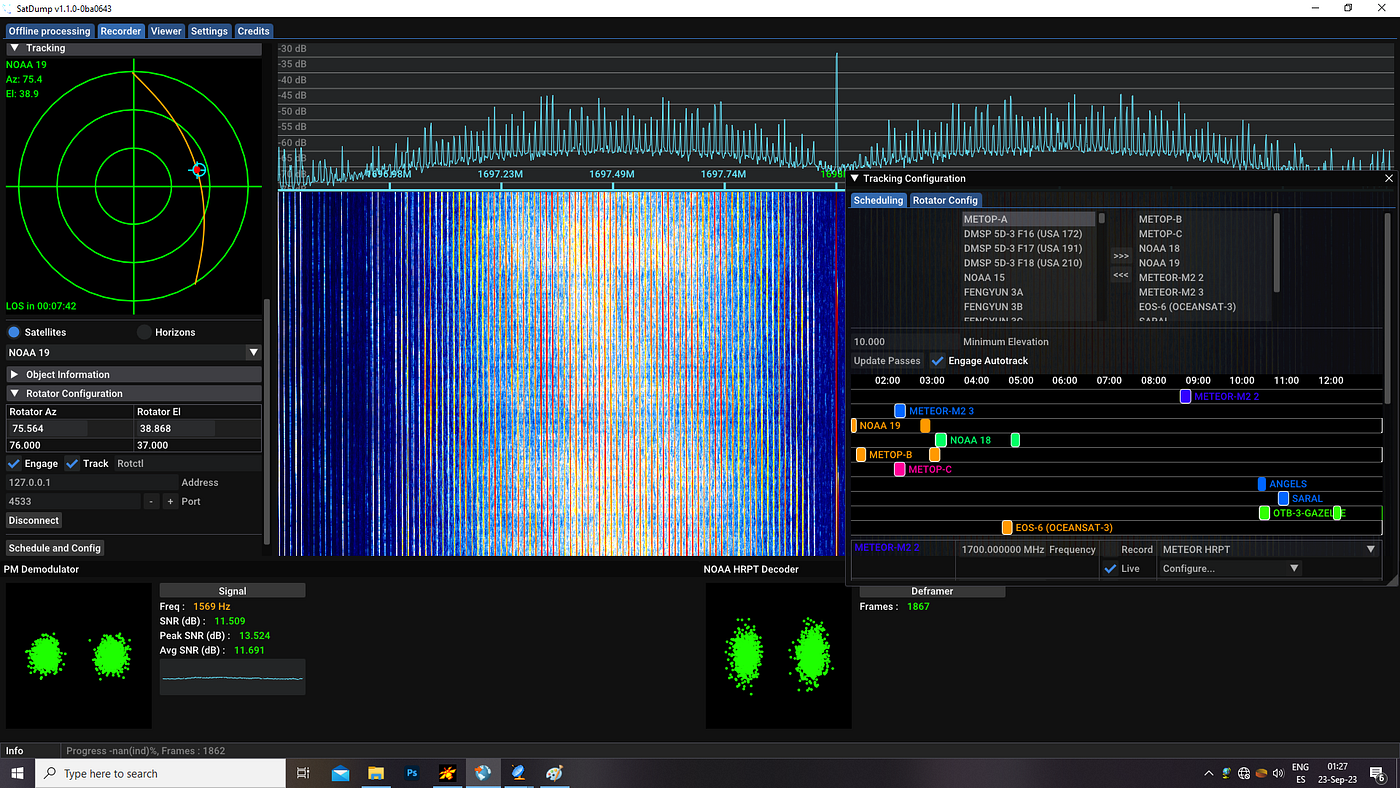
Configuring Satdump
Satdump will be powering the software side of the decoding stack. To capture Meteor footage, you’ll need to ensure the correct settings prior to the pass. Failure to do this correctly will result in a pass that gives nothing but disappointment.
Satdump will automatically adjust for Doppler. So first, we’ll need to ensure that we have selected the correct decoding pipeline:
Meteor M2-x LRPT 72k
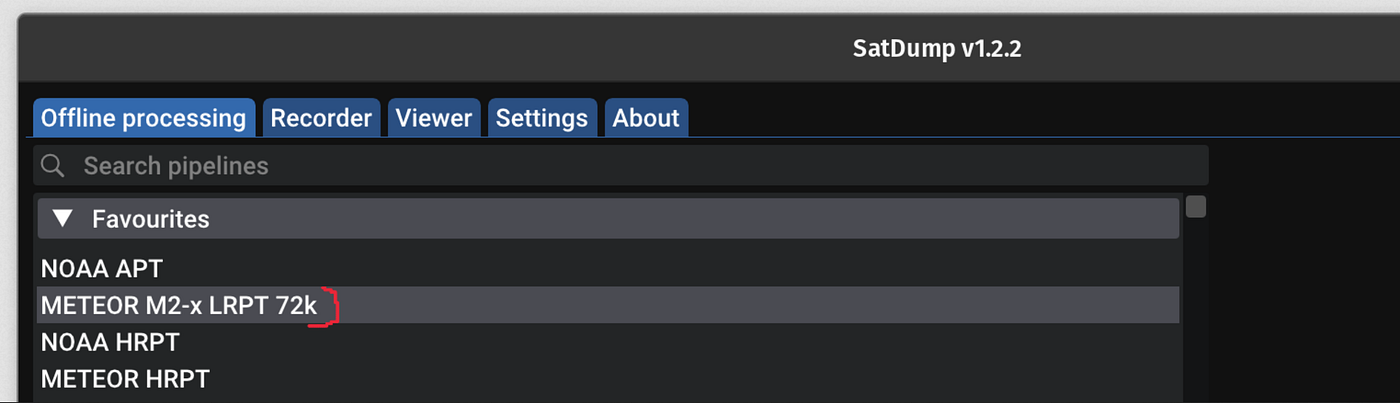
Then we will need to:
Set the correct frequency: 139.100MHz
Set the correct sample rate: 2.4 Msps
Set the correct gain level: 15–20db then adjust as necessary
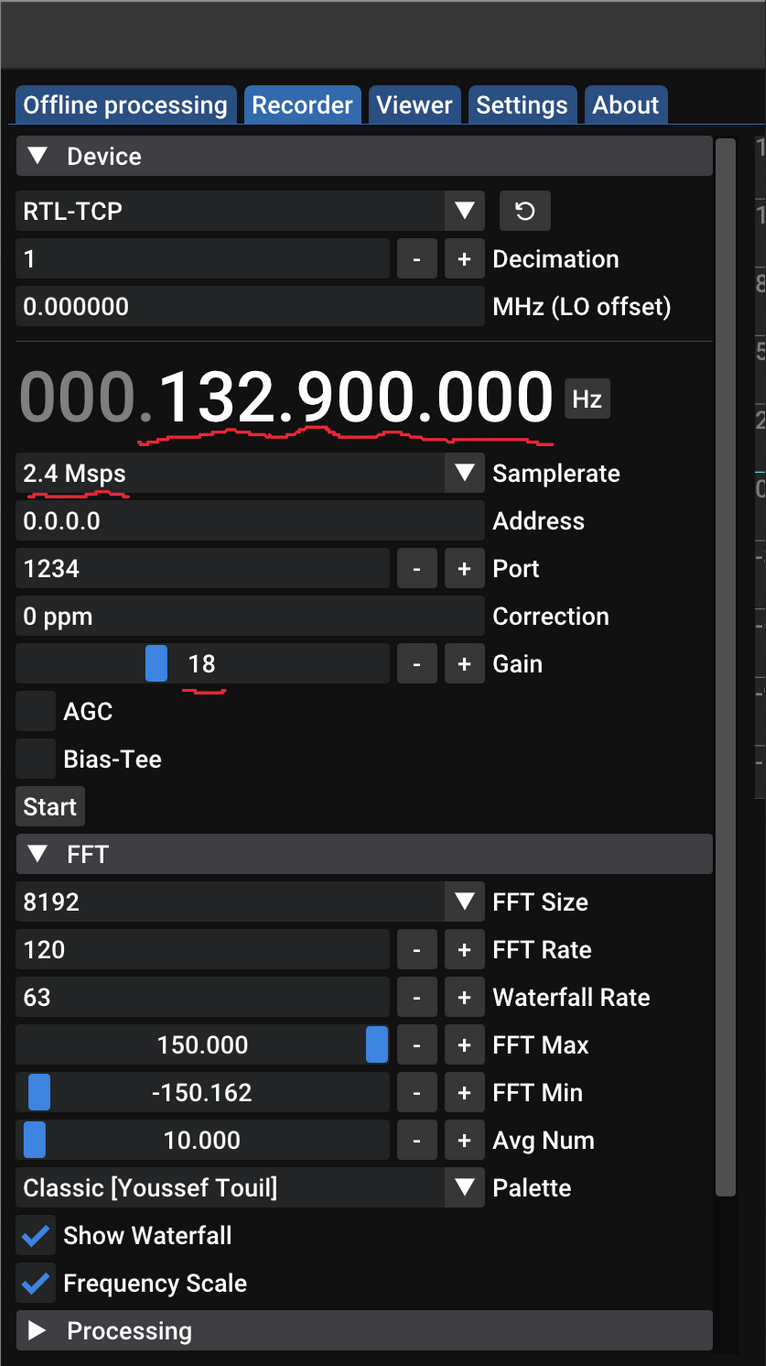
We can do all this easily thanks to the Satdump GUI. If you aren’t confident in the ability of your station, you can focus on recording your signal as the satellite is overhead and then decode it later on.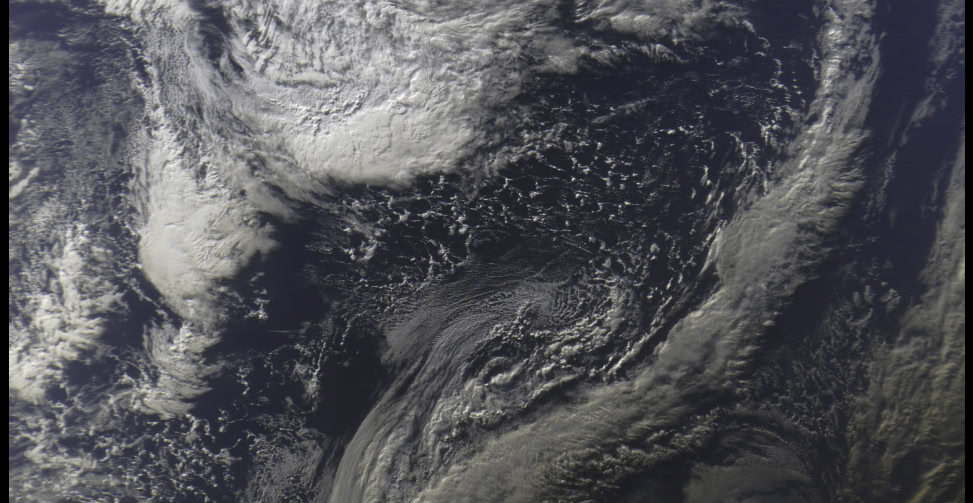
Image Decoding
To capture your image, simply hit start on either the decode or recording submenu, and you should see the waterfall spring to life. However, unlike the older APT satellites, there is one final thing to look for.
Earlier in the article, we made mention of error correction, and for any problems you might have decoding imagery, this error correction is the first starting point.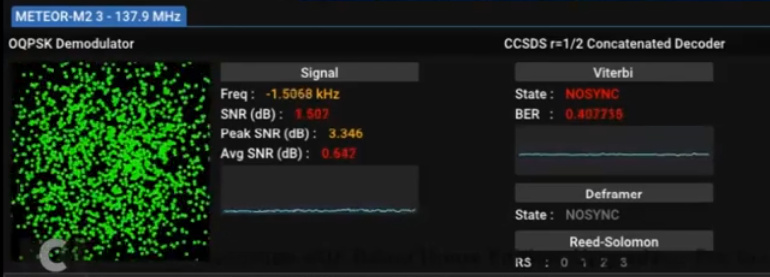
Meteor satellites use Low-Density Parity checks to ensure that by the time you’ve received the signal, plenty of work has been done to ensure the clarity and quality are in the best possible shape.
In practical terms, this means a few things that are relevant to us as we are attempting to decode imagery.
In the Satdump window, when the waterfall is running, we will see the status of both the demodulator and the decoder. These displays will look very different depending on what the signal strength is and if your station has achieved an accurate lock onto the signal from the satellite.
When no lock exists, the demodulator looks to be a general mess of randomised noise, and the decoder will display a red “NOSYNC” message.
As the satellite shifts and signal strength increases, you should obtain a clearer signal. At this point, the demodulator will start to shift into four distinct segments that are clearly visible. On the Signal menu, you’ll see an increase in SNR as well as your average signal-to-noise ratio.
The Decoder will also reflect this updated state with green “SYNCED” messages visible. As the satellite moves across the sky relative to your position, variations in signal strength will be reflected within these displays.
Weaker signals will push the demodulator window back towards random noise. If signal strength is particularly low, you may see the decoder lose sync. If this is particularly bad, it may be worth considering a better antenna system, preamplifier or filters to help improve your overall signal quality.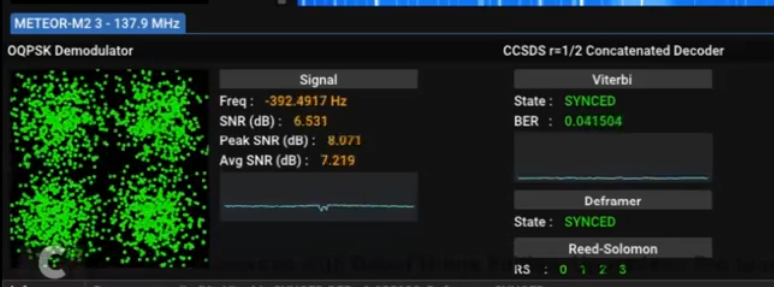
One of the last things to remember is the difference in LRPT and APT modes when the signal strength is low. With APT, a low signal would be recognised by the addition of noise within the imagery. This would be so distinctive that experienced eyes could look at APT imagery and identify where in the pass the noise was.
Meteor does things a little differently in this regard. As signal strength drops, the error correction will do the heavy lifting with regard to ensuring the link between the receive station and the satellite remains consistent. However, adverse conditions and a continued decrease in signal strength mean that eventually the error correction becomes incapable of maintaining that link.
In these circumstances, rather than having noise, you’ll simply lose the signal outright. This is represented by a chunk of missing data in your imagery. If you’re seeing this in your own imagery, it’s worth looking at your station to see where improvements can be made regarding this.
It’s for this reason that most stations are in a state of constant evolution, constantly being modified in the chase for the perfect setup.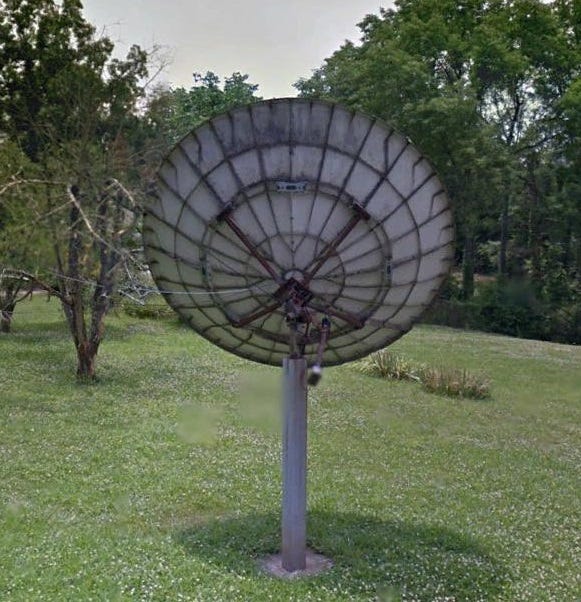
Over To You
For many, the end of the APT fleet was the end of an era. NOAA satellites would give many amateur radio operators and general radio listeners enthusiasts their first steps into the world of radio from space. However, Space weather hasn’t died, it simply evolved.
The Elektro, GOES & Fengyun series are a much more complex starting point, and low earth orbit has plenty of educational value that would be lost without the continued operation of a satellite program that provided an easy, entry-level path into the world of space communications.
The Meteor fleet is scheduled to be supported for some time to come, with the fleet even expected to expand slightly in the coming years. While successfully capturing imagery is going to look a little different to the NOAA fleet of old, the payoff for that is better imagery and sensors.
Investigator515 explores the RF spectrum, cybersecurity, and the hidden tech behind modern espionage.
Follow for new content weekly
Bluesky • X • Substack
You might also like,
- OSINT Investigators Guide to Self Care & Resilience
- Spies In The Mud: The RF-111 Aardvark
- What The Tech?! Space Shuttles