Guide to Creating Liquidity Pool on Solana DEX

Hello, this is Jorge speaking! In this article, I’m going to guide you on how to Create a Liquidity Pool on Solana Blockchain. We have different options like Raydium, Orca or Meteora, but the most common and the DEX we will use today is Raydium.
If you don’t have a Solana Token yet, in this Story, I guide you on how to Create a Solana Token Step by Step and without Coding. How to Create a Liquidity Pool on Solana
1. CREATE OPENBOOK MARKET
Essentially, creating a market means that we will create the token pair with which we can later create the liquidity pool.
We can do that directly on Raydium, but I’m going to show you how to do it from only 0.4 SOL, which is much cheaper than any other way.
I’ll show you how to create it, then I will explain to you how the different costs and lengths exactly work.
To create a Market, you will need the “Revoke Freeze Authority” of your token. If you keep the Freeze Authority, you will be able to freeze tokens on the holder’s wallet; that’s the reason why DEX requires the Freeze Authority to be Revoked.
To do this, you can go to this page, select your token, and complete the process. The cost is only 0.1 SOL.
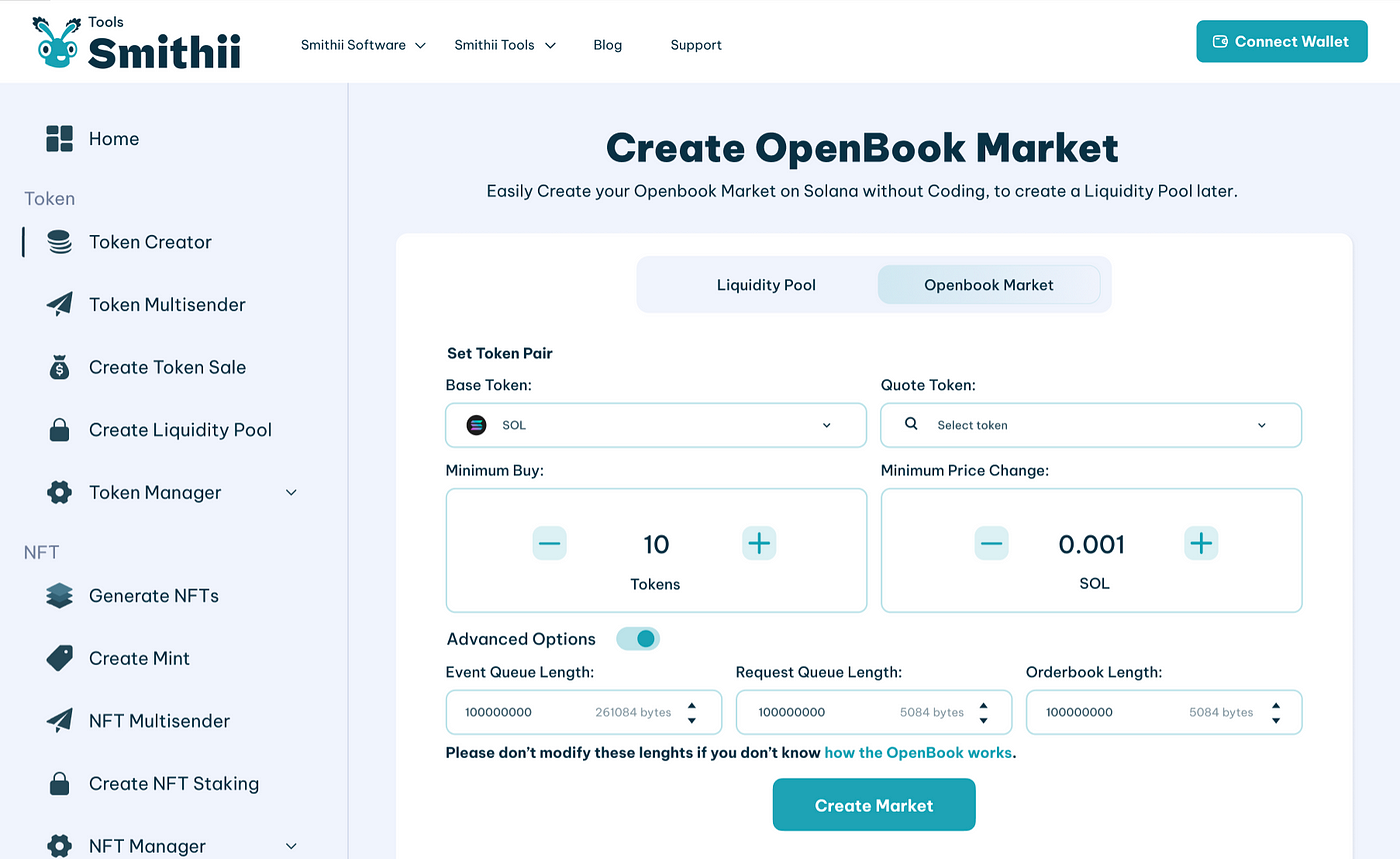
Now that we have everything ready for the Market ID, we are going to use our dApp called “Create OpenBook Market”, this is a software that allows us to create and customize our Market ID in just 1 minute for only 0.1 SOL (plus market storage cost).
- Access to Create OpenBook Market (https://tools.smithii.io/openbook-market/solana)
- Connect your wallet in order to be able to use the software
- Select the “Base Token”. The token you have created and has no value yet.
- Select the Quote Token. A token with market value. Usually SOL or USDC.
- Set the “Minimum Order Size”. That is, the minimum amount that users will be able to buy from your token.
- Set the “Price Tick”. That is, the minimum amount that can change the price of your token.
- Select the advanced options (only if you want to use a market lower than 2.8 SOL).
These are the “inputs” that you must indicate for the different prices of your Market ID.
0.4 SOL:
- Event Queue Length: 128
- Request Queue Length: 63
- Orderbook Length: 201
1.5 SOL:
- Event Queue Length: 1400
- Request Queue Length: 63
- Orderbook Length: 450
2.8 SOL:
- Event Queue Length: 2978
- Request Queue Length: 63
- Orderbook Length: 909
CREATE OPENBOOK MARKET SOLANA
Note that you can also use other numbers, but these would be the “standard” ones. The one recommended by the protocols is the last one, 2.8 SOL.
To finish the process click on Create Market and accept the transactions.
After finishing the creation you will see the Market ID. Copy it and save it, as you will need it to add the liquidity in some DEX.
If you find this content intriguing, please remember to share it and consider following my profile. Thank you immensely for taking the time to read!
PROBLEMS OF A CHEAP OPENBOOK MARKET
The cost of creating an OpenBook Market in Solana depends on the size of the market. This size affects the amount of transactions that the marketplace can process.
In theory the “optimal” size would cost us around 2.7–3 SOL. But the reality is that we can create a market from less than 0.5 SOL.
If you have capacity you should always use the “optimal” market. I will show you how to do either option later.
Under experiences shared with us, with a “Cheap” Market we have seen tokens with 500k USD Marketcap without any problems.
If you plan to create a “serious” project instead of a memecoin, I do not recommend skimping on expenses.
In any case, if you go for the lowest cost option, you should use a larger than normal “minimum order size” to avoid microtransactions taking up space in the OpenBook Market.
In summary, the main problem would be that our token has many transactions and that a percentage of them give error because they are not processable by our marketplace.
2. CREATE LIQUIDITY POOL ON SOLANA ON RAYDIUM
Once we have the market created on Raydium, we can proceed directly with the creation of the liquidity pool. It is important to note that you can only create the liquidity pool if your token Freeze Authority has been “Revoked” as we mentioned before.
With this in mind, we go directly to the section to create pools on Raydium: raydium.io/liquidity/create/ and connect our wallet.
While here, we paste the “OpenBook Market ID” that we copied earlier and click confirm.
Next is one of the key sections: setting the initial price of our token and adding liquidity to the pool.
Regarding the initial price, simply indicate what you consider optimal; it is recommended to prepare complete tokenomics to follow a strategy.
Continue by specifying the amount of liquidity for each token you will deposit, remembering to have enough in your wallet.
To finish, select the public date of the liquidity pool and click confirm.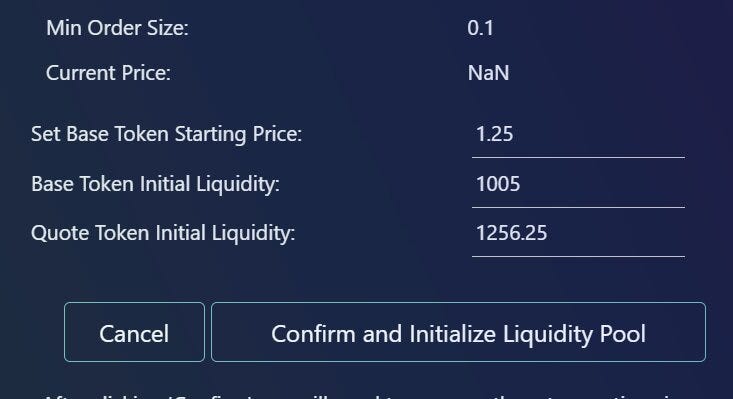 Create Solana Liquidity Pool on Raydium
After clicking the button, you will need to confirm 2 transactions. Once done, you will see the ID of your liquidity pool (for easy retrieval), and the process will be complete. Now, your Solana liquidity pool is created!
This liquidity pool will be active on the page we used at the beginning of this second step to swap.
CONCLUDING REMARKS
Creating the Liquidity Pool of our Token could be a challenge if we don’t have a plan. In my opinion, it’s mandatory to create a whole tokenomics and strategy to launch our token and succeed.
I trust you found the content valuable. Kindly show your support by sharing it and following it.
Thank you sincerely for taking the time to read!