Python (Part 3)-Integrated Development Environments

The Ultimate Guide to Integrated Development Environments (IDEs) for Python
Introduction
An integrated development environment (IDE) refers to a software application that offers computer programmers with extensive software development abilities. IDEs most often consist of a source code editor, build automation tools, and a debugger. Most modern IDEs have intelligent code completion. In this article, you will discover the best Python IDEs currently available and present in the market.
Welcome to our comprehensive guide to Integrated Development Environments (IDEs) for Python! In this article, we will explore the world of IDEs and how they can enhance your Python development experience. Whether you are a beginner or an experienced Python developer, choosing the right IDE can significantly impact your productivity and workflow. We will discuss the features, advantages, and disadvantages of various IDEs to help you make an informed decision.
Sections
What is an IDE?
Why use an IDE for Python development?
Popular IDEs for Python
Section 1- What is an IDE?
An Integrated Development Environment (IDE) is a software application that provides a comprehensive set of tools, features, and utilities to streamline the software development process. It integrates various components such as code editors, debuggers, build tools, and version control systems into a single user-friendly interface. IDEs are designed to enhance productivity, facilitate code organization, and simplify the debugging process.
- An IDE enables programmers to combine the different aspects of writing a computer program.
- IDEs increase programmer productivity by introducing features like editing source code, building executables, and debugging.
Section 2- Why use an IDE for Python development?
Using an IDE for Python development offers numerous advantages over using a basic text editor. Here are some key benefits:
Code completion: IDEs provide intelligent code completion, which suggests relevant code snippets, function names, and variable names as you type. This feature saves time and reduces errors by preventing typos.
Syntax highlighting: IDEs highlight different elements of your code with distinct colors, making it easier to read and understand. This feature improves code readability and helps identify syntax errors quickly.
Debugging support: IDEs offer advanced debugging tools that allow you to set breakpoints, step through code execution, inspect variables, and analyze program flow. These features assist in identifying and fixing bugs more efficiently.
Automatic code formatting: IDEs often include automatic code formatting capabilities, ensuring consistent coding style throughout your project. This feature saves time and promotes code maintainability.
Integration with version control systems: Many IDEs seamlessly integrate with popular version control systems like Git, allowing you to manage your source code repositories directly from within the IDE. This integration simplifies collaboration and code management.
Section 3- Popular IDEs for Python
Let’s explore some of the most popular IDEs for Python development: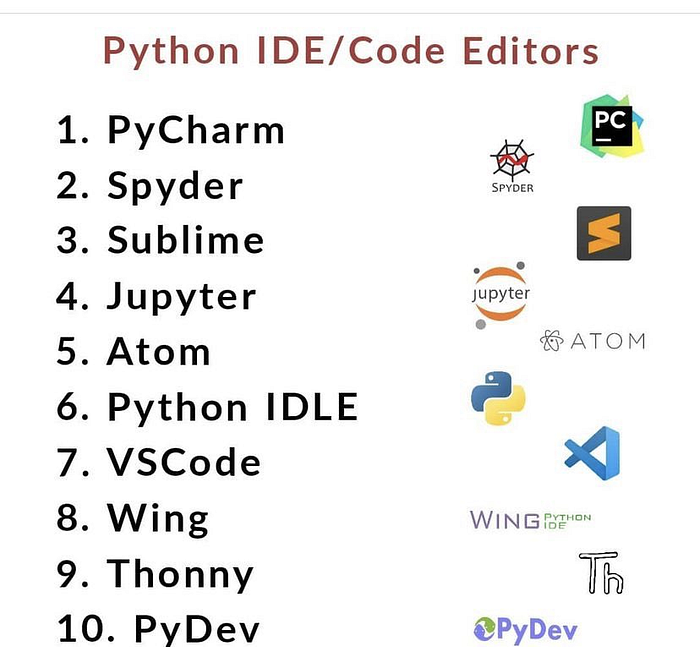
1- PyCharm
Next up we have PyCharm, this is one of my favorite IDE I pretty much use for all of my tutorials. PyCharm is one of the largest IDEs on this list but it offers a ton of features. One of my favorite things with this IDE is running the code within the environment, this allows us to run line by line or the whole program right in the IDE. On top of this, PyCharm has all of the following features as well. To download for Python, download it here:
2- Visual Studio Code
this is a very popular IDE built by Microsoft! This IDE is a multi-language interpreter, so you can run code from multiple different languages, one of these languages is Python! Visual Studio Code is an industry-standard used at tons of different companies, so I would totally recommend learning it for sure! This is the link to download this software:
https://code.visualstudio.com/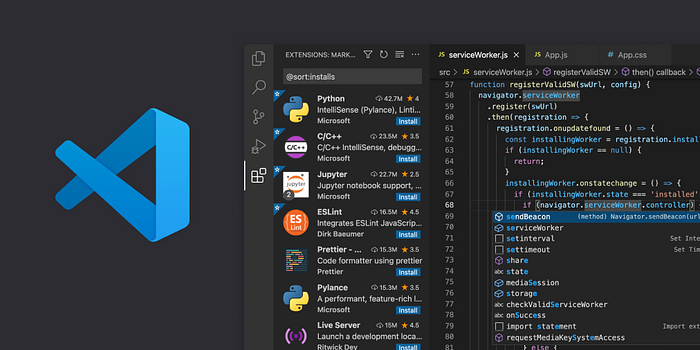
2.1- Anaconda and Vscode configuration
Visual Studio Code and Anaconda are powerful tools for Python developers. However, if you are trying to use Anaconda and Visual Studio Code together there is a good chance you have run into some problems. As common as these tools are for programming with Python, it can be difficult to figure out how to get them to work together.In Visual Studio Code you can run Python code with Anaconda by using the Anaconda Prompt, updating the Visual Studio Code workspace settings to be aware of your Anaconda installation, or adding Anaconda to the Windows Path variable.
This section will describe how to implement all three of these methods with step-by-step instructions.
1. Install Visual Studio Code and Anaconda
VSCode Configuration
Step 1: Install VSCode with the default setting
To start, download and install Visual Studio Code. When installing Visual Studio Code (VSC), you can keep all the default settings.
Step 2: Install Python Extension
Once you have VSCODE installed, open VSC and install the Python extension and the Pylance extension (if they’re not already installed).
Open Vscode> Extension>Python(intelliscen)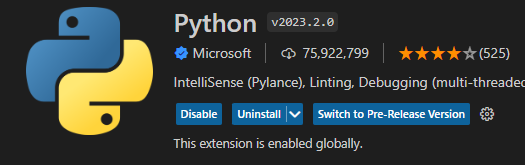 Now install Anaconda (you can also install Miniconda). I like to use the default/recommended installation settings for Anaconda. I’ll describe these with images below.
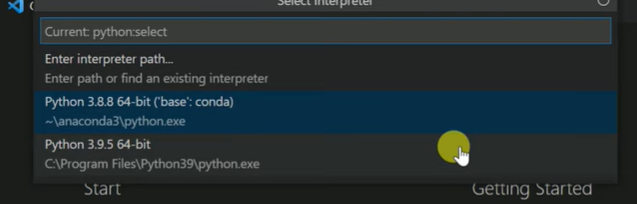
Step 3: Setup Interpreset VSCode used
ctrl+shift+P
Option 1:
open user setting Search Python Path
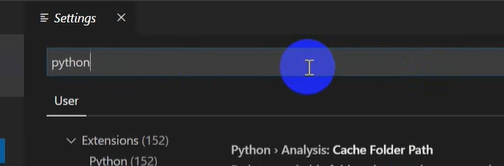

Anaconda configuration
To keep things simple, you can install Anaconda just for the current user.Select your install location. I usually keep mine as the default. For Windows, this will probably be C:\Users\your-user-name\anaconda3. Remember the install location because you will need it later if you decide to add Anaconda to the path variable.
Now you will have the option to add Anaconda to the PATH environment variable. If you add Anaconda to the PATH variable it will most likely work with Visual Studio Code with no problems. However, I don’t like to do this because I frequently uninstall and reinstall Anaconda and it can cause problems if it is added to the PATH variable. I also use multiple python versions and distributions and adding them to the PATH variable can get complicated and confusing.
I do not recommend adding Anaconda to the PATH variable for now. Later in this article, I’ll show you how to do it manually in case you change your mind.
I do recommend registering Anaconda as your default Python distribution. Doing so will allow Visual Studio Code to locate the Anaconda Python distribution.Click install and wait for the Anaconda installation to finish. This will take a little while.
4. Change the Workspace Settings
To use Anaconda with VSC you can also change the workspace settings so your project uses the Anaconda tools. To do this open the VSC settings and (CTRL + SHIFT + P) and type “settings”. Then select “Open Workspace Settings (JSON). This will create a new directory (.vscode) and an empty JSON file (settings.json) in your code directory. The JSON file will contain settings that pertain to your current project.
{
    "python.pythonPath": "C:\\Users\\<your-user-nameL\\anaconda3\\envs\\<your-conda-env>\\python.exe",
    "python.terminal.activateEnvironment": true,
    "terminal.integrated.shell.windows": "C:\\Windows\\System32\\cmd.exe",
}
Edit settings.json by adding these lines of code. You may need to change the file paths slightly to reflect your system.
This code will run the Windows Command Prompt with the Anaconda tools available so that you can run the Python code directly from VSC.
Right-click on the Python file you want to run in the VSC file explorer panel and select “Run Python File in Terminal”. This will open a new terminal window that is aware of your Anaconda environment and run the Python code.
5. Add Anaconda Tools to the Windows PATH Variable
In VSC you’ll notice that if you type conda in the command prompt you will get the error described above. And if you type python in the command prompt it may take you to the Windows store to install Python. This is because the Windows command prompt does not know that you have Anaconda and its Python distribution installed.
To fix this add the path to the Anaconda python.exe and Scripts folder to the Windows PATH variable. As I mentioned above, you have the option to do this when Anaconda is installed. I do not recommend this method, and it’s not recommended by Anaconda, but it may be what some users want to do.
To add to the Windows PATH variable search for ‘Environment Variables’ from the Windows Start Menu and select the option to “Edit the system environment variables”.In the window that opens select “Environment Variables”
Now you have the option to change environment variables for the current user or the system. You can add the appropriate file paths to either the Path (or PATH) variable for either the User or the System.
Select the “Path” variable and click “Edit”. This will open a new window with a list of file paths. Select “New” to add a new path. Add the following two paths to the “Path” variable.
- C:\Users\your-user-name\Anaconda3\
- C:\Users\your-user-name\Anaconda3\Scripts
Now click OK to close all the open Environment Variable windows.
ow when you type conda into the command prompt a usage information message should display.
3-Jupiter Notebook
In this machine learning project for beginners, we will use Jupyter Notebook for development. Next up we have Jupyter Notebook, this is another IDE that’s used heavily for data science. A great thing about this IDE is that it’s fully ran in your browser, this allows you to easily send notebooks from one person to another (as long as they have access to Jupyter).This IDE also supports over 40 different languages (including R, Julia and Scala), you can also run Jupyter Notebooks in blocks of code or entire files! This is definitely an awesome IDE that’s used in almost every company out there, to learn more about this IDE check out the link below: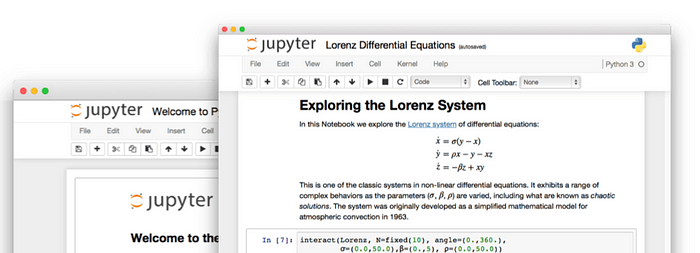
4-Google CoLab
Finally we have Google CoLab, one of my favorite IDE’s available right now. Google CoLab is a little bit different from the other IDE’s, there are no files to download, nothing to install, everything is ran within your browser! Another massive feature is that you get to have access to Google’s GPU’s for free! This allows you to run your code much faster compared to a CPU! That feature alone makes Google CoLab stand out over the other IDE’s. You can also share your code easily by sending them a link, very similar to sharing a Google Drive file to someone. If you want to learn more about Google CoLab, check out the link down below:
https://colab.research.google.com/notebooks/
5-Spyder
Starting off we have Spyder, a very powerful IDE specifically tailored for data science. Unlike some other IDE’s on this list, Spyder allows you to turn different languages inside one software, you can also run code line by line, per cell or the whole file!. My 2 favorite things about this IDE are the variable explorer and the plots being plotted straight in the side bar (unlike other IDE’s which print them out differently). Another massive feature about Spyder are the plugins, there are tons of plugins available for this software for a ton of different tasks, if you want to download this IDE check out the link below:
https://www.spyder-ide.org/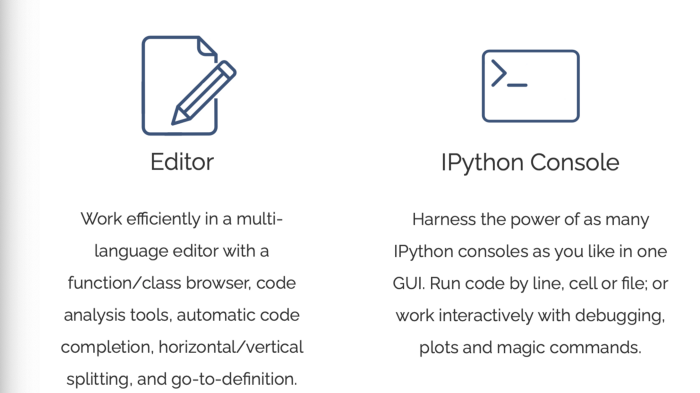
Conclusion
Choosing the right IDE is crucial for effective Python development. Each IDE mentioned in this article has its own strengths and weaknesses. PyCharm offers a comprehensive set of features but comes with a steeper learning curve. Visual Studio Code provides excellent customization options and extensive community support. Jupyter Notebook is ideal for data analysis and interactive coding. Spyder caters specifically to scientific computing tasks. Atom is highly customizable but may require additional setup to become a full-fledged Python IDE.
Consider your specific needs, preferences, and project requirements when selecting an IDE for Python development. You may also want to try out multiple IDEs to find the one that suits your workflow best. Happy coding!
Please Follow coursesteach to see latest updates on this story
If you want to learn more about these topics: Python, Machine Learning Data Science, Statistic For Machine learning, Linear Algebra for Machine learning Computer Vision and Research
Then Login and Enroll in Coursesteach to get fantastic content in the data field.
Stay tuned for our upcoming articles where we will explore specific topics related to Python in more detail!
Remember, learning is a continuous process. So keep learning and keep creating and Sharing with others!💻✌️
More update about Python Please follow and enroll:
Course: Introduction of Python
📚GitHub Repository
📝Notebook
References
1-Top 5 Python IDE’s For Data Science
2–15+ Popular Python IDEs in 2023: Choosing The Best One
3-Python — Setup Visual Studio Code with Anaconda