Building the ClockworkPi uConsole

The uConsole can be turned into a very useful, portable SDR station.
Get your own Clockwork Pi by visiting our publication partners over at Open Source SDR Lab. Use the code “radiohackers” at checkout for an extra 5% off.
The Raspberry Pi is a fun bit of equipment. Coming in many forms, it’s able to assist with everything from home automation to flight trackers and everything in between.
The Cyberdeck market is also a fan of the Pi. Cyberdecks are small, mini computers that are built into assorted form factors and then taken out into the field. Many makers prefer to assemble their own cyberdecks, but with the trend having grown over the past few years, you can now get them in kit form as well.
Today, we’ll take a look at one of these kits and then put one together. Known as the uConsole, it’s a hackable cyberdeck that works great when you pair it with a software-defined radio.
The uConsole Kit
The uConsole is a modular handheld computer from ClockworkPi built around a swappable compute module system, letting you choose from options including a Raspberry Pi CM4, ClockworkPi’s own ARM-based A-04 or A-06 boards, or even a RISC-V R-01 module.
The uConsole comes from a DIY ethos. The whole device is designed to be assembled, repaired, and upgraded at home, is held together with screws rather than glue and has 3D design files published on GitHub for anyone who wants to modify or reprint the case.
The result is a pocket-sized Linux terminal that sits somewhere between a cyberdeck and a field tool, purpose-built for makers who want full control over their hardware.
Key Specs:
- Display: 5-inch IPS screen at 1280×720, with micro-HDMI output
- Input: 74-key backlit thumb keyboard (QWERTY, arrow pad, gamepad keys) and mini trackball
- Connectivity: 802.11ac WiFi, Bluetooth 5.0, USB-C charging, 1x USB 2.0, MicroSD slot, 40-pin GPIO, and optional 4G LTE modem
- Audio: 3.5mm audio jack and internal stereo speakers
- Power: Dual removable 18650 batteries
- Build: All-metal chassis, screw-assembled, 170mm × 130mm × 26mm
The uConsole sounds like a pretty cool bit of kit, however, it does come with a disclaimer. Production is slow. Like, really, really slow. The uConsole used for today’s article would arrive nearly a full ten months after the initial order had been placed.
Unpack & First Thoughts
A quick lift of the lid gives you an immediate insight into what it is that the uConsole is trying to achieve. This is no toy, and while there are plenty of other cyberdeck options for the Pi, it’s quite clear that plenty of thought has gone into the design of this.
The pack comes with an instruction manual, sticker kit and all the hardware you need to build your device and get it running. The uConsole is able to be optioned with different specs, so each kit will be different depending on the specs that you’ve selected.
It’s cleanly put together, and while it’s clearly targeted at a market that is comfortable with their hands, its modular design means that assembly shouldn’t be too difficult for beginners to tackle either.
While you won’t be winning any prizes for screen size, it’s comfortable enough to run a terminal, and the fact that it runs on two 18650 batteries you source yourself says everything about the type of market they are targeting.
Is it worth the money, and more importantly, was it worth the wait?
Let’s build it and see.
The Build
To ensure you can build out the uConsole to completion, you’ll need to have a couple of things. If you optioned yours with a compute module, then you’ll be ready to go.
If you’ve bought the shell only, you’ll also need to arrange a core, a memory card and download the operating system. For the purposes of today, we’ll assume that you’ve ordered the complete kit.
Note: While the uConsole will work with the Compute Module 5, this can come with some issues. Check the Clockwork Pi forums for more information.
Before we start the build, we’ll need to arrange the OS and figure out how to sort the operating system. This will depend on the type of module you are using. While the instructions state using a Lite module with no onboard memory, models with the EMMC will work as well, albeit with a few caveats. If you get stuck on the configuration, check the Clockwork forums for more information.
You can download the image for the uConsole via this link.
If you need some additional help with assembly, use the assembly manual on the big screen to help guide the way.
Once the compute module is organised, we’ll need to look at adding the screen and installing the keyboard. This clips in and is able to be installed into the front via the ribbon cable. Be gentle with the ribbon so you don’t damage anything.
Note: The trackball has been reported to be a little sticky when still new. It’s worth giving it a proper clean before you install it.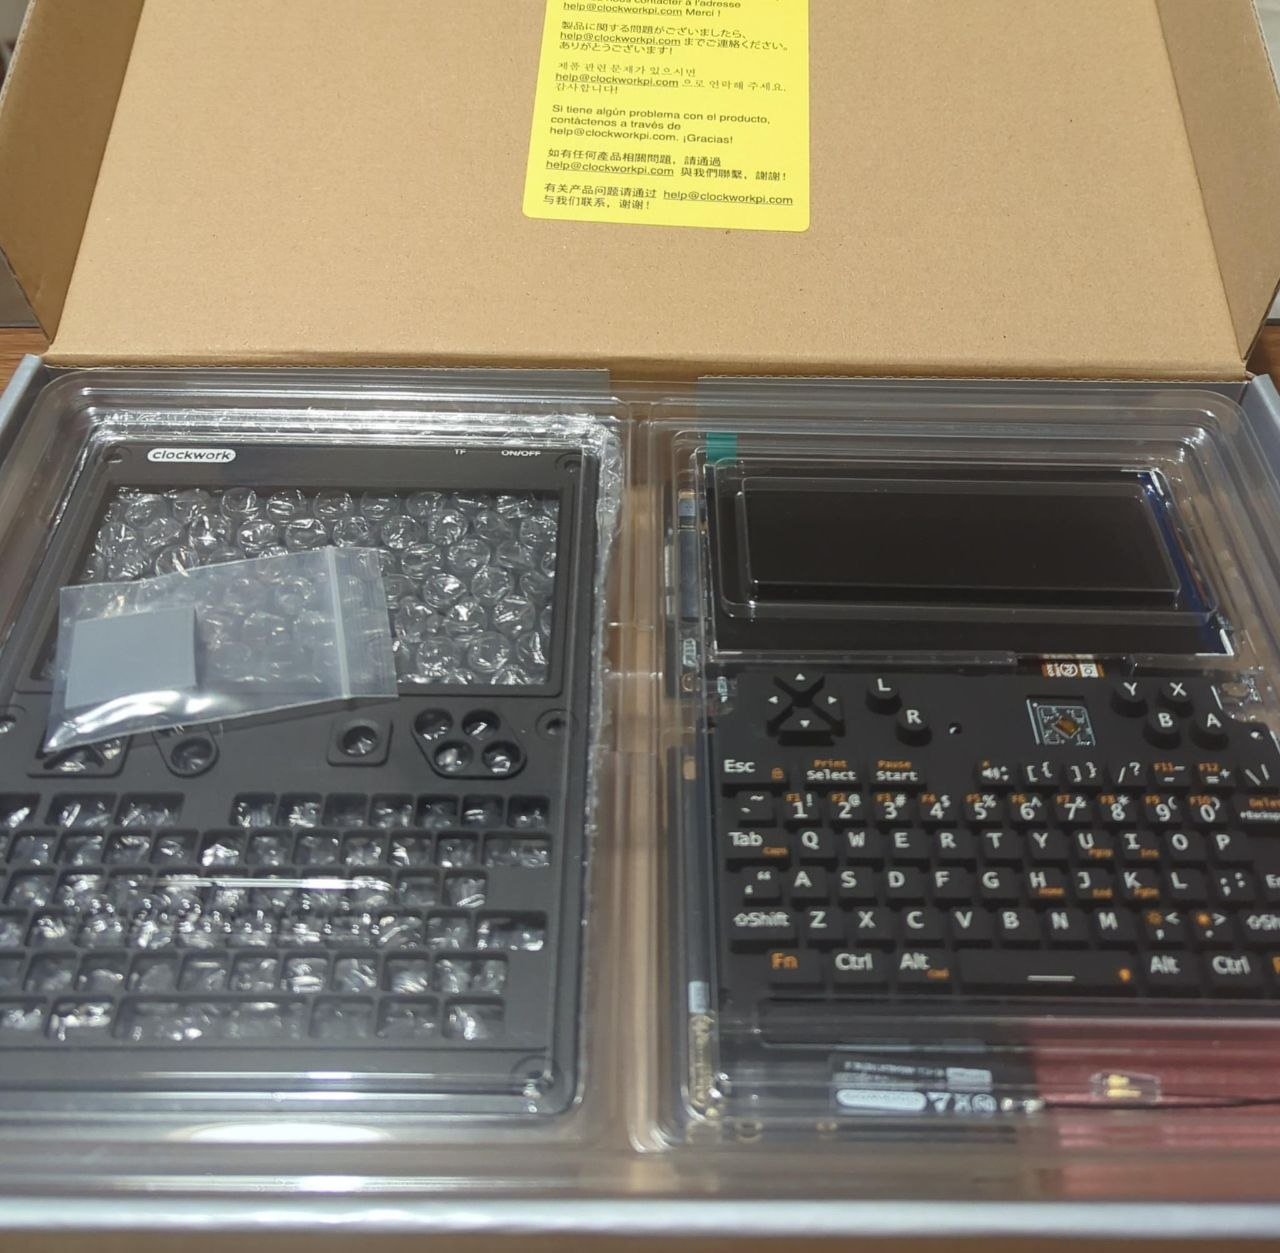
After the keyboard and screen are installed, we’ll need to put the front panel over the top and secure it using our hex-headed bolts.
Next, we will look to install the main board. This slides into place and is secured using our 2.5mm hex-headed bolts. It should fit snugly into place without needing to be forced.
Next, we’ll mount the compute module core and install the Wi-Fi antenna onto the compute module.
Next up is the ext module. We’ll put that in and retain it with more 2.5mm hex head bolts.
Then, we can put the retaining plate on the side so everything sits nicely in place. Before we install the battery module, it’s worth going back over the previous steps to ensure everything is fitted correctly and that nothing has moved during installation.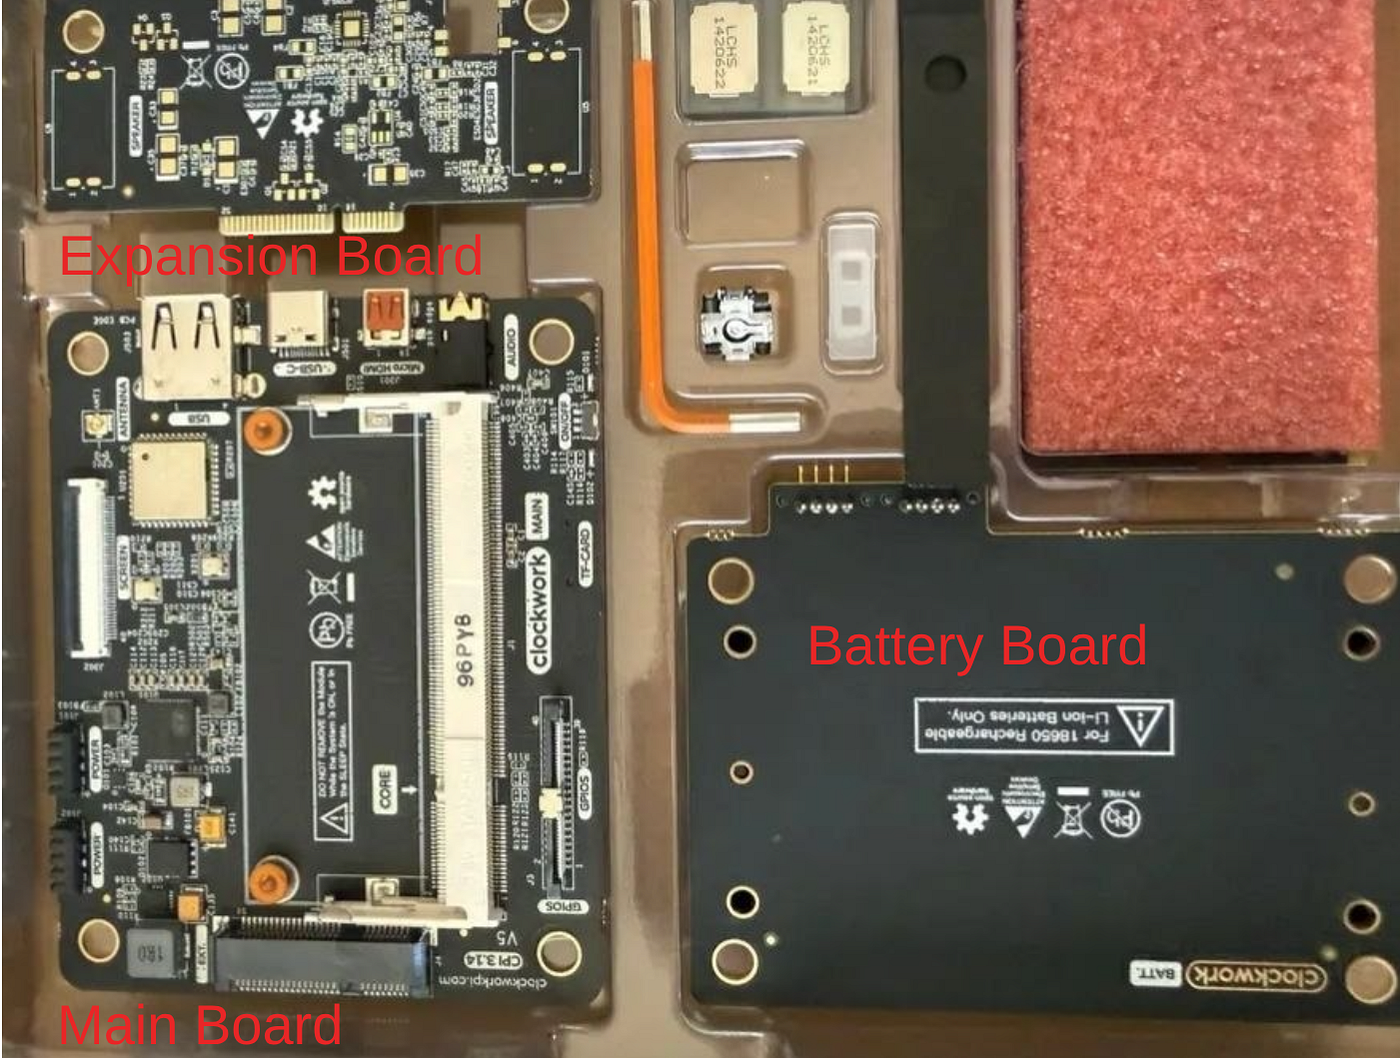
We selected a Wi-Fi only module, so no 4G antenna is present in this kit. If you have 4G available, you’ll need to install the antenna at this point. Once this is done, we can then move on to installing the battery module and installing our 18650 cells.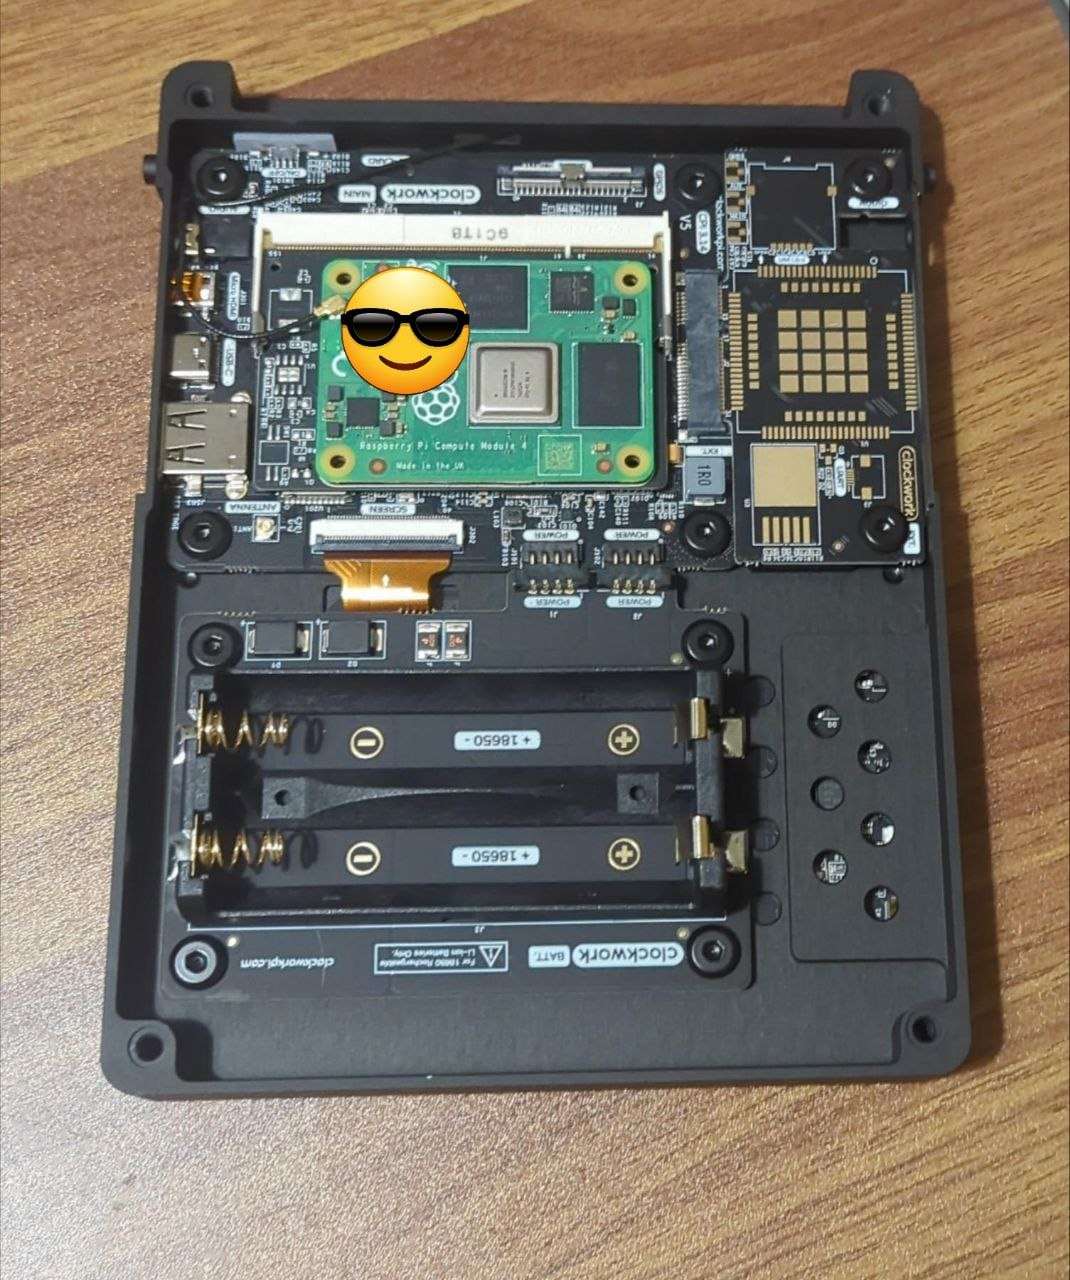
We’re almost done! Next, we need to install the thermal block onto the chip of the compute module. This will transfer heat away from the chip and turn the back section of the case into a full heat sink. Once it is installed, you can install the back cover and screw it into place. Check the image for correct placement.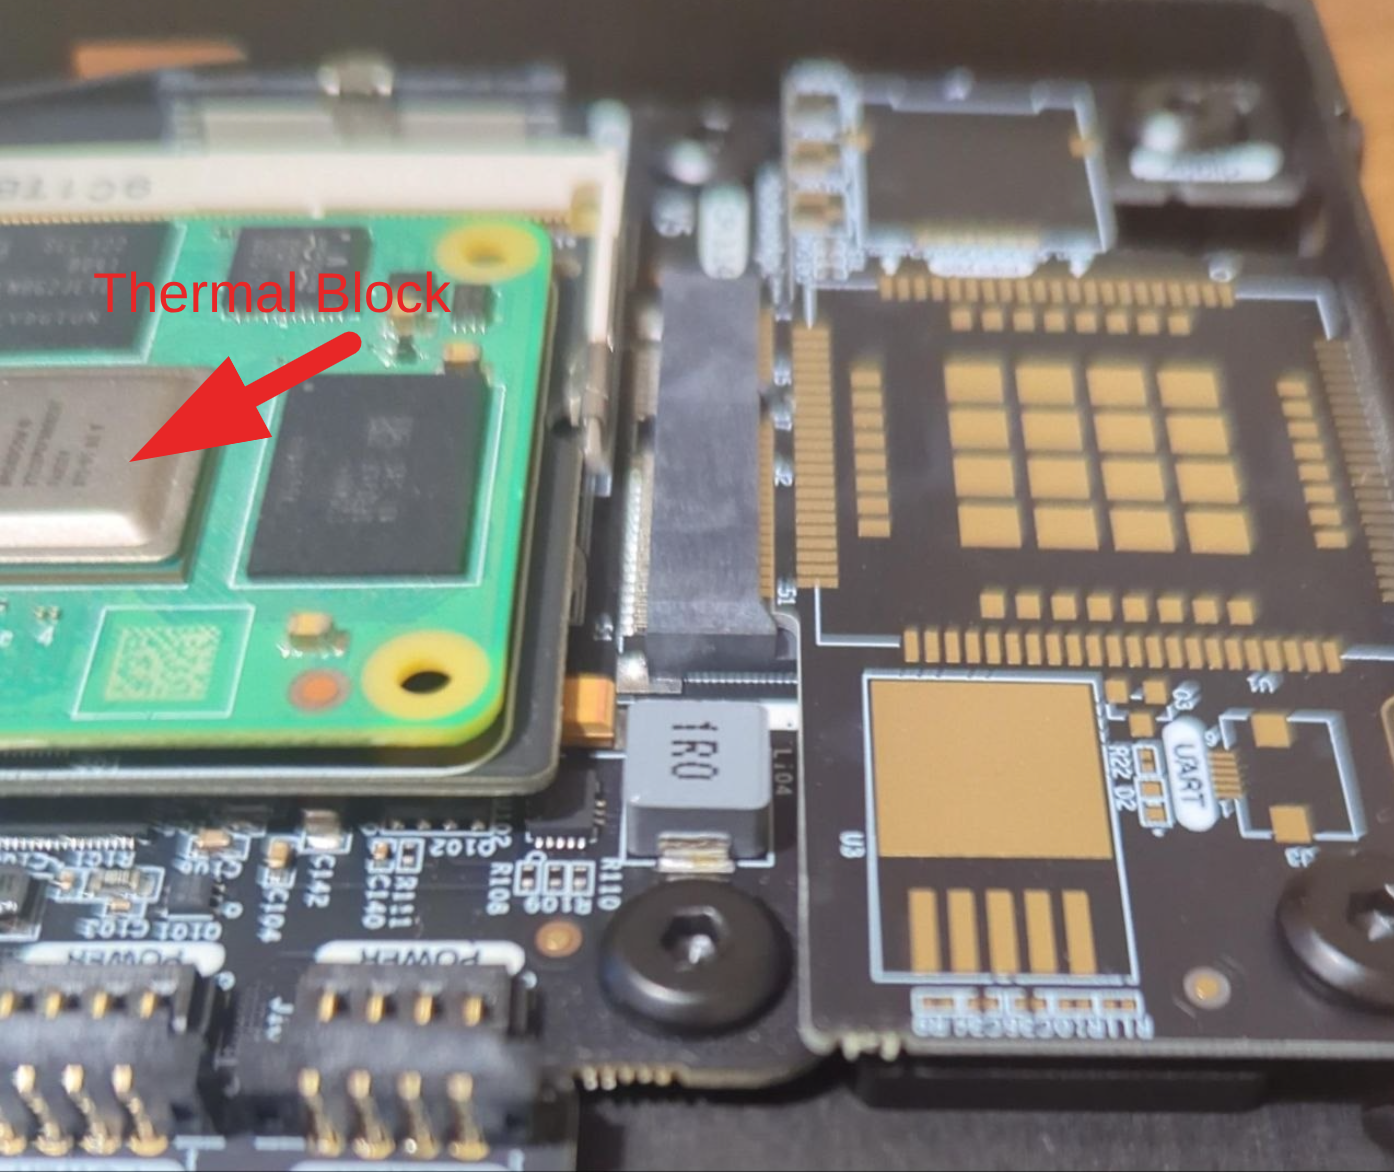
Now, we just need to install the stand. The final pair of 2.5mm hex heads will screw this into the side of the housing. Make sure the bolts are firm, but not overtightened.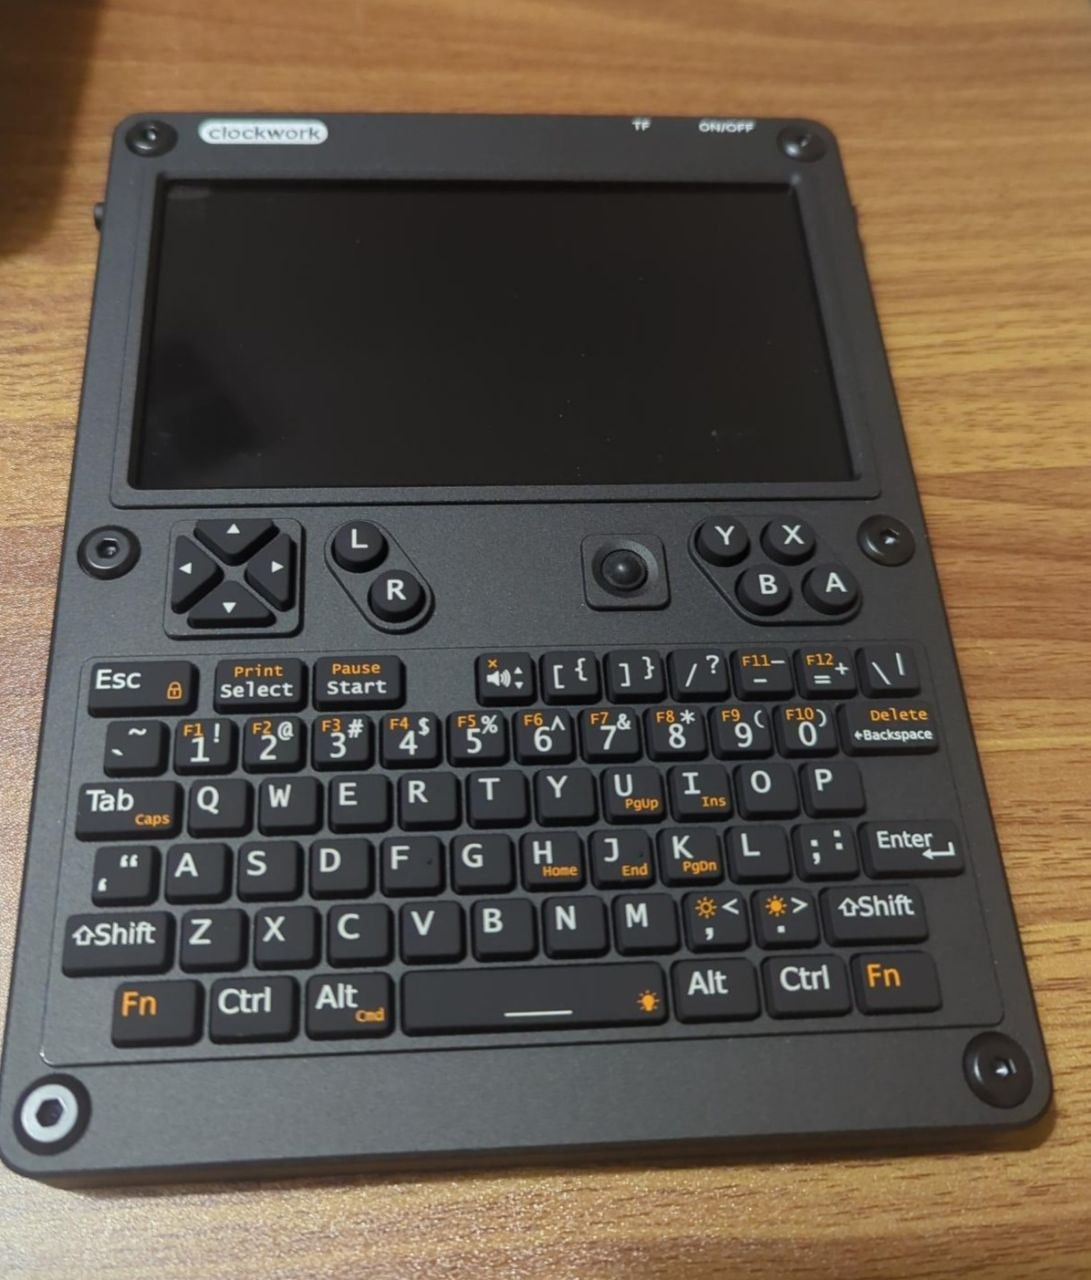
If you have a Lite Compute module, install your SD card, and we are done with the build. With the stand installed and our SD card set, the final installation steps are complete. Give the unit a final check over, and we can prepare for our first boot.
The Boot & Check
Once we’ve carried out the final hardware checks, we can boot the uConsole and see how we are looking.
To do this, we’ll simply hit the power switch at the top and hold it for a few seconds. Given this is the first boot stage, bear in mind that it might take some time for things to spring to life.
Once it starts, we’ll set it up like we would any other Linux machine. Then, we’ll want to give it a check over to make sure the accessories are working and that everything looks to be operating as it should. Don’t skimp on the checks; if there is a fault, we’ll need to know about it so we can get it sorted while it has a warranty.
Post-Boot Checklist
- Screen powers on with no dead pixels or backlight bleed
- Keyboard and trackball respond correctly
- WiFi connects and Bluetooth scans
- Internal speakers and 3.5mm jack produce audio
- Battery percentage displays and USB-C charging registers
- USB-A port and MicroSD slot detect devices
- Confirm the compute module is recognised with cat /proc/cpuinfo
Once you’re done, run a package update to ensure you’re running the latest software.
A Little More
The uConsole in standard trim is pretty functional and provides a reasonably good user experience. However, the publication is called Radio Hackers, so naturally, we are going to add a little something to the build to ensure that the uConsole has everything we might need to explore the radio spectrum properly.
This will consist of an open-source software stack and the addition of the Hackgadets AIO board from the hardware side. The AIO gives us a full radio stack consisting of LORA, GPS, RTL-SDR and other hardware we need to explore the spectrum in-depth.
So, on top of the standard packages, we’ll also add the RF software, which in this instance consists of:
- rtl_433
- Satdump
- GQRX
- Inspectrum
- Universal Radio Hacker
- Dump1090 and,
- acarsdec
When you’re done, you’ll be left with a toolkit that allows you to capture, examine and explore the radio spectrum with confidence.
Feel free to add in any other software packages or omit what you think isn’t going to work for your workflow.
Final Thoughts
The Raspberry Pi has always been great value for makers, and while RAM/chip prices have had an impact on the price point, that is still a fact that rings true even today.
uConsole is an easy-to-assemble piece of kit that takes some getting used to, but when you’re done, you’re left with a piece of hardware that has genuine utility.
The delay is not a fun thing. No one likes to wait months for something they’ve ordered, but if you’re able to put that point to the side for a moment, you find a product that still comes with some real utility.
The basic board is pretty good, but it’s the addition of dedicated accessories like the Hacker Gadgets AIO board that really help to make the uConsole shine.
Whether it is worth buying or not is a decision that has to be made by you. And in the interests of full disclosure, the product does still have some bugs that need to be ironed out in the future.
One of the best things about the project, though, is the active community that is currently working through bugs, developing accessories and actively using their uConsole out in the wild.
This was built by makers, for makers and seeing the community develop around the uConsole has helped to ensure that the product has been a success.
While the uConsole can be a great piece of equipment as-is, spending some time customising it to your own circumstances leaves you with a legitimately useful tool.
One that you can say that you can truthfully say that you built with your own hands.
Investigator515 explores the RF spectrum, cybersecurity, and the hidden tech behind modern espionage.
Follow for new content weekly
Bluesky • X • Substack
You might also like,
- OSINT Investigators Guide to Self Care & Resilience
- Spies In The Mud: The RF-111 Aardvark