Database Migrations for beginners — Springboot + Flyway

Such as we versioning the code source, is a good practice to versioning database scripts.
In my career, I always see many companies change database structures using database tools, like Dbeaver, Datagrip, SQL Developer …
In some teams after finishing the developer task, the DBAs compare the developer database with the production database and apply the changes.
Another way is to save the script that was executed during the development task together in the application code project, these script is a simple scripts, that are executed manually.
One way easier is to use the migration approach, in which all database artifacts, are version controlled with application code together.
All database artifacts can be in the same control version repository that’s used by all stakeholders. The benefits are:
- There’s only one place to look, it is easier for anyone to find what is needed.
- Every change to the database is stored, so it’s easier to audit if any problems occur.
- Also, it’s easier to create new environments “sandbox, test, production”.
To avoid keeping scripts without someone controlling version tools, or changing the database using schema editing tools as mentioned before, we can do this by script migrations. Each script can represent schema changes, database code changes, transaction data updates, fixes… In other words DDL and DML.
Example:
Here I was creating a table to store clients.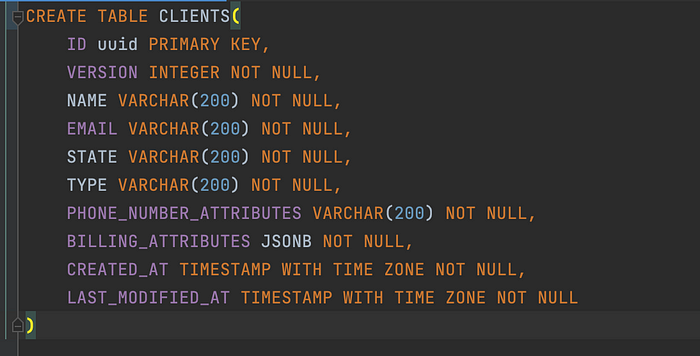
Script Migration V1
After I need to store the appointments together as JSONB. Then, I created another migration script, adding the column that I need.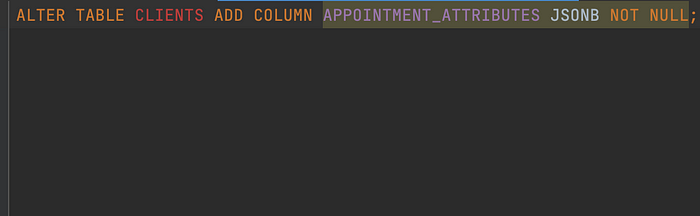
Script Migration V2
After running the first, and second scripts we can see that both situations are stored in a table in charge of the audit.
In the case of the Flyway, the table is flyway_schema_history
SELECT * FROM flyway_schema_history;

With this way of working, we never use database tools for editions, like Dbeaver, Datagrip, and SQL Developer to run DML and DDL. All changes are made by migrations.
Each migration needs a unique identification, we need to track each migration have been applied, and we need to manage the sequence of each migration, for this, the flyway_schema_history store someone data like:
- version — migration script version
- script — the file name of the migration script
- installed by — the user that executed the migration script
- success — if was executed with success or not
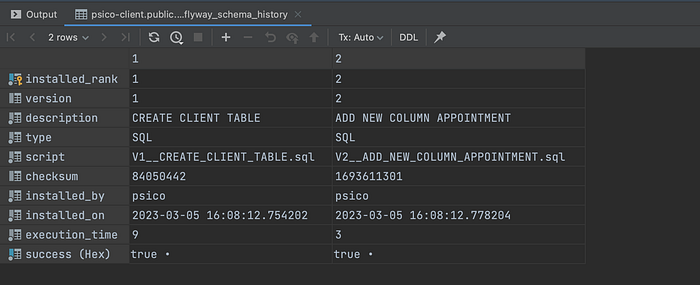
- the first thing did was create the clients’ table, and after this, to alter the table by adding a new column.
Creating migration scripts is part of the development task. When we developers create the migration script, we put it in the migration folder in the project.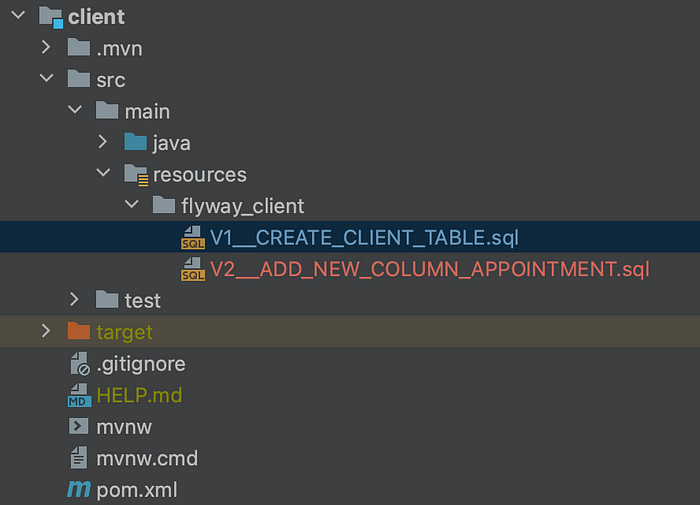
Flyway folder migration.
Continuous Integration & Continuous Delivery (CI/CD)
Just like we can use continuous integration to our application code, we might use too our scripts migration.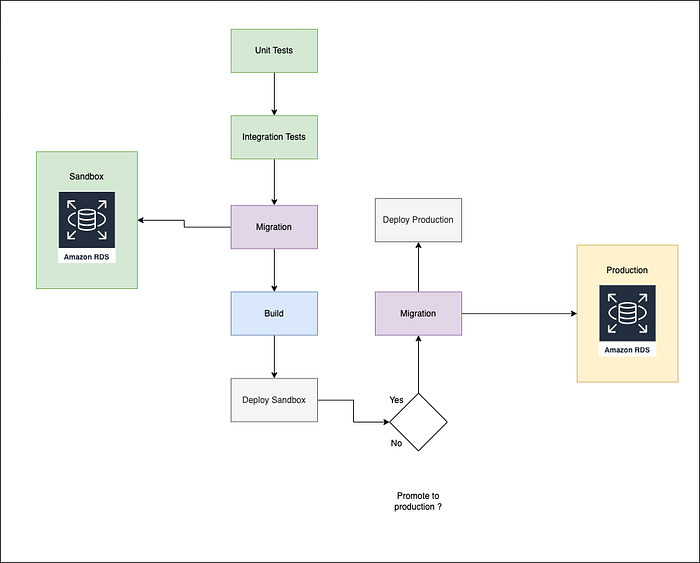
Test our migration scripts locally, with an integration test for example, after that running the migration scripts in CI to deliver in the sandbox environment and consequently to the production environment, is a good practice.
After all, we’ll have all way executed since the creation of the scripts until production is passing by the pipeline (CI) and with a lot of options to test the new feature.
At some teams, I worked another way to execute migration scripts was to run outside of CI, before deploying the developer runs the migration script in your workstation locally.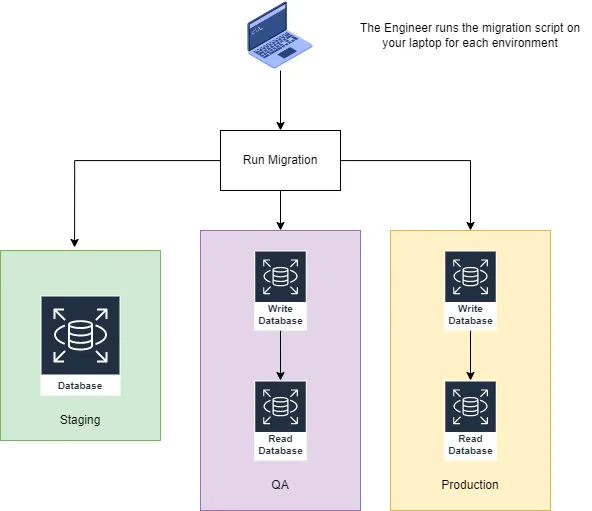
Hands-on
In this story, I’ll show you how to implement migration tools in your project.
I chose to work with Spring but feel free to choose the framework that you love.
Techstack
- Springboot 3.0
- Flyway
- PostgreSQL
First, we need to add the dependencies.
<dependency>
   <groupId>org.flywaydb</groupId>
   <artifactId>flyway-core</artifactId>
   <version>9.8.3</version>
  </dependency>

  <dependency>
   <groupId>org.postgresql</groupId>
   <artifactId>postgresql</artifactId>
  </dependency>

  <dependency>
   <groupId>org.springframework.boot</groupId>
   <artifactId>spring-boot-starter-data-jpa</artifactId>
  </dependency>

  <dependency>
   <groupId>org.springframework.boot</groupId>
   <artifactId>spring-boot-starter-web</artifactId>
  </dependency>
Datasource configuration
spring:
  datasource:
    hikari:
      jdbc-url: jdbc:postgresql://localhost:54322/wallet-transaction
      pool-name: wallet-transaction-hikari-pool
      driver-class-name: org.postgresql.Driver
      username: wallet-transaction
      password: wallet-transaction

# application.yml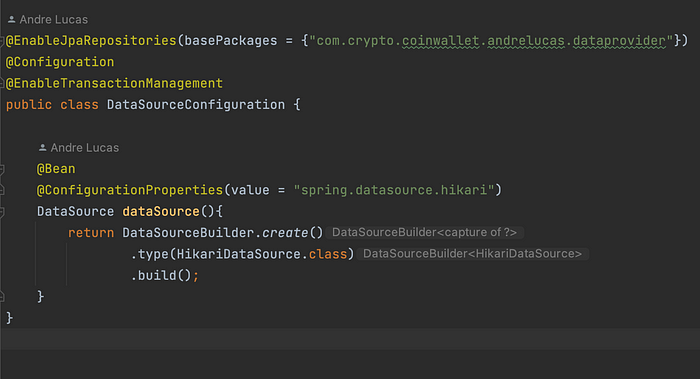
Flyway configuration
By default, the flyway migration scripts, are in the folder db/migrations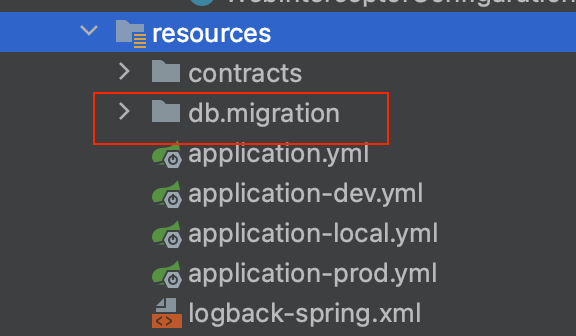
But we can change if we want…
flyway:
  enabled: false
  locations: db/migration
Look at the properties “enable: false”, this option is as false and isn’t recommended to be as true, mainly for a production environment, the best way is to have the migration step in the pipeline as mentioned before. To test in the database locally, ok there isn’t a problem.
Another way is to configure the flyway programmatically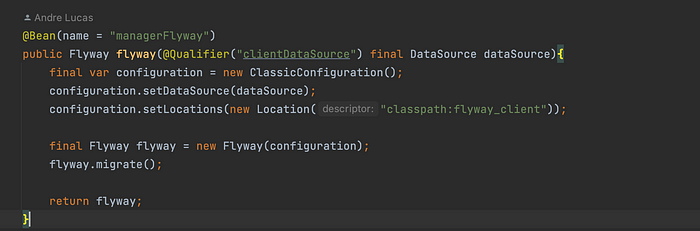
In this case, the flyway bean receives the data source configuration bean, and another path where is the migration scripts.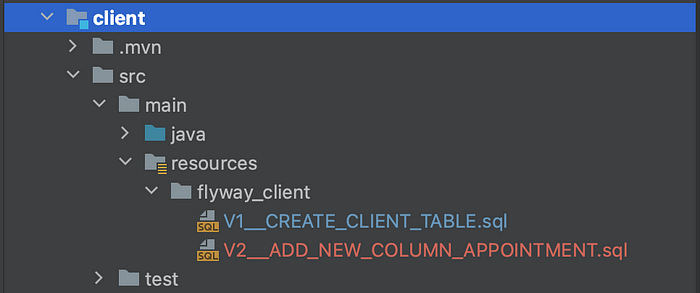
Fully Code
https://github.com/andrelucasti/micro-coin-wallet
Conclusion
Migration tools are a great option, there are other options like Liquibase.
References
https://docs.spring.io/spring-data/jpa/docs/current/reference/html/
https://flywaydb.org/
https://flywaydb.org/documentation/usage/plugins/springboot
https://martinfowler.com/articles/evodb.html