[Node] Run your BABYLON node (bbn-test-2)

 Babylon introduces a groundbreaking method for Bitcoin staking, allowing Bitcoin owners to stake directly on Proof-of-Stake (PoS) blockchains without the need for intermediaries, bridges, token wrapping, third-party custody, or oracles. It includes Bitcoin timestamping, a protocol which sends succinct and verifiable timestamps of any data (such as PoS blockchains) to Bitcoin and Bitcoin staking, a protocol which allows bitcoin the asset to provide economic security to any decentralized systems through trustless (and self-custodian) staking.
Currently, in the testnet phase, Babylon has already secured $18 million in funding from leading venture capital firms. In this step-by-step guide, you will learn to set up and run your node as well as becoming your own validator !
Welcome to Node Science! Here, you will learn and understand how to set up your node easily and quickly, without any prior technical knowledge.
Feel free to follow us on Twitter to stay updated on everything related to nodes and join our Discord for further discussion or any questions with our community!
I) VPS configuration
To run a node you’ll need a VPS (Virtual Private Server) and one of the most reliable and cheapest solutions is Contabo. It’s a cost-effective German VPS solution built in 2003, known for its robust performance and reliability, catering to a wide range of computing needs and budgets.
You can choose the CLOUD VPS 2 by clicking here. Note that you can opt for a more powerful server (VPS 3 or 4) to run multiple different nodes on it more economically.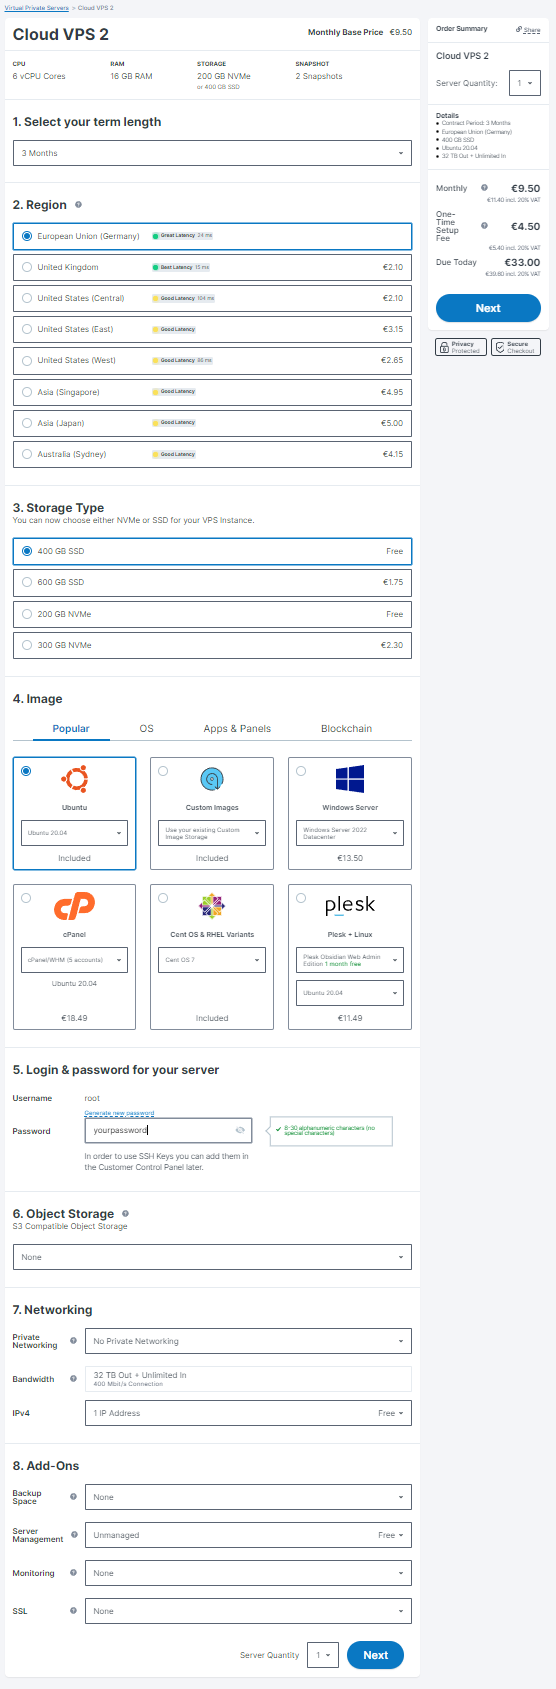 Don’t forget to choose a password.
Once payment is complete, you’ll receive an e-mail with your IP address entitled “Your login data!”. To connect to your VPS and securely run your node, you must download and install the Putty software, which enables a secure connection. Type your IP address and Open.
II) Node deployment
Ensure you copy each command line using (Ctrl+C), and then paste it into your terminal by right-clicking your mouse. Execute them sequentially, pressing Enter after each, if required.
Start by refreshing the local package index to incorporate the most recent modifications made in the repositories.
apt-get update && sudo apt-get upgrade -y
Then installs several essential tools and dependencies.
sudo apt -qy install git build-essential curl jq lz4 screen
- git: A distributed version control system widely used for collaborative software development.
- build-essential: A meta-package that installs essential items for compiling software on Ubuntu, including compilers and development libraries.
- curl: A command-line tool for transferring data with URLs. It’s commonly used for downloading files from the web.
- jq: A command-line tool for processing JSON data. It helps manipulate and analyze JSON data in shell scripts.
- lz4: A fast compression algorithm.
- screen: allows you to create multiple virtual terminals within a single terminal window or session.
Now you need to install Go, a programming language designed by Google and officially announced in November 2009.
First start by removing the possibly existing Go installation directory.
sudo rm -rf /usr/local/go
Then download the Go programming language binary distribution for Linux AMD64 architecture from go.dev, extract the contents of the downloaded tar.gz file, and install them into your /user/local directory.
curl -Ls https://go.dev/dl/go1.20.12.linux-amd64.tar.gz | sudo tar -xzf - -C /usr/local
Then update the system-wide and user-specific PATH environment variables to include directories where Go executable binaries are located.
eval $(echo 'export PATH=$PATH:/usr/local/go/bin' | sudo tee /etc/profile.d/golang.sh)
eval $(echo 'export PATH=$PATH:$HOME/go/bin' | tee -a $HOME/.profile)
Change your current directory to your home directory using and then recursively and forcibly remove the directory named “babylon” and all its contents.
cd $HOME
rm -rf babylon
Clone the babylon repository, change your current directory to “babylon” directory and then switch the current branch in your Git repository to the version tagged as “v0.7.2”.
git clone https://github.com/babylonchain/babylon.git
cd babylon
git checkout v0.7.2
Create a directory for cosmovisor (which is a powerful utility for managing the binary version of Cosmos SDK-based chains), under your home directory and move the babylond executable from the build directory to this directory. Finally, delete the build directory.
make build
mkdir -p $HOME/.babylond/cosmovisor/genesis/bin
mv build/babylond $HOME/.babylond/cosmovisor/genesis/bin/
rm -rf build
Set up cosmovisor by creating symbolic links, allowing for seamless version updates, and making the babylond command easily accessible from anywhere on the system.
sudo ln -s $HOME/.babylond/cosmovisor/genesis $HOME/.babylond/cosmovisor/current -f
sudo ln -s $HOME/.babylond/cosmovisor/current/bin/babylond /usr/local/bin/babylond -f
Since you have the Go programming language installed on your system, you can now install the 1.5.0 version of cosmovisor.
go install cosmossdk.io/tools/cosmovisor/cmd/cosmovisor@v1.5.0
Create and enable a systemd service for the Babylon node, managed by cosmovisor. The Babylon node service is then configured to start automatically under the management of systemd, using cosmovisor for automatic updates and process management.
sudo tee /etc/systemd/system/babylon.service > /dev/null << EOF
[Unit]
Description=babylon node service
After=network-online.target

[Service]
User=$USER
ExecStart=$(which cosmovisor) run start
Restart=on-failure
RestartSec=10
LimitNOFILE=65535
Environment="DAEMON_HOME=$HOME/.babylond"
Environment="DAEMON_NAME=babylond"
Environment="UNSAFE_SKIP_BACKUP=true"
Environment="PATH=/usr/local/sbin:/usr/local/bin:/usr/sbin:/usr/bin:/sbin:/bin:/usr/games:/usr/local/games:/snap/bin:$HOME/.babylond/cosmovisor/current/bin"

[Install]
WantedBy=multi-user.target
EOF
sudo systemctl daemon-reload
sudo systemctl enable babylon.service
Assign the name of your choice to your node, such as MONIKER="NodeScience"
MONIKER="YOUR_MONIKER"
Set the chain ID of your node to bbn-test-2. The chain ID is a unique identifier for a blockchain network, ensuring that nodes connect to the correct network.
babylond config chain-id bbn-test-2
Configure the keyring backend to test. The keyring backend is responsible for storing private keys securely.
babylond config keyring-backend test
Sets the address of the node daemon to tcp://localhost:16457. This tells your babylond client where to send RPC (Remote Procedure Call) requests.
babylond config node tcp://localhost:16457
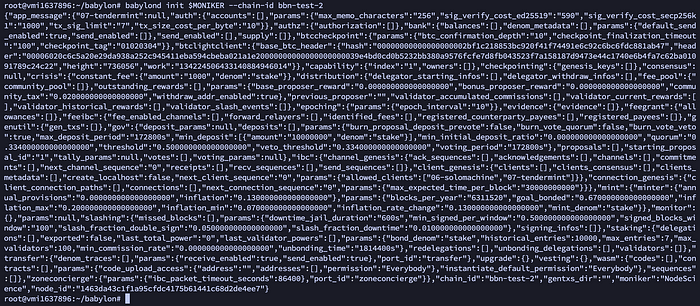
Initialize your node with the moniker specified by the MONIKER variable you set earlier and associates it with the chain ID bbn-test-2. This step sets up the basic configuration and directory structure for your node, preparing it to sync with the Babylon network specified by the chain ID.
babylond init $MONIKER --chain-id bbn-test-2
 Use curl to download the
 genesis.jsonand the addrbook.json files. The genesis.jsoncontains the initial state of the blockchain, such as the initial accounts, their balances, and other blockchain parameters while the addrbook.json file contains a list of known peers on the network. This helps your node to quickly find and connect to other peers in the network.
Then, redirect your downloaded files into your node’s configuration directory $HOME/.babylond/config.
curl -Ls https://snapshots.kjnodes.com/babylon-testnet/genesis.json > $HOME/.babylond/config/genesis.json
curl -Ls https://snapshots.kjnodes.com/babylon-testnet/addrbook.json > $HOME/.babylond/config/addrbook.json
Use sed (a stream editor for filtering and transforming text), to modify configuration settings in the config.toml and app.toml files of your Babylon node setup. Each command searches for specific lines in these configuration files and replaces them with new settings.
sed -i -e "s|^seeds *=.*|seeds = \"3f472746f46493309650e5a033076689996c8881@babylon-testnet.rpc.kjnodes.com:16459\"|" $HOME/.babylond/config/config.toml

sed -i -e "s|^minimum-gas-prices *=.*|minimum-gas-prices = \"0.00001ubbn\"|" $HOME/.babylond/config/app.toml

sed -i \
  -e 's|^pruning *=.*|pruning = "custom"|' \
  -e 's|^pruning-keep-recent *=.*|pruning-keep-recent = "100"|' \
  -e 's|^pruning-keep-every *=.*|pruning-keep-every = "0"|' \
  -e 's|^pruning-interval *=.*|pruning-interval = "19"|' \
  $HOME/.babylond/config/app.toml

sed -i -e "s%^proxy_app = \"tcp://127.0.0.1:26658\"%proxy_app = \"tcp://127.0.0.1:16458\"%; s%^laddr = \"tcp://127.0.0.1:26657\"%laddr = \"tcp://127.0.0.1:16457\"%; s%^pprof_laddr = \"localhost:6060\"%pprof_laddr = \"localhost:16460\"%; s%^laddr = \"tcp://0.0.0.0:26656\"%laddr = \"tcp://0.0.0.0:16456\"%; s%^prometheus_listen_addr = \":26660\"%prometheus_listen_addr = \":16466\"%" $HOME/.babylond/config/config.toml
sed -i -e "s%^address = \"tcp://localhost:1317\"%address = \"tcp://0.0.0.0:16417\"%; s%^address = \":8080\"%address = \":16480\"%; s%^address = \"localhost:9090\"%address = \"0.0.0.0:16490\"%; s%^address = \"localhost:9091\"%address = \"0.0.0.0:16491\"%; s%:8545%:16445%; s%:8546%:16446%; s%:6065%:16465%" $HOME/.babylond/config/app.toml
seedare nodes in the network that your node can connect to for initial synchronization and peer discovery.minimum-gas-pricessets the gas prices used to calculate transaction fees and incentivizes validators to include transactions in a block.pruninghelps manage disk space by removing old state data. These settings specify a custom pruning strategy, keeping the most recent 100 states, not keeping any states permanently (0), and pruning every 19th state.proxy-appupdates various network-related settings such as the addresses and ports for different services. This might be necessary to avoid port conflicts or to adhere to specific network policies.addressupdates the addresses and ports for various APIs.
Use curl to download the latest compressed snapshot of the Babylon testnet blockchain in the correct directory for your Babylon node and wait until it reaches 100%.
curl -L https://snapshots.kjnodes.com/babylon-testnet/snapshot_latest.tar.lz4 | tar -Ilz4 -xf - -C $HOME/.babylond
[[ -f $HOME/.babylond/data/upgrade-info.json ]] && cp $HOME/.babylond/data/upgrade-info.json $HOME/.babylond/cosmovisor/genesis/upgrade-info.json
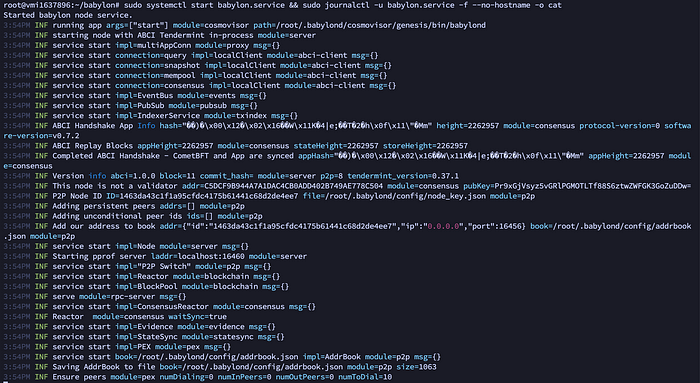
 Start your Babylon node and immediately display its logs with
 journalctl, allowing you to monitor the node’s activity and troubleshoot any issues that arise during startup or operation in real time.
sudo systemctl start babylon.service && sudo journalctl -u babylon.service -f --no-hostname -o cat
 You can exit logs by typing CTRL+C.
Now you need to setup your validator.
Start by creating a new wallet called “wallet” and do not forget to write these informations (address, pubkey, mnemonic phrase) in a safe place !
babylond keys add wallet
Go to Babylon Discord by clicking here, go to Faucet Channel and claim test tokens by typing faucet <adresse>. There is currently a lot of demand, so it may take some time before you receive them and you must have them for the next stage.
You can check your balance with this command:
babylond q bank balances $(babylond keys show wallet -a)
Then generate your BLS (Boneh-Lynn-Shacham) key associated with your previously created wallet.
babylond create-bls-key $(babylond keys show wallet -a)
And finally, restart your node to apply new configurations/updates.
sudo systemctl restart babylon.service
Apply new changes in app.toml and config.toml files.
sed -i -e "s|^key-name *=.*|key-name = \"wallet\"|" $HOME/.babylond/config/app.toml
sed -i -e "s|^timeout_commit *=.*|timeout_commit = \"10s\"|" $HOME/.babylond/config/config.toml
key-name: name of your wallet previously defined.timeout_commit: sets the maximum time before a block is “committed”, so it means that your node will wait up to 10 seconds for commits from other validators before finalizing a block.
Now it’s time to create your validator, but before, ensure that network synchronization is complete.
babylond status | jq .SyncInfo
You have to wait until the variable catching_up is “false”.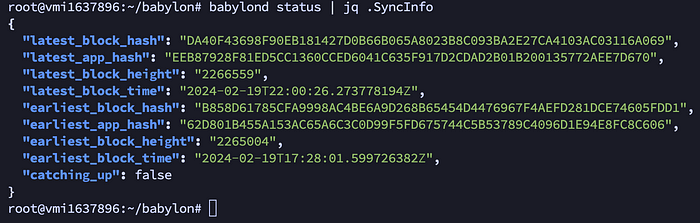 You can then create your validator by replacing everything in capital letters with your own details.
babylond tx checkpointing create-validator \
--amount 1000000ubbn \
--pubkey $(babylond tendermint show-validator) \
--moniker "YOUR_MONIKER_NAME" \
--identity "YOUR_KEYBASE_ID" \
--details "YOUR_DETAILS" \
--website "YOUR_WEBSITE_URL" \
--chain-id bbn-test-2 \
--commission-rate 0.05 \
--commission-max-rate 0.20 \
--commission-max-change-rate 0.01 \
--min-self-delegation 1 \
--from wallet \
--gas-adjustment 1.4 \
--gas auto \
--gas-prices 0.00001ubbn \
-y
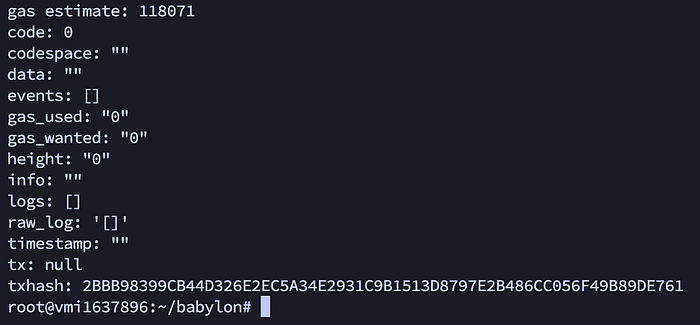 Congratulations, you’ve successfully become a validator on the Babylon network! You can past your txhash on explorers to ensure your transaction is a success.
As usual, you can attach to a screen session with:
screen -S babylon
and follow your real-time logs with this command.
sudo journalctl -u babylon.service -f --no-hostname -o cat
Simply press CTRL+A+D to detach from the screen session; your node will keep running. And if you to reattach to the existing screen session, just type screen -r babylon.
by:
https://nodescience.medium.com/node-run-your-babylon-node-ba8e24b4737b