Run a NuLink Node (Reward Confirmed)

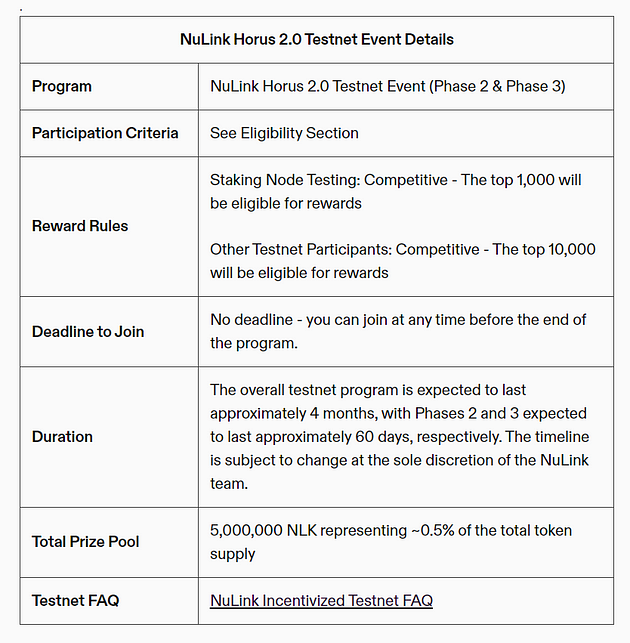
Participate and earn $NLK for Staking Node Testing and Other Testnet competitions rewards (5,000,000$NLK)
Program Overview:
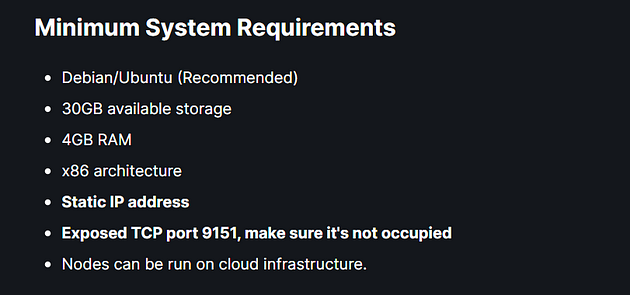
Minimum Node Requirements
Order & Configure your VPS
You can establish your node by either configuring it on a personal computer or by utilizing a Virtual Private Server (VPS), which is well-suited for managing websites, applications, or other internet-based services, including nodes.
For my setup, I selected Contabo, a well-regarded provider of VPS rentals. Opting for a plan with at least 100 GB of storage is advisable to ensure sufficient space for long-term node operation.
My suggestion would be to go for the Cloud VPS S or higher option. https://contabo.com/en/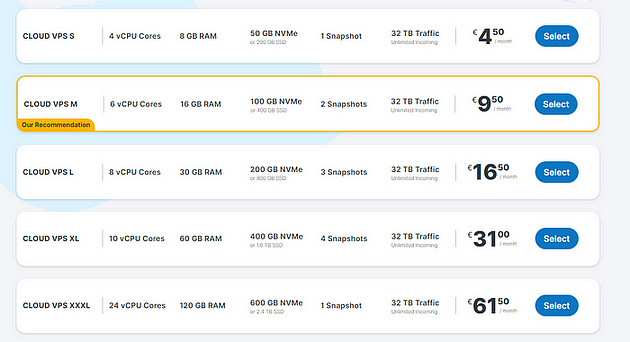 Choose Cloud VPS S or Higher
- Select Payment Term
- Region — Germany
- Storage Type -400 GB SSD
- Image — Go to Apps & Panels > Docker
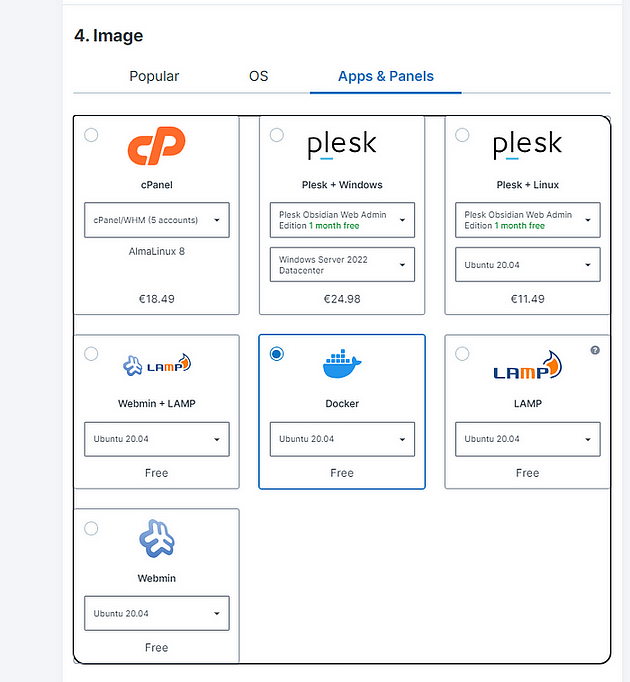 Apps & Panels > Docker
5. Log in & Set a Password for your Server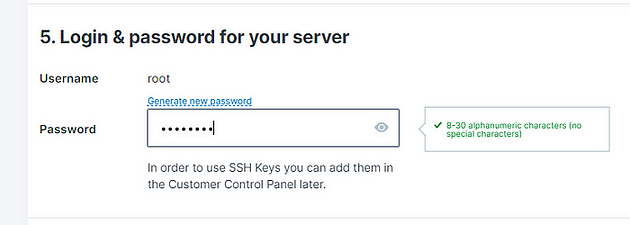 Set a password
6. Object Storage — Default
7. Networking — Default
8. Add-Ons — Default
After finalizing your payment, you’ll get an email verifying your purchase. Hold tight for a follow-up email, which will provide details about your VPS, encompassing your access credentials.
You’ll need to download and use Putty, a tool that enables you to securely connect to your VPS and utilize its functionalities. Download it here https://www.putty.org/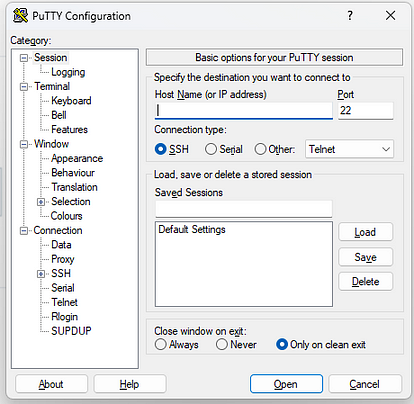 Enter IP ADDRESS
Enter the VPS IP Address then Click OPEN
Login : root
Password: (Enter your chosen password)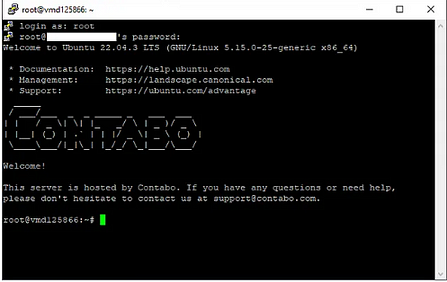 Log in using the password you set earlier.
Before you Proceed, you can check the official documentation here.
Preparations
- Install essential components
sudo apt update && sudo apt upgrade -y
2. Install Essential Codes
sudo apt install pkg-config curl git-all build-essential libssl-dev libclang-dev ufw
3. Check if Docker is up-to-date / Docker Installation
docker --version
If docker is not installed, run the following command:
sudo apt-get install ca-certificates curl gnupg lsb-release
Now add Docker’s official GPG key:
sudo mkdir -p /etc/apt/keyrings
curl -fsSL https://download.docker.com/linux/ubuntu/gpg | sudo gpg --dearmor -o /etc/apt/keyrings/docker.gpg
proceed… We Are to set up Repository: (just copy and paste)
echo \
  "deb [arch=$(dpkg --print-architecture) signed-by=/etc/apt/keyrings/docker.gpg] https://download.docker.com/linux/ubuntu \
  $(lsb_release -cs) stable" | sudo tee /etc/apt/sources.list.d/docker.list > /dev/null
Let’s grant Docker file permission just in case, before updating the package index
sudo chmod a+r /etc/apt/keyrings/docker.gpg
sudo apt-get update
after granting, updated index, Install latest version of docker
sudo apt-get install docker-ce docker-ce-cli containerd.io docker-compose-plugin
Now install Docker compose :
sudo apt install docker-compose
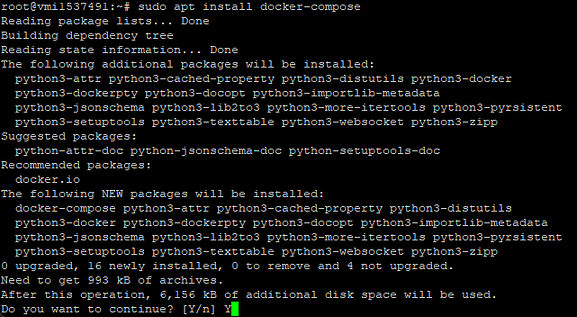 Press Y then ENTER
Lets verify the ENGINE INSTALLATION is successful by running the hello-world
sudo docker run hello-world
You should get this.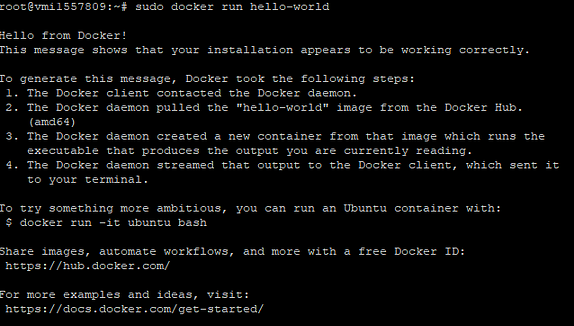 Now check Docker compose version :
docker-compose -v
4. Allow Ports
sudo apt install ufw
sudo ufw allow 9151
sudo ufw allow ssh
sudo ufw enable
5. Install Geth
Download Geth
wget https://gethstore.blob.core.windows.net/builds/geth-linux-amd64-1.13.8-b20b4a71.tar.gz
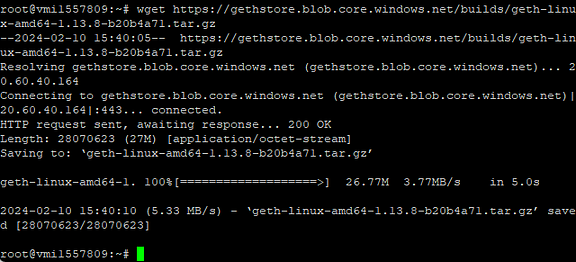 Extract Files
tar -xvzf geth-linux-amd64-1.13.8-b20b4a71.tar.gz
 Navigate to Geth folder
cd geth-linux-amd64-1.13.8-b20b4a71
Generate Ethereum Account and Keystore
./geth account new --keystore ./keystore
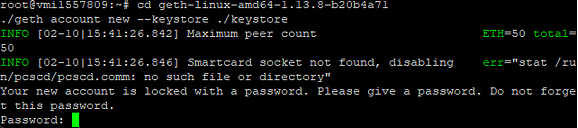 Enter a password and save it. Make sure to remember this password for later use.
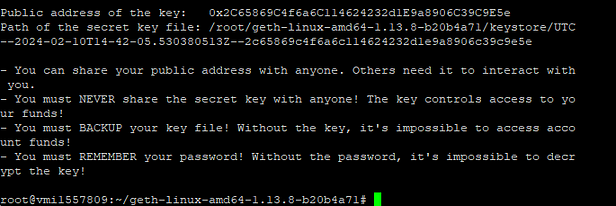 This will generate a public address. ( ex. 0x2C65869C4f6a6C114624232d1E9a8906C39C9E5e)
The wallet address generated will be your Worker Address. Make sure to send a small amount of tBNB to your worker address.
Node Installation
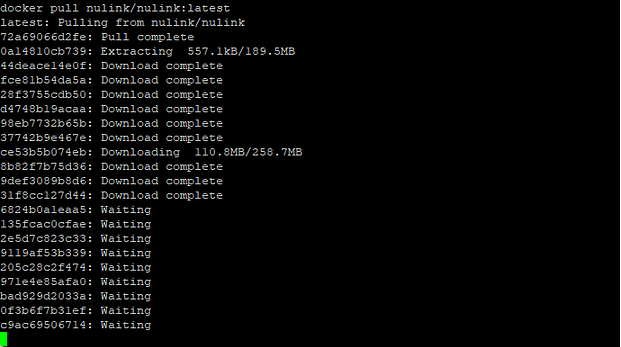
- Nulink Install
cd
docker pull nulink/nulink:latest
 2. Create Nulink Folder
cd /root
mkdir nulink
 3. Copy the keystore file of the Worker account to the host directory selected in step 3. The private file generated by NuLink Worker will also be stored in this directory.
cp /root/geth-linux-amd64-1.13.8-b20b4a71/keystore/* /root/nulink
example: Change the * in the command line to your UTC-xxxxx — xxxx
cp /root/geth-linux-amd64-1.13.8-b20b4a71/keystore/UTC--2024-02-10T14-42-05.530380513Z--2c65869c4f6a6c114624232d1e9a8906c39c9e5e /root/nulink
4. Grant permission
chmod -R 777 /root/nulink
 5. Node Configuration
Export Node Environment Variables
export NULINK_KEYSTORE_PASSWORD=<YOUR NULINK STORAGE PASSWORD>
export NULINK_OPERATOR_ETH_PASSWORD=<YOUR WORKER ACCOUNT PASSWORD>
It’s important to remember this password for future access.
6. Inititate Node
docker run -it --rm \
-p 9151:9151 \
-v /root/nulink:/code \
-v /root/nulink:/home/circleci/.local/share/nulink \
-e NULINK_KEYSTORE_PASSWORD \
nulink/nulink nulink ursula init \
--signer keystore:///code/<UTC--2024-xxxxxx> \
--eth-provider https://data-seed-prebsc-2-s2.binance.org:8545 \
--network horus \
--payment-provider https://data-seed-prebsc-2-s2.binance.org:8545 \
--payment-network bsc_testnet \
--operator-address <WALLET> \
--max-gas-price 10000000000
example: edit keystore and operator address
docker run -it --rm \
-p 9151:9151 \
-v /root/nulink:/code \
-v /root/nulink:/home/circleci/.local/share/nulink \
-e NULINK_KEYSTORE_PASSWORD \
nulink/nulink nulink ursula init \
--signer keystore:///code/UTC--2024-02-10T14-42-05.530380513Z--2c65869c4f6a6c114624232d1e9a8906c39c9e5e \
--eth-provider https://data-seed-prebsc-2-s2.binance.org:8545 \
--network horus \
--payment-provider https://data-seed-prebsc-2-s2.binance.org:8545 \
--payment-network bsc_testnet \
--operator-address 0xxxxxxx \
--max-gas-price 10000000000
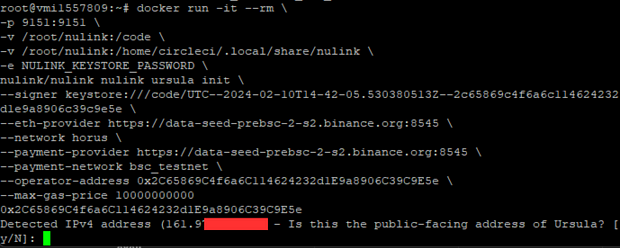 Press Y to confirm this will generate seed (save this and you will need to confirm the seed phrase later on)
 Back up seed before proceeding, it will ask you to reenter your seed.
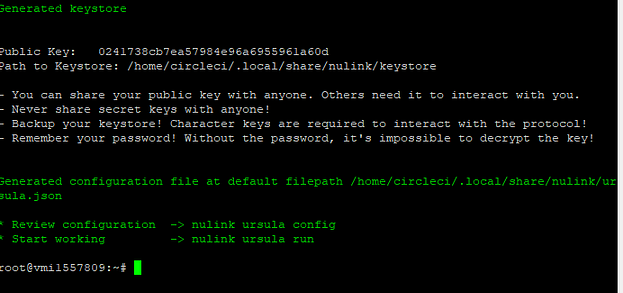 7. Launch Nulink Node
docker run --restart on-failure -d \
--name ursula \
-p 9151:9151 \
-v /root/nulink:/code \
-v /root/nulink:/home/circleci/.local/share/nulink \
-e NULINK_KEYSTORE_PASSWORD \
-e NULINK_OPERATOR_ETH_PASSWORD \
nulink/nulink nulink ursula run --no-block-until-ready
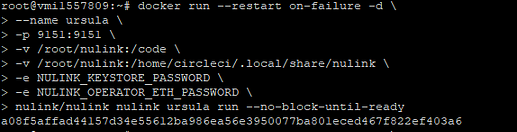 Check Node Status for Worker Account.
docker logs -f ursula
Congrats! You have now your Nulink Node Running.
STAKING PROCESS STEPS:
After creating a worker account, please see the following guide for staking
1- Go to NuLink Dashboard. You will be greeted with a network warning. Log in to the platform with your Metamask address.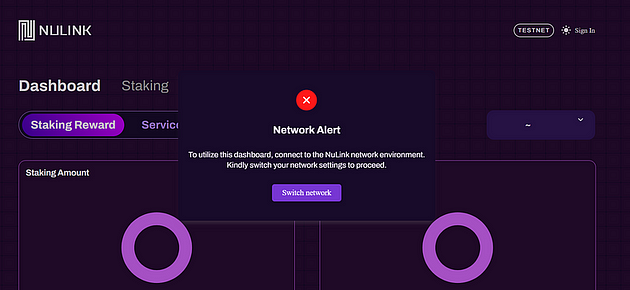 2- You will be prompted to add the BNB Smart Chain Testnet network to your metamask and once you agree, the BNB Smart Chain Testnet network will be automatically added to your metamask. This warning will not appear if you have already added the BNB Smart Chain Testnet network to your metamask.
 3- Click on the wallet icon on the top right and claim the test tokens. First claim the Tbnb token, second claim the Nlk token. If you encounter a problem when requesting test tokens then try other browsers
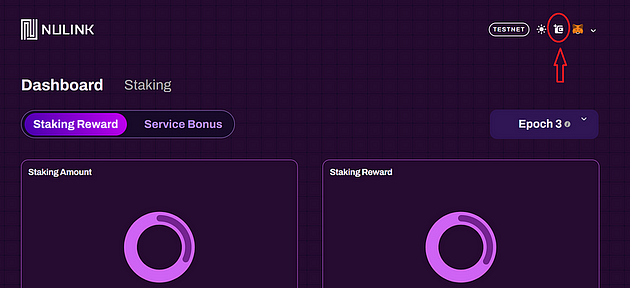 4- After requesting the test tokens, enter the Staking section and click Approve in My Balance
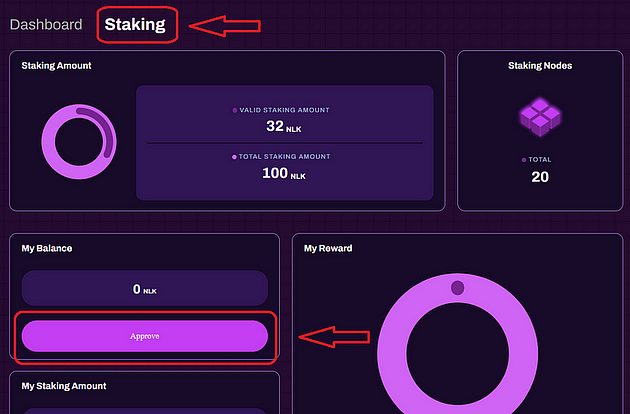 5- After Approve, the button for staking will be active and you can do the staking.
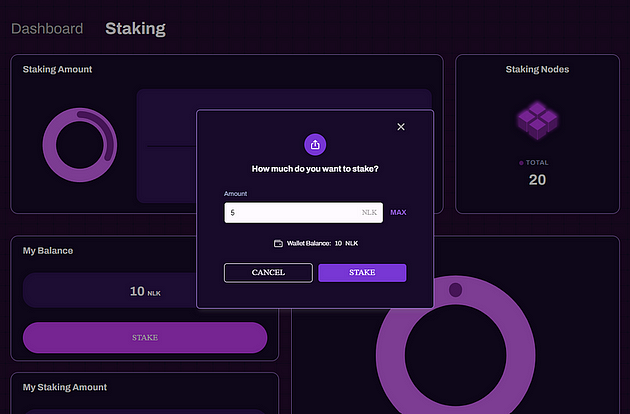 6- Go to the Node Information section below and click on the Bond worker button. Paste your worker address here and click on the Bond button.
 7- Lastly, If you have a smooth node installation and staking process, you will soon have an image like below.
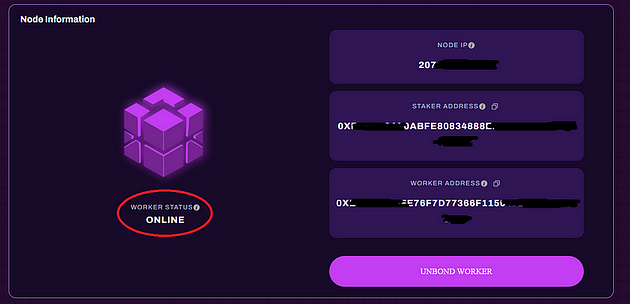 Make sure to fill up this form to participate in the NuLink Staking Nodes Competition.