How to Join DOP Testnet?

1. To commence, visit DOP's website and select the Testnet option at the apex of the homepage.
2. Mark the checkbox indicating comprehension of the terms and conditions, then proceed by clicking "Continue."
3. On the ensuing screen, opt for "Create Wallet" if you do not possess a DOP wallet. For existing wallets, consult "Import your Existing Wallet" below.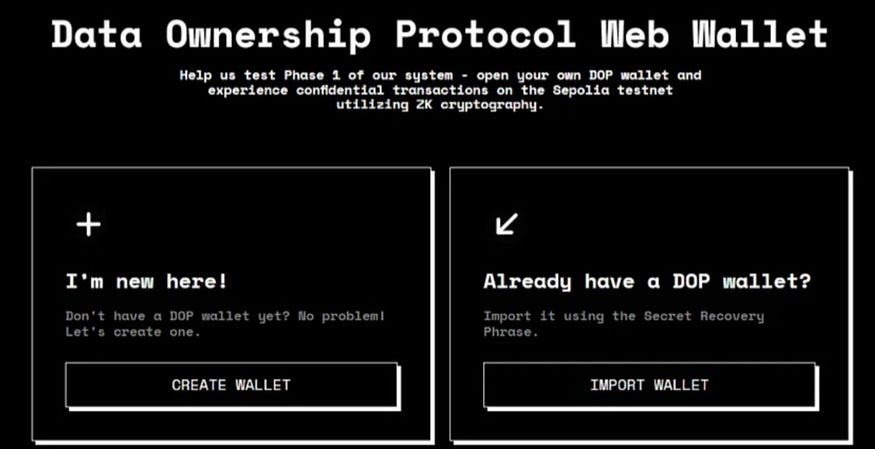
Establishing a new DOP wallet
Follow these steps to create a new DOP wallet, enabling encryption, sending/receiving, and decrypting crypto assets on the Testnet:
1. On the "Create Wallet" screen, input a new password and confirm it in the designated field. Subsequently, click "Submit."
2. Your Secret Recovery Phrase becomes visible. Click "Copy Phrase" at the bottom to store it securely. Ensure accessibility, as you will need to input the words in the correct sequence on the subsequent screen.
3. Click "Verify."
4. On the "Verify your Secret Phrase" screen, select the words of your secret phrase in the accurate order. Upon completion, click "OK, I'm done."
5. On the "Congratulations!" screen, click "Continue."
6. Your secret key materializes. Click the Copy icon to replicate it and store it securely.
7. Then, click "Done."
8. The "Unlock your Wallet" screen surfaces. Input your password in the Password field and click "Unlock" at the bottom to access your DOP wallet.
9. On the welcome screen, click "Start."
10. On the "Connect Wallet" screen, choose Metamask to link your external wallet. Confirm the connection on your external wallet.
11. The DOP Testing dashboard materializes. Further insights into the dashboard and the diverse actions and transactions you can execute are detailed below.
Overview of the Testing Dashboard
This serves as the central screen within the testing environment. The upper section displays your progress as you navigate the steps to fulfill the testing assignments.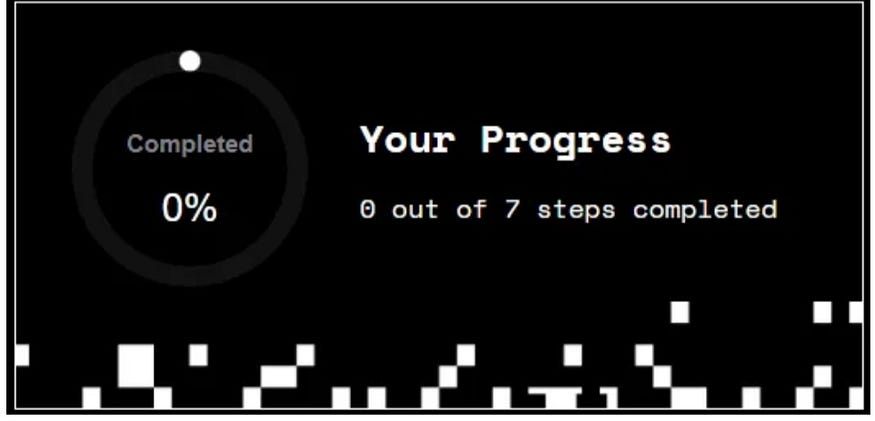 A total of 7 steps must be accomplished to qualify for DOP rewards.
These steps are enumerated beneath the progress section. Upon completing each step, its status transforms to "Completed," unlocking the subsequent step.
The left-side menu bar incorporates all available functions on the Testnet.
Click on any menu item to expand and reveal the functions.
Access "Your Testing Progress" at any time by clicking to return to the testing dashboard.
Fulfilling the assignments
Step 1: Follow Us on X (formerly Twitter) Commence by following DOP on Twitter. Click "Follow DOP." Adhere to any onscreen instructions to connect your Twitter account and follow DOP.
Step 2, obtain 0.05 tokens of SepoliaETH.
Step 4, acquire Testnet versions of 10 crypto assets, 10,000 tokens each, intended for testing purposes only.
In Steps 3 and 4, consider adding the token contracts to Metamask for visibility. Click on the Metamask fox icon.
Additionally, manually add individual contracts by choosing the desired token from the dropdown list and clicking "Copy." Upon completing these three steps, your screen should resemble the following: Now, proceed to the intriguing part, unveiling the basic functions facilitated by DOP.
- Click "Get Started" to initiate the encryption process.
- On the "Encrypt" screen, the DOP Address field is pre-filled with your DOP wallet address. If you possess multiple DOP accounts, use the dropdown to select the desired account.
- Click within the "Select Token" field to reveal available assets.
- Choose the currency for encryption. Utilize the search bar for efficient selection
- Specify the amount for encryption in the "Amount" field and click "Encrypt" at the bottom.
- Confirm the transaction on the "Transaction Summary" screen.
- Confirm the transaction in Metamask.
- Upon successful completion, a notification confirms the successful encryption of assets.
- To observe the transaction on the Sepolia blockchain, click "View in Explorer."
- Conclude by clicking "Close." A popup acknowledges the successful task completion. Click "OKAY" to dismiss. The assets from Step 5 are now encrypted. To view encrypted assets, click "Encrypted Tokens" under "Account" in the upper left menu.
Step 6, Send Assets by clicking "Get Started" to access the "Send" screen. Follow the subsequent steps to send encrypted assets to another DOP wallet.
- Use the dropdown or manually enter the address in the "DOP Account" field.
- Within the "Select encrypted token" field, opt for the previously encrypted token.
- Enter the desired amount for sending.
- Click "Send" to initiate the transfer.
- Confirm the transaction in the "Transaction Summary" pane.
- Confirm the transaction in your Metamask wallet.
- The transaction concludes within a few seconds. Upon completion, dismiss the displayed popups to proceed to the next step.
Step 7, Decrypt Assets by clicking on "Get Started" under the "Decrypt Assets" step.
- The "External Account" field is pre-filled with your connected wallet address.
- Click within the "Select Encrypted Tokens" field to reveal available encrypted assets. Note: If you sent all encrypted tokens in Step 6 — Send Assets, encrypt more to complete this step. Navigate to "Transaction > Decrypt" in the left navigation menu and follow the steps in Step 5 — Encrypt Assets.
- Select the desired asset for decryption.
- Specify the amount in the "Amount" field.
- Enter your Wallet Password.
- Click "Decrypt."
- Confirm the transaction on the "Transaction Summary" screen.
- Confirm the transaction in Metamask.
- Upon completion, a notification verifies the successful decryption. Click "View in Explorer" to observe the transaction on Etherscan. The decrypted tokens are now visible on the blockchain and can be transferred outside of DOP.
- Click "Close."

Final Step
A popup announces the successful completion of the DOP Testnet.
Click "Done."