Run an EigenLayer Operator (Testnet-Node)

You have the opportunity to engage with EigenLayer’s testnet in several capacities, including as a restaker, operator, or AVS Node Operator.
“Enhancing Ethereum’s Cryptoeconomic Security with EigenLayer’s Restaking Innovation”
EigenLayer is a protocol built on Ethereum that introduces restaking, a new primitive in cryptoeconomic security. This primitive enables the rehypothetication of $ETH on the consensus layer. Users that stake $ETH can opt-in to EigenLayer smart contracts to restake their $ETH and extend cryptoeconomic security to additional applications on the network. Part of EigenLayer’s potential lies in its ability to aggregate and extend cryptoeconomic security through restaking and to validate new applications being built on top of Ethereum.
Order & Configure your VPS
You can establish your node by either configuring it on a personal computer or by utilizing a Virtual Private Server (VPS), which is well-suited for managing websites, applications, or other internet-based services, including nodes.
For my setup, I selected Contabo, a well-regarded provider of VPS rentals. Opting for a plan with at least 100 GB of storage is advisable to ensure sufficient space for long-term node operation.
My suggestion would be to go for the Cloud VPS M or higher option. https://contabo.com/en/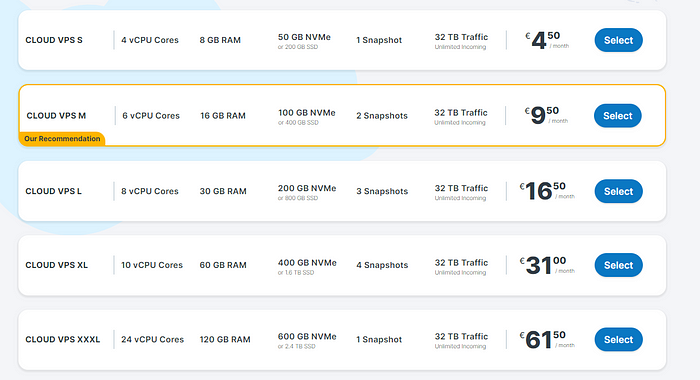 Choose Cloud VPS M or Higher
- Select Payment Term
- Region — Germany
- Storage Type -400 GB SSD
- Image — Go to Apps & Panels > Docker
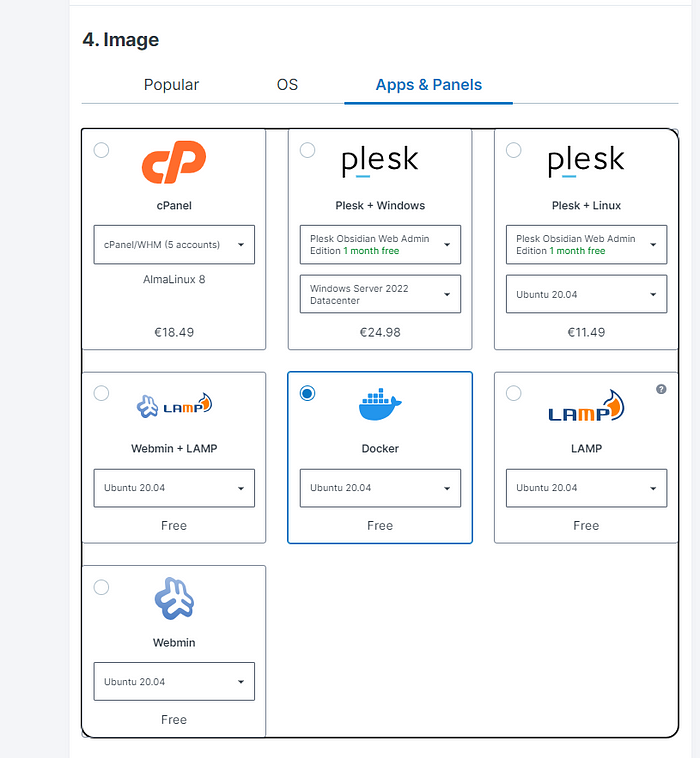 Apps & Panels > Docker
5. Log in & Set a Password for your Server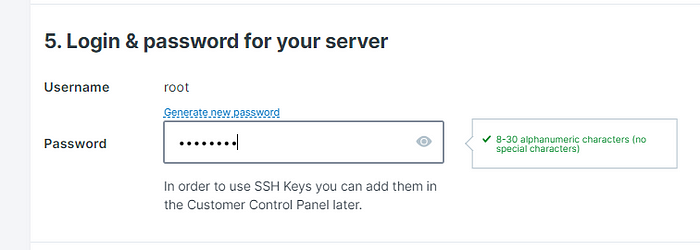 Set a password
6. Object Storage — Default
7. Networking — Default
8. Add-Ons — Default
After finalizing your payment, you’ll get an email verifying your purchase. Hold tight for a follow-up email, which will provide details about your VPS, encompassing your access credentials.
You’ll need to download and use Putty, a tool that enables you to securely connect to your VPS and utilize its functionalities. Download it here https://www.putty.org/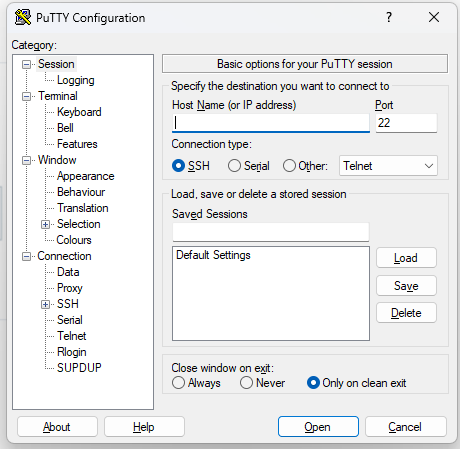 Enter IP ADDRESS
Enter the VPS IP Address then Click OPEN
Login : root
Password: (Enter your chosen password)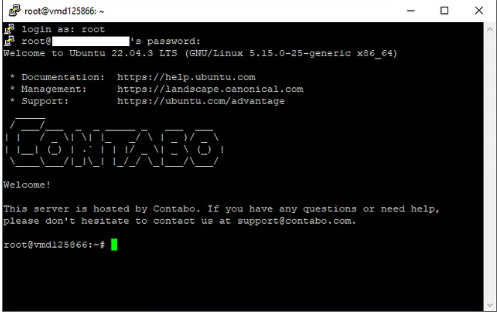 Log in using the password you set earlier.
Before Proceeding, you can check the official documentation here.
Preparations
- Install essential components
sudo apt update && sudo apt upgrade -y
2. Install Essential Codes
sudo apt install pkg-config curl git-all build-essential libssl-dev libclang-dev ufw
reply Y then proceed 3. Check if Docker is up-to-date / Docker Installation
docker version
If docker is not installed, run the following command:
sudo apt-get install ca-certificates curl gnupg lsb-release
Now add Docker’s official GPG key:
sudo mkdir -p /etc/apt/keyrings
curl -fsSL https://download.docker.com/linux/ubuntu/gpg | sudo gpg --dearmor -o /etc/apt/keyrings/docker.gpg
proceed… We Are to set up Repository: (just copy and paste)
echo \
  "deb [arch=$(dpkg --print-architecture) signed-by=/etc/apt/keyrings/docker.gpg] https://download.docker.com/linux/ubuntu \
  $(lsb_release -cs) stable" | sudo tee /etc/apt/sources.list.d/docker.list > /dev/null
Let’s grant Docker file permission just in case, before updating the package index
sudo chmod a+r /etc/apt/keyrings/docker.gpg
sudo apt-get update
after granting, updated index, Install latest version of docker
sudo apt-get install docker-ce docker-ce-cli containerd.io docker-compose-plugin
Now install Docker compose :
sudo apt install docker-compose
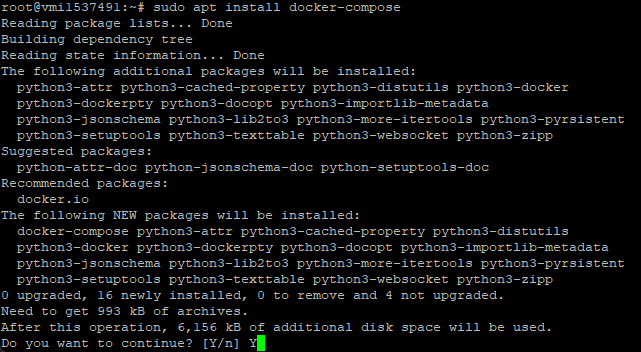 Press Y then ENTER
Lets verify the ENGINE INSTALLATION is successful by running the hello-world
sudo docker run hello-world
You should get this.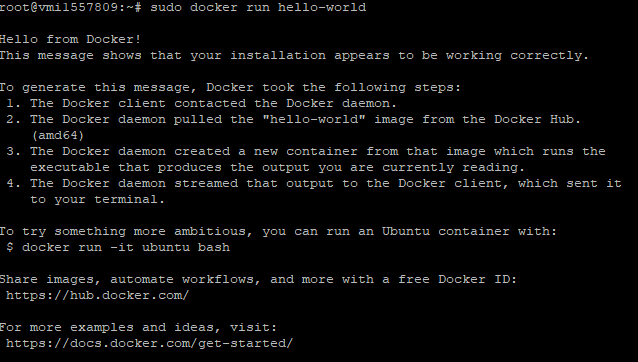 Now check Docker compose version :
docker-compose -v

Part 1: Node Installation
1. Let’s Install SCREEN
sudo apt install screen
Create new screen session
sudo screen -S Eigenlayer
2. GO LANGUAGE INSTALLATION
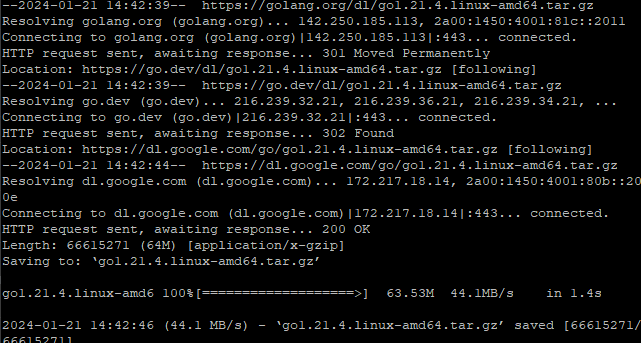
a. Install
wget https://golang.org/dl/go1.21.4.linux-amd64.tar.gz
 b. Extract folder
tar -C /usr/local -xzf go1.21.4.linux-amd64.tar.gz
 c. Add Go to your Environment
export PATH=$PATH:/usr/local/go/bin
 d. Verify Go bin installation
go version

3. Install CLI from Source
a. Install github eigenlayer
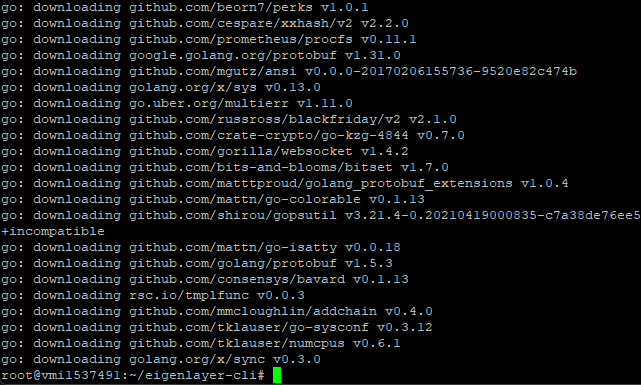
git clone https://github.com/Layr-Labs/eigenlayer-cli.git
cd eigenlayer-cli
mkdir -p build
go build -o build/eigenlayer cmd/eigenlayer/main.go
 b. Copy file into the system
cp ./build/eigenlayer /usr/local/bin/
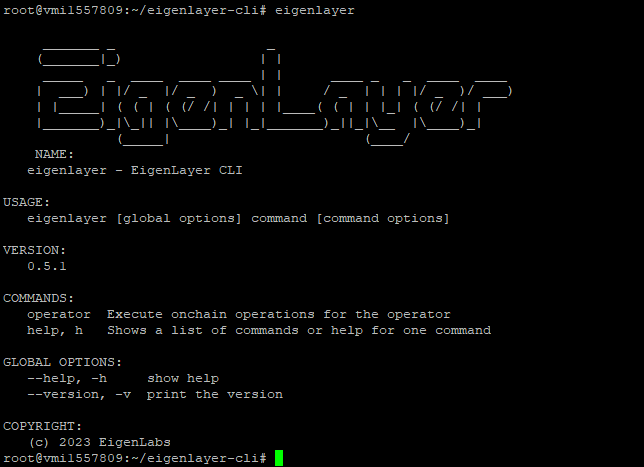
 c. Verify if Eigen is properly installed
eigenlayer
4. Create and List Keys
a. Create Keys
eigenlayer operator keys create --key-type ecdsa [keyname]
eigenlayer operator keys create --key-type bls [keyname]
example:
eigenlayer operator keys create --key-type ecdsa EkkoNodes
eigenlayer operator keys create --key-type bls EkkoNodes
[keyname] — This will be the name of the created key file
This will prompt a password which you can use to encrypt the keys. Keys will be stored in a local disk and will be shown once keys are created. It will also show the private key only once, so that you can back it up in case you lose the password or key file. Make sure to Backup your keys. You can only see this once.
b. View Keys
eigenlayer operator keys list
5. Operator Registration
a. Metadata URL Configuration
- Create a Github Account
- Create a repository
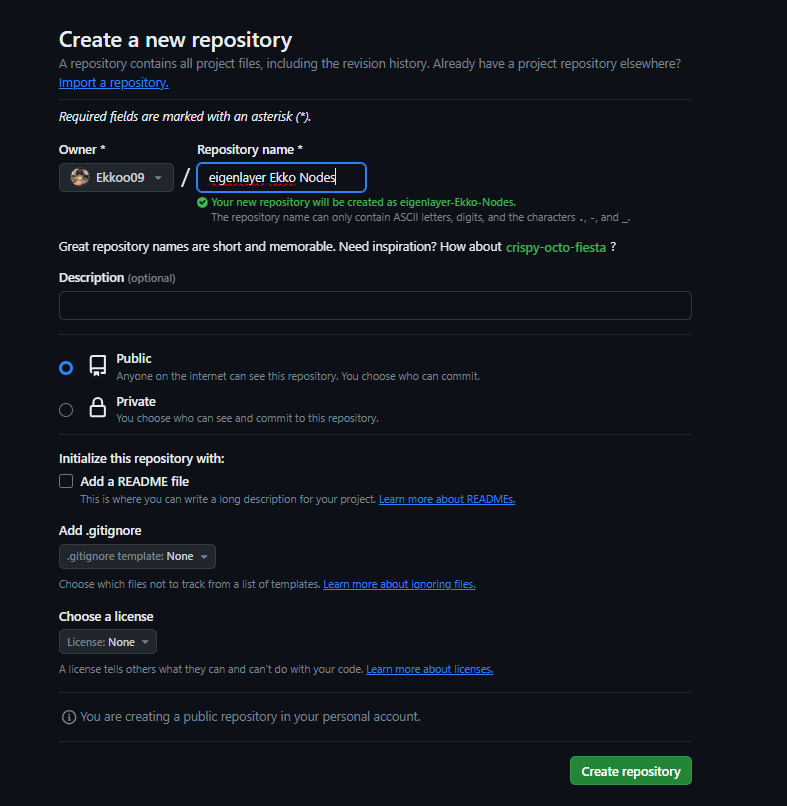
- Create a new file
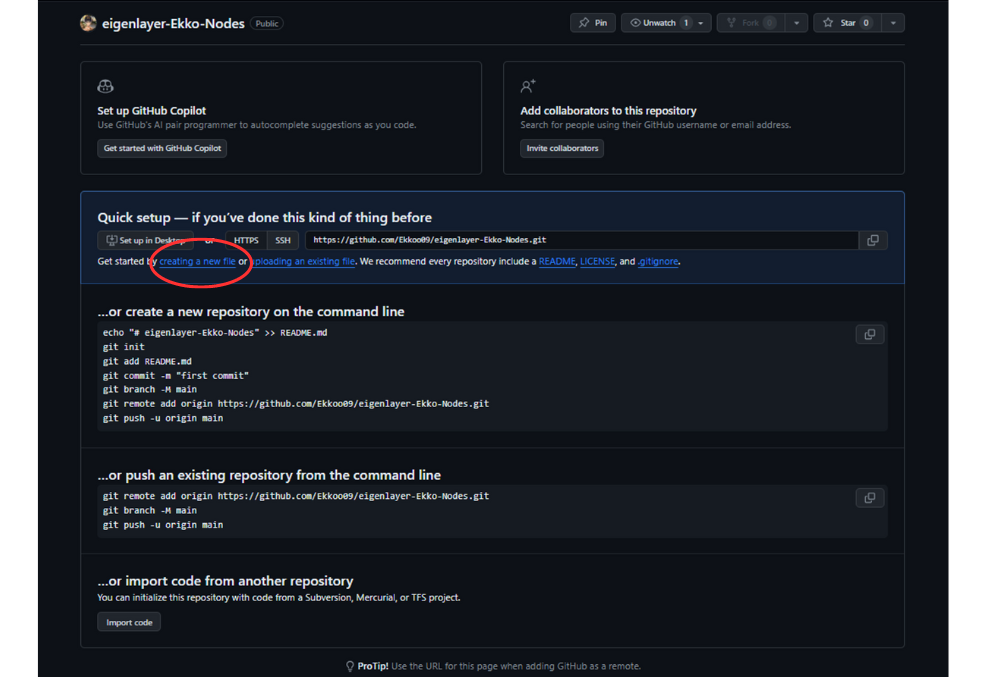
- Name the file “metadata.json” Paste and edit this
{
  "name": "<OPERATOR_NAME>",
  "website": "<YOUR_WEBSITE>",
  "description": "<DESCRIPTION>",
  "logo": "https://www.example.com/logo.png",
  "twitter": "<YOUR_TWITTER>"
}- After completing your file, click on “Raw,” to get the link and paste the it into your ‘operator.yaml’ file.
 ex: https://raw.githubusercontent.com/Ekkoo09/eigenlayer-Ekko-Nodes/main/metadata.json ‘do not use’
b. Navigate to the config/ folder :
cd pkg/operator/config
c. Create the ‘operator.yaml’ folder :
touch operator.yaml
d. Edit the config file
nano operator.yaml
you will see a blank file;
You need to edit these first before pasting:
address: <ADDRESS_OF_YOUR_WALLET>
earnings_receiver_address: <ADDRESS_OF_YOUR_WALLET>
metadata_url: <METADATA_FILE_RAW>
eth_rpc_url: <API_ALCHEMY> (you can use any rpc provider)
private_key_store_path: /root/.eigenlayer/operator_keys/<NAME_KEY>.ecdsa.key.json
bls_private_key_store_path: /root/.eigenlayer/operator_keys/<NAME_KEY>.bls.key.json
# All the below fields are required for successful operator registration.

operator:
  # This is the standard Ethereum address format (ex: 0x6a8c0D554a694899041E52a91B4EC3Ff23d8aBD5) of your operator
  # which is the ecdsa key you created or imported using EigenLayer CLI
  address: <ADDRESS_OF_YOUR_WALLET>
  # This is the standard Ethereum address format (ex: 0x6a8c0D554a694899041E52a91B4EC3Ff23d8aBD5)
  # This is the address where your operator will receive earnings. This could be same as operator address
  earnings_receiver_address: <ADDRESS_OF_YOUR_WALLET>
  # This is the standard Ethereum address format (0x...)
  # This is the address which operator will use to approve delegation requests from stakers.
  # if set, this address must sign and approve new delegation from Stakers to this Operator
  # This is optional, so you can leave it  with the default value for un-gated delegation requests
  delegation_approver_address: 0x0000000000000000000000000000000000000000
  # Please keep this field to 0, and it can be updated later using EigenLayer CLI
  staker_opt_out_window_blocks: 0
  metadata_url: <METADATA_FILE_RAW>

# EigenLayer Slasher contract address
# This will be provided by EigenLayer team
el_slasher_address: 0xD11d60b669Ecf7bE10329726043B3ac07B380C22

# Address of BLS Public Key Compendium contract
# This will be provided by EigenLayer team
bls_public_key_compendium_address: 0xc81d3963087Fe09316cd1E032457989C7aC91b19

# ETH RPC URL to the ethereum node you are using for on-chain operations
eth_rpc_url: <API_ALCHEMY>

# Signer Type to use
# Supported values: local_keystore
signer_type: local_keystore

# Full path to local ecdsa private key store file
private_key_store_path: /root/.eigenlayer/operator_keys/<NAME_KEY>.ecdsa.key.json

# Full path to local bls private key store file
bls_private_key_store_path: /root/.eigenlayer/operator_keys/<NAME_KEY>.bls.key.json

# Chain ID: 1 for mainnet, 5 for Goerli, 31337 for local
chain_id: 5
see mine for reference: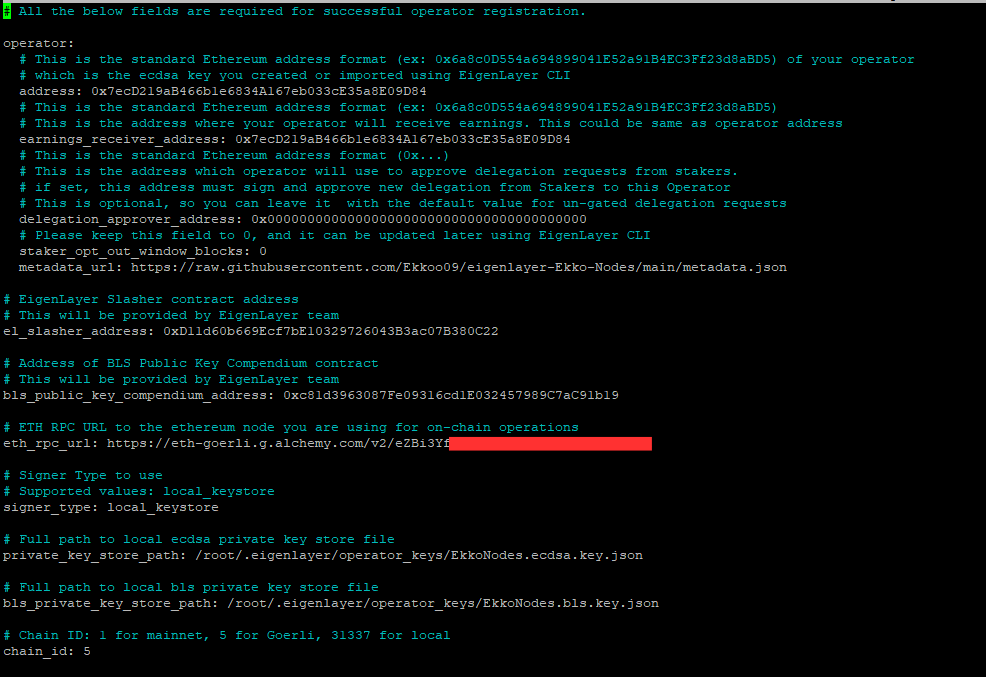 Exit and Save: Press CTRL+X, then Y, and ENTER.
e. Operator Registration
Before proceeding, make sure your wallet has enough gETH to register.
eigenlayer operator register operator.yaml
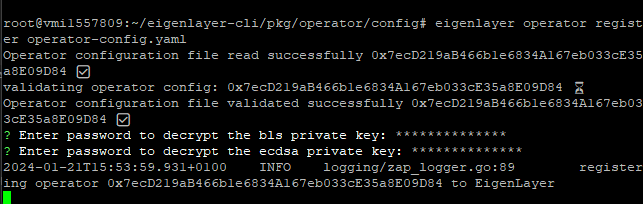 Enter Password
f. Verify Operator status
eigenlayer operator status operator.yaml
or you can view it on the website here (will appear after a few mins)
Part 2: EigenLayer AVS Operator
Now that your operator is registered on Eigenlayer, you can launch the Eigenlayer node.
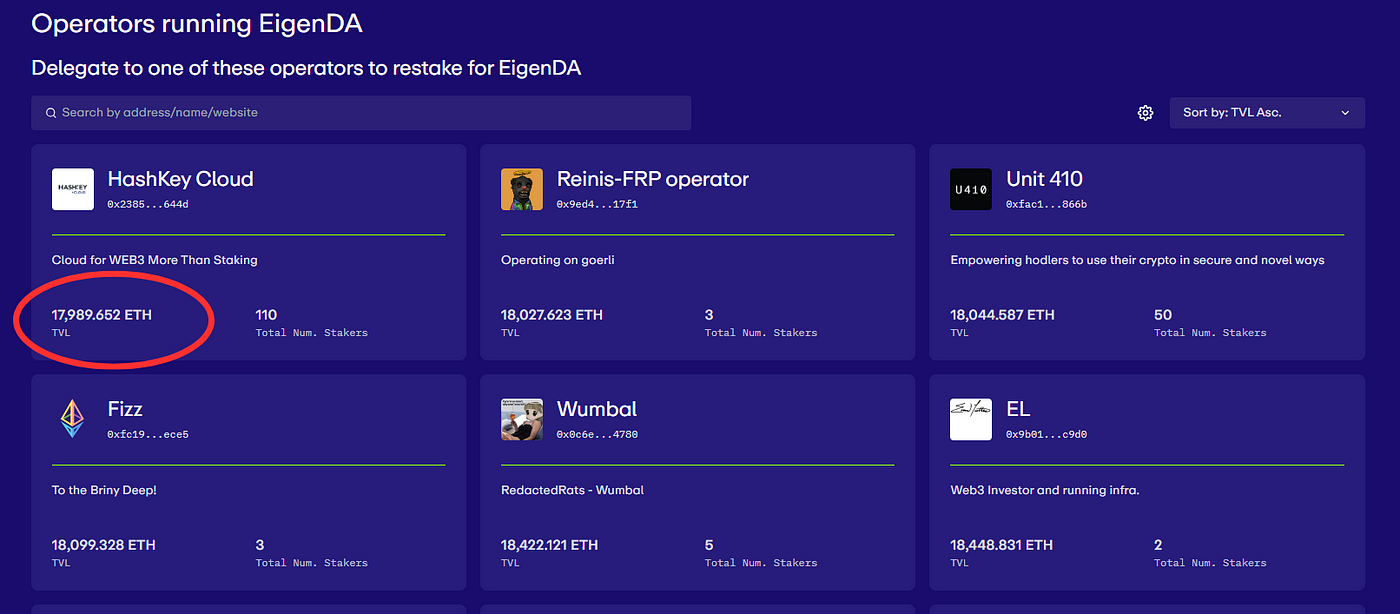
You will need to have 32 gETH and enough restaked gETH on your operator to rank among the top 200 validator nodes.
WARNING: As of this writing you will need at least 18,000 gEth restaked to your operator to be on the EigenDA AVS Operator.
 https://testnetbridge.com/
Before Proceeding, check the AVS Operator Guide here.
1. Installation
a. Clone repo
git clone https://github.com/Layr-Labs/eigenda-operator-setup.git
cd eigenda-operator-setup
b. Update the .env file (Modify the sections marked with TODO to match your environment.)
nano .env
sample text file.
# TODO: IP of your node
NODE_HOSTNAME=<YOUR_IP>

# TODO: Node Nginx config
NODE_NGINX_CONF_HOST=./resources/rate-limit-nginx.conf

# TODO: Operators need to point this to a working chain rpc
NODE_CHAIN_RPC=<KEY_API>
NODE_CHAIN_ID=5

# TODO: Operators need to update this to their own paths
USER_HOME=/root/
EIGENLAYER_HOME=/root/.eigenlayer
EIGENDA_HOME=/root/.eigenlayer/eigenda/

NODE_LOG_PATH_HOST=/root/.eigenlayer/eigenda/logs
NODE_G1_PATH_HOST=/root/eigenda-operator-setup/resources/g1.point
NODE_G2_PATH_HOST=/root/eigenda-operator-setup/resources/g2.point
NODE_DB_PATH_HOST=/root/.eigenlayer/eigenda/db
NODE_CACHE_PATH_HOST=/root/eigenda-operator-setup/resources/cache

# TODO: Operators need to update this to their own keys
NODE_ECDSA_KEY_FILE_HOST=/root/.eigenlayer/operator_keys/<NAME_WALLET>.ecdsa.key.json
NODE_BLS_KEY_FILE_HOST=/root/.eigenlayer/operator_keys/<NAME_WALLET>.bls.key.json

# TODO: The ip provider service used to obtain a node's public IP [seeip (default), ipify)
NODE_PUBLIC_IP_PROVIDER=seeip

# TODO: Operators need to add password to decrypt the above keys
NODE_ECDSA_KEY_PASSWORD=<PASSWORD>
NODE_BLS_KEY_PASSWORD=<PASSWORD>
modify the parts between <…>
c. Create local folders which are required by EigenDA:
mkdir -p $HOME/.eigenlayer/eigenda/logs
mkdir -p $HOME/.eigenlayer/eigenda/db
d. Opt-in into EigenDA
In order to opt-in into EigenDA as an Operator, you must meet the following delegated TVL requirements:
- Have a minimum of 32 ETH delegated.
- Have more than 1.1x current lowest-stake Operator in the active Operator set. Please see EigenDA Churn Approver for more detail.
- The operator to churn out has less than 10.01% of the total stake
Execute the following command to opt-in to EigenDA AVS:
./run.sh opt-in
e. Run EigenDA
Start the docker containers:
docker compose up -d
If you have successfully opted in to EigenDA and correctly running your EigenDA software, you should see the following logs for your EigenDA container:
If you have successfully opted in to EigenDA and correctly running your EigenDA software, you should see the following logs for your EigenDA container:
OPTIONAL Upgrade your node
Pull the latest repo
cd eigenda-operator-setup
git pull
Pull the latest docker images
docker compose pull
Stop the existing services
docker compose down
Start your services again
docker compose up -d
That’s it! Make sure to follow EigenLayer’s Socials to stay updated.
Twitter: https://twitter.com/eigenlayer
Let’s Connect
Thank you for spending time reading my article. If you’d like to delve deeper into the topics and have further questions or just want to say hi, don’t hesitate to reach out.
Find me on:
- Twitter: @EkkoNodes
Support My Work
If the node running guides I provide have helped you and you wish to support the continuation and enhancement of this resource, any contribution is greatly appreciated. Below is my dedicated wallet address for those who would like to contribute:
0xCE84bab3ade470A64B7EA26e7940e3149C7Fd016
About Me
Hello! I’m Ekko Nodes. After years crunching numbers as an Accountant, I decided to take a leap into the vibrant world of crypto, blockchain, and Web3. With an eye for potential and a knack for discovery, I’m on a quest to unearth the most intriguing projects, the latest airdrops, and the newest nodes in the blockchain universe. My journey is one of constant learning, fueled by my passion for writing, researching, and all things tech. If you’re eager to explore the dynamic landscape of digital currencies and decentralized technologies, let’s embark on this adventure together.
SOURCE
Disclaimer
The insights shared here are for educational and entertainment purposes only and are not to be taken as financial advice. Each individual’s journey in the crypto space is unique, and it’s crucial to conduct thorough research and consider seeking professional counsel before making investment decisions. Stay curious, tread carefully, and tailor your choices to fit your personal circumstances.