R Pi Radio: Rocking The Airwaves

The Raspberry can be used to put together a simple, FM radio station.
This tutorial is for educational purposes only. Please note that the laws around transmitting devices vary from country to country. If you intend to build this project, please check with the laws that are relevant to your local area, and use an output filter to clean up the signal. Always play nicely.
If you aren’t a medium member, you can read with no paywall via substack
It’s our opinion, that one of the coolest things about the Raspberry Pi apart from its price, is its GPIO pins. These pins allow all manner of add-ons for the Pi, including I/O sensors, radiofrequency and power upgrades, hats and LCD screens to make it a fully-fledged portable unit.
Because of these pins, the Pi is capable of any number of projects, but for radio uses and radio hacking, one of the coolest uses is leveraging its transmit ability.
To keep things simple, what this basically means is, that the Pi is capable of outputting a signal via the #4 GPIO pin that is then able to be modulated. This means that the Pi can transmit a signal that’s able to be detected using a radio receiver. This can be AM, FM or any other type of signal that is able to be computer-modulated.
This signal is however somewhat dirty. Emitted as a square wave, this means that the signal will emit harmonics on adjacent frequencies which are capable of causing interference. So for any long-term installation, we’ll need to apply a filter to rectify this, but for temporary experimenting indoors in a controlled lab environment, we can probably omit this for a short period.
For the purposes of today's article, we’ll be looking at using a Pi, equipped with some basic code to turn the Pi into a radio station that we can detect using any typical FM radio. Despite this, it’s important to realise though that pin 4 on the GPIO is capable of transmitting many low power signals when properly configured. This means after completing this experiment, it’s trivial to repurpose our Raspberry Radio station for offensive SDR transmitting.
Equipment & Skill Level
Full Size, Raspberry Pi
Antenna Wire for GPIO pin
SD card
Power Supply for the Pi
Pirate Radio Disk Image
Music For Playback
To participate, you'll need to know how to get a Pi up and running, and how to run some basic code in Raspberry Pi OS. If you haven’t used a Pi before, there are tutorials available on the Raspberry Pi website and this project is reasonably simple to get running so don’t be too stressed if this is your first attempt.
Configuration
We’ll start by powering up the Pi and letting it boot into the desktop.
Our custom disk image includes a pre-configured system for running PiFM and a folder for us to put our music into. To get it up and running, we’ll simply need to add our music, fit our temporary antenna and then test it.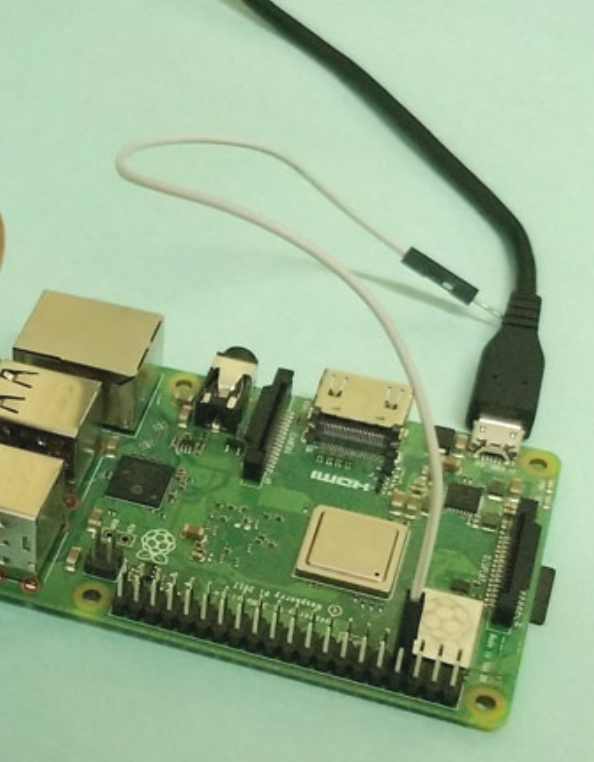 If you’d like more information on PiFM, or to review the code yourself, we can find PiFM via this GitHub link.
When we’re building an antenna, it’s best to stick to the commercial FM band. While this varies from country to country and should be checked prior to transmitting, typically this is in the range of 88–108mhz, so cut your wire somewhere in the middle of this range. Find an antenna calculator here.
First, we’ll want to update our system using the command
sudo apt update
once that's run we’ll then use this command to do the final upgrades
sudo apt upgrade
Once our system is updated and running the latest software, we’ll also add our music to the following folder
Pirate Radio
To configure our frequency, we’ll use the configuration folder within the root directory and the nano text editor to open it
nano pirateradio.config
When we open our config folder, we should see the following settings that are able to be modified.
[pirateradio]

frequency = 88.9

shuffle = True

repeat_all = True
To adjust our frequency, we’ll input our frequency into the config folder. If you want to select shuffle, we should leave it on true. And repeat_all will allow us to play our tracks on a loop. Then we’ll close out our config file.
We’ll then need to restart the system after updates, at which point it should start playing our music automatically. We can restart using the following command
sudo reboot now
All Done
Once your Pi has rebooted, you should be able to detect your music on your FM radio nearby. While the system will have a limited range, you’ll find it works pretty well for localised communications.
Remember though, without a filter, the signal is quite dirty. So we should only use the system with a marginal antenna, and not leave the system unattended or permanently on. If you’d like to rectify this, all it takes is a simple filter to clean it up. This incidentally, is a great project if you’re looking to learn about the radio spectrum in more detail.
Filters are an essential part of delivering a clean signal and being able to ‘roll your own’ filters and antennas is an essential part of being a radio amateur or exploring parts of the electromagnetic spectrum. There’s plenty of open-source information to get you started with this, so hit Google for starting information or keep an eye on our blog later on for more information on this topic.
It’s also worth mentioning that while we mentioned using music, you can also play any audio file of your choice using this system. This means it can also be used as a messaging or alert system if that’s more suitable for your situation. Regardless of your use case, it’s a great system for experimenting with running code and using antennas and transmitters in your home lab.
One Last Lesson
Before we wrap up today's article there's one important fundamental lesson to take away from this project.
Given the variations in regional-specific frequency allocations, the default frequency may have landed you on an allocated frequency. The rules of transmitting in most countries will state you need a license for this, but we bring an external signal into the lab for testing purposes, you will find that the strongest signal wins the day, rendering the weaker signal entirely unreadable.
This is the FM “Capture Effect” and it’s unique to frequency-modulated transmissions. It’s also one of the physics-backed, laws of radio and something you’ll encounter more often as you widen your experimentation. There are many of these types of phenomena that we’ll continue to explore on our journey through the radio spectrum, and we’ll be using experiments such as this one to give you real-world experience around what some of these things look like.
If you enjoyed this project, don’t forget to subscribe to the Radio Hackers publication, where we explore Software Defined Radio in the real world, and experiment with SDR in cybersecurity roles.
Medium has recently made some algorithm changes to improve the discoverability of articles like this one. These changes are designed to ensure that high-quality content reaches a wider audience, and your engagement plays a crucial role in making that happen.
If you found this article insightful, informative, or entertaining, we kindly encourage you to show your support. Clapping for this article not only lets the author know that their work is appreciated but also helps boost its visibility to others who might benefit from it.
🌟 Enjoyed this article? Support our work and join the community! 🌟
💙 Support me on Ko-fi: Investigator515
📢 Join our OSINT Telegram channel for exclusive updates or
📢 Follow our crypto Telegram for the latest giveaways
🐦 Follow us on Twitter and
🟦 We’re now on Bluesky!
🔗 Articles we think you’ll like:
- Software Defined Radio & Radio Hacking Pt 1
- OSINT Investigators Guide to Self Care & Resilience
✉️ Want more content like this? Sign up for email updates