Pi Projects: A Raspberry Pi Pico BadUSB

How to turn a Pi Pico into a Bad USB for security testing purposes.
The full-sized Raspberry Pi has earned a well-deserved reputation for being a versatile and affordable platform for various DIY projects that we’ve covered previously. This includes weather stations, software-defined radio stations and ADS-B flight trackers.
Today, we’ll be looking at building a Bad USB using its smaller cousin, the Pi Pico. A Bad USB is a powerful tool used in ethical hacking and cybersecurity training, and with a Raspberry Pi Pico, you can explore its capabilities in your own lab.
Understanding the Raspberry Pi Pico
Before we start to build our Bad USB, let’s get to know the star of the show. The Raspberry Pi Pico is a microcontroller board, small in size but packed with massive potential. It’s equipped with a programmable chip, which allows it to mimic various USB devices, including the infamous Bad USB.
It might be small, but it’s extremely affordable, able to be loaded with custom scripts and has a full array of GPIO pins, allowing for the addition of sensors should your project require this.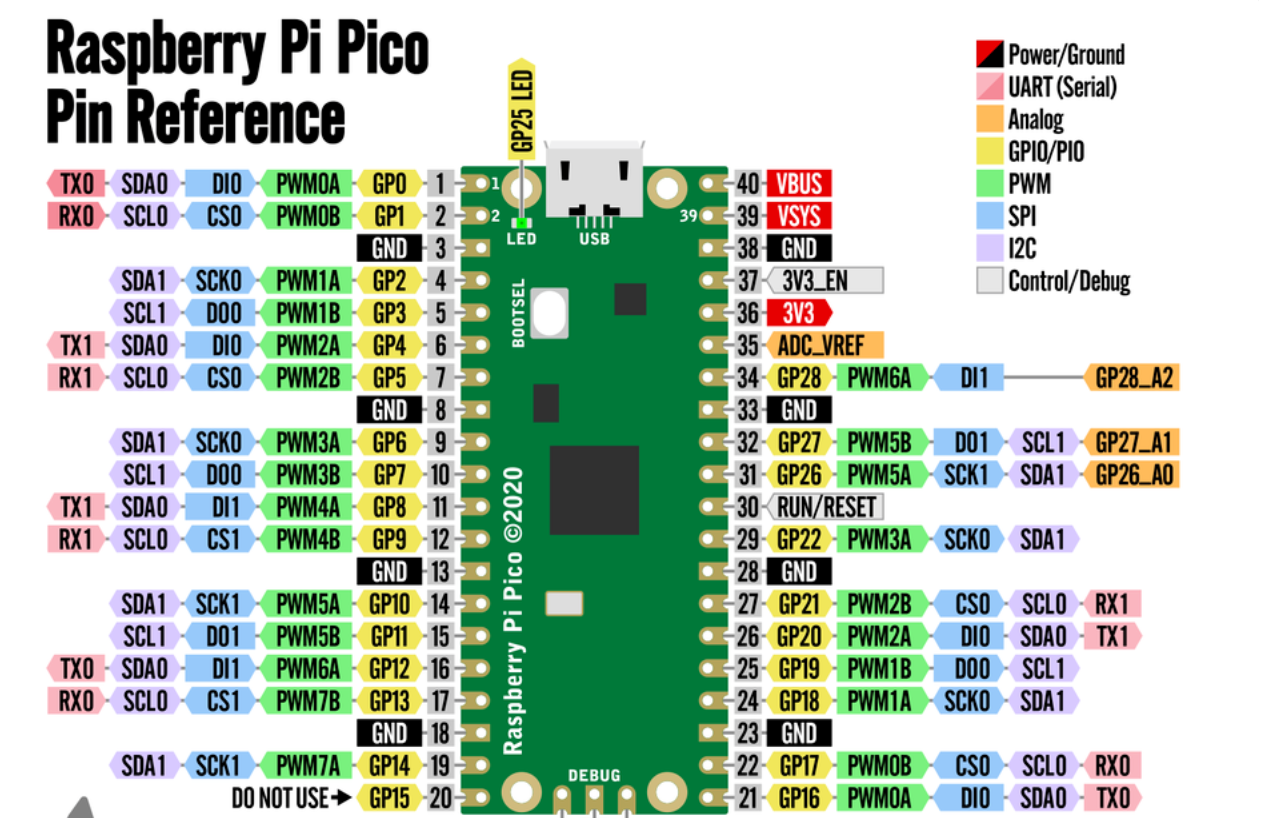 GPIO Pins. Source: raspberrypi.com
What Is a Bad USB?
A Bad USB is a USB device that poses as legitimate but, when plugged into a computer, performs malicious actions. These actions could include injecting malware, stealing data, or taking control of the host computer. This tool is often used by cybersecurity professionals and ethical hackers to understand vulnerabilities and potential threats.
Bad USBs also have a secondary legitimate use. You could configure a Bad USB to reinstall a clean software image onto a machine. Or alternately, you could put together a script that installs your chosen software packages on a fresh system. There are many interesting uses for a tool such as this.
The reason Bad USBs can be an attack vector is that the computer recognises the device as a Human Interface Device, or HID. This gives the device two things. The ability to bypass a lot of security configurations, as well as the ability to rapidly execute code.
If you’re not ahead of all the acronyms, a HID is basically just a device we use to engage with our computers, like a keyboard or a mouse. The plug and play nature of many HID devices makes it a perfect candidate for running code.
While many operating systems now attempt to provide protections against this, there was a point a few years ago when Bad USBs were extremely effective at bypassing security.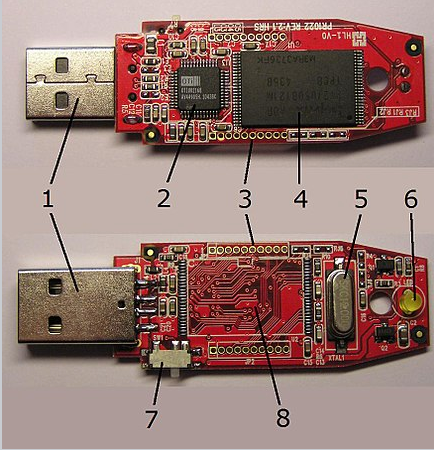 Bad USB internals, showing the flashable chipset. Source: Wikipedia
Building Your Bad USB.
The good bits! Here’s how to create a Bad USB using a Raspberry Pi Pico for educational purposes:
You’ll Need:
1. Raspberry Pi Pico.
2. A USB cable to connect the Raspberry Pi Pico to your computer.
3. A host computer to configure the Raspberry Pi Pico and its software.
Steps:
1. Set up the Raspberry Pi Pico:
Start by setting up your Raspberry Pi Pico. Install the necessary drivers and software on your host computer, and connect the Raspberry Pi Pico using a USB cable. If you need further guidance on setting up, look at the official website.
2. Write / Source the Code:
Using Circuit Python, write or find a Python script that mimics a Bad USB device. Your script can simulate keyboard inputs, inject keystrokes, or perform any other educational hacking actions you’d like to explore. Alternately, if you’re not a coder or would like to use pre-configured code, there are plenty of scripts for this on GitHub.
Your end script will be known as the “payload” using the filename “payload.dd”.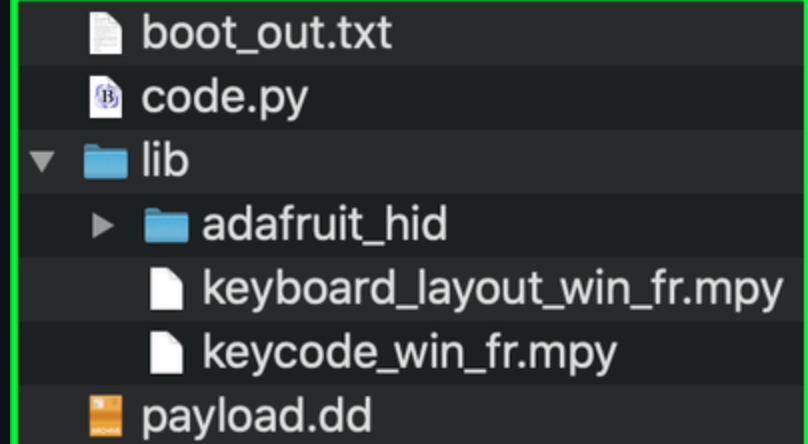
3. Flash the Raspberry Pi Pico:
Upload your Python script to the Raspberry Pi Pico using Thonny or your preferred IDE. Ensure the code is ready to run when the device is connected to a computer, and ensure you’ve configured your Pico to operate as a HID.
4. Testing:
Connect your Raspberry Pi Pico to a computer and observe the results. If you’ve set it up correctly, you should see your payload run automatically when the device is plugged in.
Remember, this is a learning exercise, so ensure you’re working within a controlled and safe environment, such as a home lab or a dedicated testing computer.
We used this payload for our demonstration Ducky.
Educational Purposes Only
It’s important to emphasise that the purpose of building a Bad USB with a Raspberry Pi Pico is strictly for educational and development purposes. Using this tool to gain unauthorised access or engage in any malicious activity is illegal and unethical.
By creating and configuring a Bad USB with a Raspberry Pi Pico, we can:
- Gain a better understanding of how these tools work.
- Learn how to better protect systems from potential threats.
- Develop our skills in ethical hacking and cybersecurity, and
- Level up our Coding and Hardware skills.
If you’re not a coder, you can still take away a lot from the exercise. For instance, finding and configuring someone else's code from GitHub will still teach you plenty about configuring hardware.
Cybersecurity Training
As the cyber landscape becomes increasingly complex, the demand for skilled cybersecurity professionals will continue to grow. Ethical hacking, which involves using hacking techniques for positive and legal purposes, is an essential skill in this field.
However, there’s also a need for those skilled with Radio Frequency and Hardware development, meaning projects like the Raspberry Pi in custom configurations, play an essential part in developing and honing these skill sets.
While you can just buy one, building a Bad USB with a Raspberry Pi Pico is an educational exercise that can help you understand the tactics and tools used by ethical hackers to protect computer systems from threats, but more importantly, will lay the groundwork for dealing with hardware, and custom software or coding.
Beyond this, we can look at integrating other sensors for cybersecurity-based purposes using things like I2C as well as the GPIO we used in today’s article. This gives us the ability to add cameras, clone RFID cards, or spoof devices, all extremely useful tools for offensive purposes.
If you’ve enjoyed this article, be sure to follow us as we continue exploring how the radio spectrum overlaps with cybersecurity and IOT technology.
If you found this article insightful, informative, or entertaining, we kindly encourage you to show your support. Clapping for this article not only lets the author know that their work is appreciated but also helps boost its visibility to others who might benefit from it.
🌟 Enjoyed this article? Support our work and join the community! 🌟
💙 Support me on Ko-fi: Investigator515
📢 Join our Telegram channel for exclusive updates or.
🐦 Follow us on Twitter and
🟦 We’re now on Bluesky!
🔗 Articles we think you’ll like:
- Software Defined Radio & Radio Hacking
- OSINT Unleashed: 5 Essential Tools for Cyber Investigators
✉️ Want more content like this? Sign up for email updates here